What Clay Can Be Baked In The Oven A Complete Guide
Not all clay is created equal when it comes to oven baking. This complete guide covers which types of clay can safely go in your oven, the right temperatures, and how to avoid common mistakes. Whether you are a beginner crafter or a seasoned artist, you will find everything you need to know about baking clay in the oven right here.
Have you ever wondered what clay can be baked in the oven? It is a question that comes up a lot among crafters, hobbyists, and anyone looking to create beautiful handmade pieces at home. The answer is not as simple as “just pop it in the oven.” Different types of clay behave very differently when exposed to heat. Some cure perfectly in a home oven, while others will crack, burn, or release harmful fumes.
This guide will walk you through everything you need to know about baking clay in the oven. We will cover which clays are oven-safe, the right temperatures, baking times, and the mistakes that ruin projects. By the end, you will feel confident and ready to start your own clay craft projects at home.
Let us get into it.
Key Takeaways
- Polymer clay is the most popular oven-bakeable clay: It cures evenly and comes in many brands and colors.
- Air dry clay cannot go in the oven: It dries naturally at room temperature and will crack or burn if heated.
- Oven temperature matters hugely: Most polymer clays bake between 230°F and 275°F, and precision prevents burning.
- Baking time depends on thickness: Thicker pieces need longer, but you should follow brand guidelines closely. Always use a dedicated oven or baking sheet: This prevents chemical contamination and ensures even heat.
- Epoxy and ceramic clays have different rules: Some can be oven-baked, but others need a kiln or air drying.
- Practical testing saves projects: Doing a small test piece first helps you dial in your oven settings perfectly.
📑 Table of Contents
- Understanding Different Types of Clay
- Can You Bake Polymer Clay in a Regular Home Oven?
- Polymer Clay Baking Temperature and Time Guide
- Common Mistakes When Baking Clay in the Oven
- Baking Clay Jewelry and Small Projects
- How to Achieve a Smooth Finish After Baking
- Expert Insights on Oven-Baked Clay
- Comparison: Which Clays Can You Bake?
- Quick Tips for Perfect Oven-Baked Clay
- Frequently Asked Questions
- Final Thoughts
Understanding Different Types of Clay
Before you turn on your oven, you need to know what kind of clay you are working with. Not every clay is meant for the oven. Using the wrong type can waste your time, ruin your project, and even create safety hazards. Let us break down the most common types.
Polymer Clay
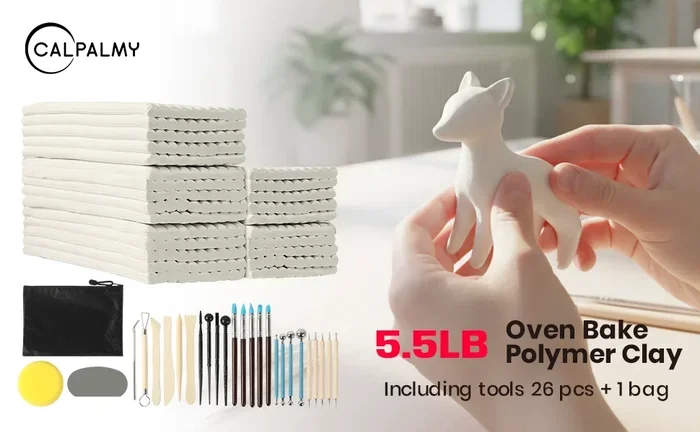
Polymer clay is the go-to choice for oven baking. It is a synthetic modeling material made from PVC particles and plasticizers. When you heat it at the right temperature, it cures and hardens permanently. This makes it perfect for oven-baked clay projects like jewelry, figurines, and home decor.
Popular brands include Sculpey, Fimo, Kato Polyclay, and Premo. Each brand has slightly different baking instructions, so always check the packaging. Most polymer clays bake between 230°F and 275°F for 15 to 30 minutes per quarter inch of thickness.
Air Dry Clay
Air dry clay is NOT oven-safe. This type of clay dries naturally at room temperature over 24 to 48 hours. If you put air dry clay in the oven, it will crack, warp, or even catch fire. The heat is too intense and too fast for this type of clay to handle.
Air dry clay is great for kids’ crafts and simple sculptures, but if you want oven-baked clay projects, you need to switch to polymer clay or another heat-curable material.
Ceramic and Earthenware Clay
Ceramic clay needs very high temperatures to cure properly. Most ceramic clays require a kiln that reaches 1800°F or higher. A home oven simply cannot reach these temperatures. So ceramic clay is not a good fit for oven baking.
However, some low-fire ceramic options exist for small crafts. These still usually require a kiln, though. If you want to work with ceramic clay baking, consider investing in a small kiln or taking your pieces to a local pottery studio.
Epoxy Clay
Epoxy clay is a two-part clay that hardens through a chemical reaction. You mix the two parts together, and it cures on its own. Most epoxy clays do not need heat at all. They cure at room temperature within a few hours.
Some epoxy-based products claim to be oven-safe for faster curing. If you are considering this route, read the product label carefully. Never assume an epoxy clay can go in the oven without checking the manufacturer’s instructions first.
Can You Bake Polymer Clay in a Regular Home Oven?
The short answer is yes. You can absolutely bake polymer clay in a regular home oven. This is one of the biggest advantages of working with polymer clay curing methods. You do not need a special kiln or expensive equipment.
That said, there are some important things to keep in mind. A regular kitchen oven works fine for most polymer clay projects, but you need to pay attention to temperature control and ventilation.
Temperature Control Is Everything
Polymer clay is sensitive to temperature. Too hot, and it will burn. Too cool, and it will remain soft and crumbly. Most brands recommend baking at 275°F, but some formulations work better at 230°F or 260°F.
Use an oven thermometer to verify your oven’s actual temperature. Many home ovens run hot or cold by 10 to 25 degrees. That small difference can make or break your project. An inexpensive oven thermometer from the dollar store can save you from ruined pieces.
Ventilation Matters
When polymer clay bakes, it releases a small amount of vapor. In a well-ventilated kitchen, this is not a concern. But if you have a small kitchen with poor airflow, consider opening a window or turning on a fan. This keeps any fumes from building up in your workspace.
Never burn polymer clay intentionally. Overheated polymer clay can release unpleasant fumes. Stick to the recommended temperature and time, and you will have a safe and pleasant crafting experience.
Using a Dedicated Baking Sheet
One of the best practices for baking clay safely is to use a dedicated baking sheet. Do not use the same tray you cook food on. Even with parchment paper or aluminum foil, trace amounts of clay residue can transfer to food.
Buy a cheap baking sheet from a dollar store and label it as your crafting tray. This keeps your kitchen safe and your food free from any chemical residue. It is a simple habit that makes a big difference.
Polymer Clay Baking Temperature and Time Guide
Getting the right polymer clay baking temperature and time is the secret to professional-looking results. Too little time or too low a temperature, and your piece will be under-cured. Too much time or too high a temperature, and it will burn or discolor.
Here is a general guide to help you get started:
- Thickness up to 1/4 inch: Bake at 275°F for 15 to 20 minutes.
- Thickness 1/4 to 1/2 inch: Bake at 275°F for 30 minutes.
- Thickness over 1/2 inch: Bake at 275°F for 30 to 45 minutes. You may need to increase time gradually.
Always start with the manufacturer’s instructions on the package. Different brands have slightly different formulations, and the recommended settings can vary. Sculpey, Fimo, and Kato each have their own ideal temperature ranges.
If you are unsure, do a test piece. Roll a small log of clay, bake it, and check the hardness. This polymer clay tips trick helps you fine-tune your oven settings without risking a bigger project.
How to Tell If Polymer Clay Is Fully Cured
A fully cured piece of polymer clay should be hard and durable. You should not be able to indent it with your fingernail. It should feel similar to a hard plastic or a ceramic tile when cooled.
If the clay is still soft in the center, it needs more time. If it is discolored or bubbling, the temperature was too high. Learning to recognize these signs takes a little practice, but soon you will know exactly what to look for.
Common Mistakes When Baking Clay in the Oven
Even experienced crafters make mistakes sometimes. The good news is that most common errors are easy to avoid once you know what they are. Here are the pitfalls to watch out for.
Baking at Too High a Temperature
This is the number one mistake people make. They set the oven to the wrong temperature or forget to check with a thermometer. A few extra degrees can scorch your clay, turning it brown or black and ruining the piece entirely.
Always double-check your oven settings before placing your clay inside. Set a timer so you do not forget about your project while it bakes.
Underbaking
Underbaking is just as bad as overbaking. If the clay is not heated long enough, it will remain soft and fragile. Under-cured oven-bakeable clay can crumble, snap, or dent easily after it is finished.
If your finished piece breaks easily, it was probably underbaked. The fix is simple: re-bake it at the correct temperature for a longer period. Just be careful not to overbake it this time around.
Skipping the Parchment Paper
Placing clay directly on a bare baking sheet can cause sticking and uneven heating. Always line your tray with parchment paper, aluminum foil, or a ceramic tile. This ensures the bottom of your piece bakes evenly and releases cleanly afterward.
Parchment paper is the safest and most affordable option. It prevents sticking and makes cleanup a breeze.
Opening the Oven Door Too Often
Every time you open the oven door, the temperature drops. This can cause uneven curing in your clay. Try to resist the urge to check on your project constantly. Set a timer and trust the process.
If you need to check your piece, do it quickly and close the door right away. The less heat you lose, the more consistent your results will be.
Baking Clay Jewelry and Small Projects
Polymer clay jewelry is one of the most popular uses for oven-baked clay. Pendants, earrings, beads, and rings all look stunning when made from properly cured polymer clay. The best part is that you can create custom colors and patterns that no store-bought jewelry can match.
For small jewelry pieces, keep your baking time short. A thin pendant might only need 10 to 15 minutes at 275°F. Thicker bead strands may need 20 to 30 minutes.
Use a wire rack or a bead baking rack to suspend your pieces. This allows heat to circulate around all sides evenly. It prevents flat spots and ensures a consistent cure throughout your project.
Adding Embellishments Before Baking
One of the joys of working with oven-bakeable clay is adding details before curing. You can press textures into the surface, embed small objects, or layer different colors of clay. Just make sure any additions are also made from polymer clay or oven-safe materials.
Avoid adding non-clay embellishments before baking. Things like glass, metal findings, or paper can behave unpredictably under heat. Add those elements after baking, once your piece has fully cooled and hardened.
How to Achieve a Smooth Finish After Baking
Fresh out of the oven, polymer clay can sometimes look a little rough or have fingerprint marks. Do not worry, this is completely normal and easy to fix.
Wait for your piece to cool completely before sanding or buffing. Use fine-grit sandpaper (400 to 600 grit) to smooth out any rough spots. Work gently and in circular motions for the best results.
After sanding, you can buff the surface with a soft cloth. This brings out a natural shine without any additional products. For an extra glossy finish, apply a coat of polymer clay glaze or sealant once the piece is fully cooled.
Some crafters also use a nail buffer to polish their baked clay pieces. This is a quick and easy way to add a professional-looking shine without any special tools.
Expert Insights on Oven-Baked Clay
Experienced clay artists recommend a few practices that separate good results from great ones. Here is what the pros say about clay baking instructions and getting the best out of your oven.
Always preheat your oven. Putting clay into a cold oven and turning it on creates uneven heating. Your piece will cure inconsistently, with some parts soft and others overdone.
Use a separate oven if possible. If you have a toaster oven or a secondary oven, use it for clay projects. This keeps your main kitchen oven free from any clay residue and prevents any cross-contamination with food.
Cool your pieces slowly. After baking, turn off the oven and let your clay pieces cool inside. A slow cool-down prevents cracking and warping. Rapid temperature changes can stress the cured clay and cause it to break.
Keep a baking log. If you work with clay regularly, keep a simple notebook of your baking times, temperatures, and results. This helps you replicate successful projects and avoid repeating mistakes.
Comparison: Which Clays Can You Bake?
Here is a quick comparison of the most common clay types and whether they can go in the oven:
| Clay Type | Oven Safe? | Curing Method | Typical Temperature |
|---|---|---|---|
| Polymer Clay | Yes | Oven bake | 230°F to 275°F |
| Air Dry Clay | No | Air dry at room temp | N/A |
| Ceramic Clay | No | Kiln fire | 1800°F+ |
| Epoxy Clay | Usually No | Chemical cure at room temp | N/A |
| Modeling Clay (Oil-Based) | No | Does not cure | N/A |
| Self-Hardening Clay | No | Air dry | N/A |
As you can see, polymer clay is really the only common type that works well in a standard home oven. If you want to create baked clay projects at home, polymer clay is your best and most accessible option.
Quick Tips for Perfect Oven-Baked Clay
- Always read the brand instructions before baking.
- Use an oven thermometer to verify actual temperature.
- Line your baking tray with parchment paper.
- Set a timer so you do not overbake.
- Let pieces cool slowly inside the oven after baking.
- Do a small test piece if you are trying a new brand or thickness.
- Keep your oven clean and free of clay residue between uses.
Frequently Asked Questions
Can I bake any type of clay in my home oven?
No, only polymer clay is safe to bake in a standard home oven. Air dry clay, ceramic clay, epoxy clay, and oil-based modeling clay should never go in the oven. Each type has its own curing method, and using the wrong method will ruin your project or create safety hazards.
What temperature do I bake polymer clay at?
Most polymer clays bake at 275°F, but always check the brand instructions. Some formulations work best at 230°F or 260°F. Use an oven thermometer to make sure your oven is accurate, and never exceed the recommended temperature.
Can I re-bake polymer clay if it is undercooked?
Yes, you can re-bake polymer clay safely. If your piece is undercooked, simply place it back in the oven at the correct temperature for the recommended time. Just make sure the piece has cooled completely before re-baking, and avoid overbaking it this time.
Is it safe to use the same oven for baking food and clay?
It is generally safe as long as you take proper precautions. Always line your baking tray with parchment paper or foil, and avoid placing raw clay directly on surfaces used for food. For extra safety, consider using a dedicated toaster oven or secondary oven for your clay projects.
How long should I bake polymer clay?
Baking time depends on the thickness of your piece. A general rule is 15 to 20 minutes per quarter inch of thickness at 275°F. Thicker pieces may need up to 45 minutes. Always follow the manufacturer’s guidelines for the specific brand you are using.
Why did my baked clay crack or break?
Cracking usually happens for one of a few reasons. Underbaking is the most common cause, so your piece may not have been in the oven long enough. Rapid temperature changes during cooling can also cause cracks. Sometimes, thin sections of a design are simply too fragile and need thicker reinforcement during sculpting.
Final Thoughts
Knowing what clay can be baked in the oven is the foundation of successful clay crafting. Polymer clay is the clear winner for home oven baking, offering versatility, ease of use, and stunning results. With the right temperature, proper baking time, and a few simple precautions, you can create beautiful pieces that rival professional work.
Remember to always check your clay type before baking. Avoid common mistakes like overbaking, underbaking, and skipping parchment paper. And most importantly, have fun with it. Clay crafting for beginners and experts alike is a rewarding and creative hobby that produces tangible, lasting results.
Now that you have all the knowledge you need, it is time to start your next project. Grab your polymer clay, preheat your oven, and let your creativity shine. Happy crafting!