Where to Place Your Oven Rack Positioning for Best Results
Proper oven rack positioning is the simplest way to transform your cooking results. Where you place your rack affects heat distribution, browning, and cooking time for every dish. The middle rack works best for most baking tasks, while the top rack excels at broiling. Understanding your oven’s heat zones helps you avoid burnt bottoms and undercooked tops. Mastering rack placement takes your home cooking to the next level.
Oven rack positioning might seem like a small detail, but it changes everything about how your food cooks. Whether you are baking cookies, roasting a chicken, or broiling salmon, where your rack sits inside the oven matters a lot. Many home cooks never think about it, and that is why their cakes come out uneven or their pizza crust stays soggy. The good news is that learning the right rack placement is quick and easy. Once you understand the basics, your cooking results will improve almost immediately.
Most ovens have three to five rack positions, and each one serves a different purpose. The top rack blasts food with direct heat from the upper element. The bottom rack focuses heat upward from the lower element. The middle rack offers balanced, indirect heat that works for almost everything. When you learn to match the rack position to your cooking task, you unlock better flavor, texture, and consistency. This guide covers everything you need to know about oven rack positioning for the best results every time.
We will walk through each rack level, explain what works best where, and share practical tips you can use right away. You will also learn about common mistakes that ruin dishes and how to fix them. By the end, you will feel confident choosing the right rack for any recipe. Let us dive in and make your oven work smarter for you.
Key Takeaways
- Middle rack is king: The center position delivers the most even heat for baking, roasting, and general cooking.
- Top rack for broiling: Place food near the top element for a quick, crispy sear on meats and casseroles.
- Bottom rack for crispy bottoms: Use the lower position for pizzas, crusty bread, and dishes that need a crispy base.
- Avoid common mistakes: Don’t place racks too close to heating elements, and never overcrowd the oven.
- Rotate your pans: Turn dishes halfway through cooking to combat hot spots and ensure even browning.
- Convection changes the game: Fan-assisted ovens allow more flexibility with rack placement due to improved air circulation.
- Know your oven: Every oven has unique hot spots. Use the breadcrumb test to map yours.
📑 Table of Contents
Understanding Your Oven’s Rack Levels
Before you start moving racks around, it helps to understand what each level does. Ovens typically have three to five rack positions, and the heat distribution changes dramatically from top to bottom. Think of your oven as having different temperature zones stacked on top of each other.
What Are the Different Rack Positions?
The top rack sits closest to the upper heating element. This position delivers intense, direct heat from above. It is perfect for tasks that need a strong burst of top heat. The middle rack sits in the center of the oven cavity. This is the most versatile position and works well for the majority of cooking tasks. The bottom rack sits closest to the lower heating element. It provides strong upward heat that is great for crispy bottoms and high-heat cooking.
Some ovens also have a lowest rack position near the floor. This is often used for pizza stones or for cooking at very high temperatures. The rack just below the middle is also a great all-around position that many bakers prefer. Knowing what each level does gives you control over your cooking outcomes.
How Heat Moves Inside Your Oven
Heat in an oven moves in two main ways: radiation and convection. The heating elements radiate heat outward, which is why the top rack gets more direct heat from above and the bottom rack gets more from below. Hot air rises, so the top of the oven is naturally warmer than the bottom. This means food on the top rack cooks faster on the top surface, while food on the bottom rack gets more intense heat from below.
Understanding this heat flow is the foundation of good oven rack positioning. When you know how heat moves, you can place your food exactly where it needs to be for the best results. For example, if you want even cooking on all sides, the middle rack is your best friend. If you want a golden brown top on a casserole, move it to the upper third of the oven.
The Role of Convection Fans
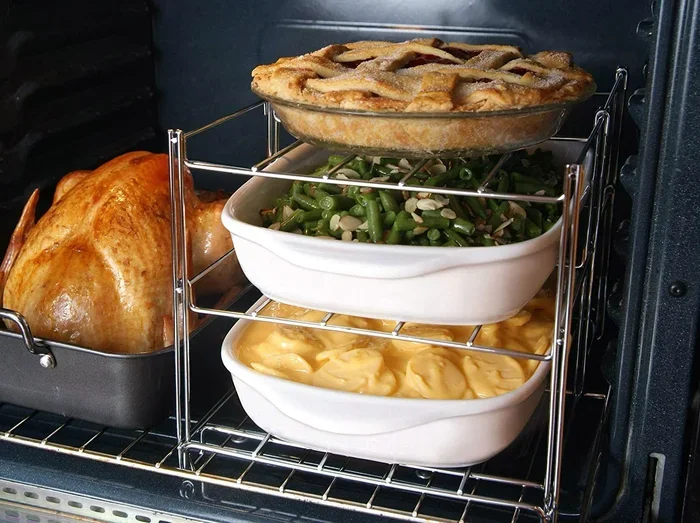
If your oven has a convection setting, it uses a fan to circulate hot air evenly throughout the cavity. This changes the heat dynamics significantly. Convection ovens reduce hot spots and cook food more evenly across all rack levels. With a convection oven, you can use multiple racks at once without worrying as much about uneven cooking.
However, convection cooking also requires some adjustments. The fan can blow around lightweight parchment paper or foil. It can also speed up cooking times by about 25 percent, so you need to check food earlier. Even with convection, the basic principles of rack positioning still apply, but you have more flexibility than with a standard oven.
Best Rack Position for Baking
Baking is where oven rack positioning matters the most. Baked goods are sensitive to heat, and even a small change in rack placement can alter the texture, rise, and color of your finished product. The general rule for baking is simple: use the middle rack.
Cakes, Cookies, and Quick Breads
For cakes, cookies, muffins, and quick breads, the middle rack is almost always the best choice. This position allows hot air to circulate evenly around the pan, which promotes uniform rising and browning. Cakes bake evenly when placed in the center, and cookies spread consistently when they are not too close to either heating element.
If you are baking multiple sheet pans of cookies, you can use the upper-middle and lower-middle racks. Just remember to swap the pans front to back and top to bottom halfway through baking. This simple trick ensures every cookie comes out the same color and texture. For single cake pans, stick with the middle rack and avoid opening the oven door too often, which can cause cakes to collapse.
Pies and Pastries
Pies and pastries benefit from a specific rack position depending on what you are making. For fruit pies with a top crust, the middle rack works well. The balanced heat cooks the filling thoroughly while browning the top crust evenly. For pies where you want a super crispy bottom crust, try placing the pie on the bottom rack for the first part of baking, then move it to the middle rack to finish.
Pastries like croissants and puff pastry need steady, even heat. The middle rack provides this. Avoid the top rack for pastries, as the direct heat from above can brown the tops too quickly before the inside has fully risen. A slow, even bake is what creates those flaky, layered textures we all love.
Bread and Pizza
For artisan bread and pizza, the bottom rack or even the oven floor is your best option. These foods need intense bottom heat to create a crispy, well-formed crust. Placing a pizza stone or baking steel on the lowest rack and preheating it for at least 30 minutes creates a professional-quality baking surface at home.
When baking bread on a stone, the bottom rack position mimics the environment of a professional pizza oven. The intense heat from below creates steam and rapid oven spring, which gives you that beautiful blistered crust and airy interior. For home bakers serious about bread, mastering this rack position is a game changer for oven rack positioning.
Best Rack Position for Broiling
Broiling is one of the most powerful cooking methods in your oven, but it demands the right rack position. Broiling uses the top heating element to deliver intense, direct heat from above. This is perfect for searing, caramelizing, and finishing dishes with a crispy, golden top.
When to Use the Top Rack
Always use the top rack or the rack position just below it when broiling. This puts your food close enough to the upper heating element to get that signature sear. Most ovens have a dedicated broil setting that activates only the top element, and the rack position should be adjusted accordingly.
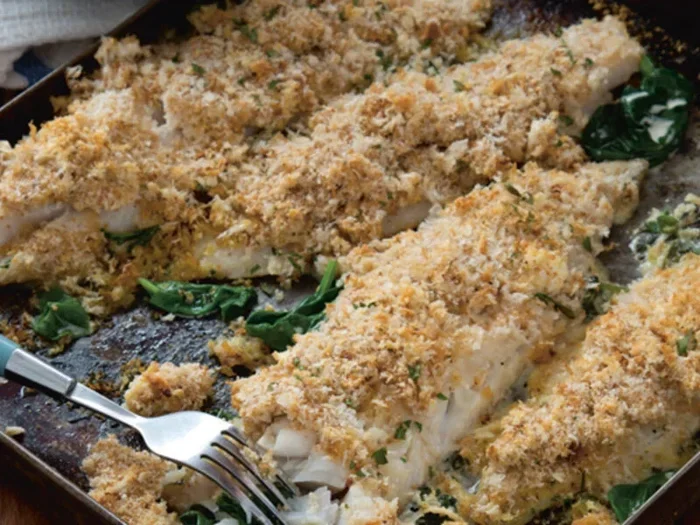
For thin cuts of meat like steaks, chicken breasts, or fish fillets, the top rack gives you a beautiful charred exterior while keeping the inside juicy. For vegetables like asparagus, bell peppers, or zucchini, broiling on the top rack creates crispy, caramelized edges in just a few minutes. The key is to watch the food closely, as broiling happens much faster than regular baking.
Broiling Tips for Perfect Sear
Position your pan about 4 to 6 inches below the top element for the best broiling results. Too close and the food will burn. Too far and you will not get the intense heat needed for a proper sear. Use a metal pan or a broiler-safe dish, since glass or ceramic can crack under the high direct heat.
Always preheat the broiler for at least 5 minutes before adding food. This ensures the element is fully hot and ready to sear immediately. Line your pan with foil for easy cleanup, but poke a few holes to allow grease to drip away. With the right oven rack positioning and a watchful eye, broiling becomes one of the fastest and most flavorful ways to cook.
Rack Position for Roasting and Meats
Roasting meats and vegetables requires a different approach than baking or broiling. The goal is even, surrounding heat that cooks the food thoroughly while developing a flavorful brown exterior. The rack position you choose directly affects how your roast turns out.
Chicken, Turkey, and Large Cuts
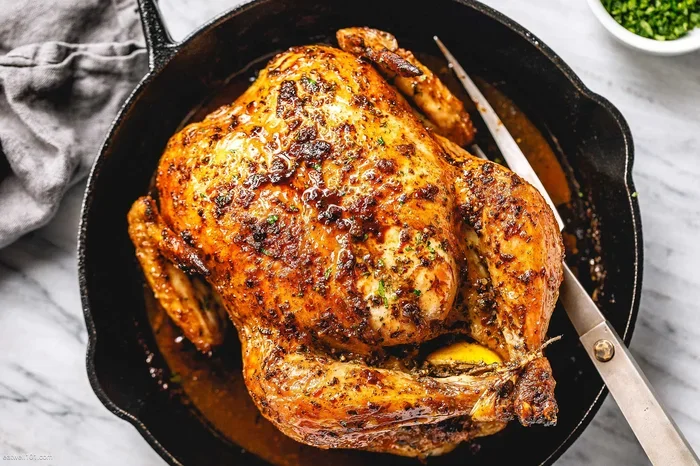
For whole chickens, turkeys, and large roasts, the middle rack is the clear winner. This position surrounds the meat with balanced heat, allowing it to cook evenly from all sides. A whole turkey or chicken on the middle rack gets crispy skin on the outside and juicy meat on the inside.
Place the roasting pan on the middle rack and avoid crowding the oven. Air needs to flow freely around the meat for even cooking. If you are roasting vegetables on a separate pan at the same time, place it on a rack above or below the meat pan. This keeps the vegetables from sitting in the meat drippings and lets them roast independently.
Vegetables and Casseroles
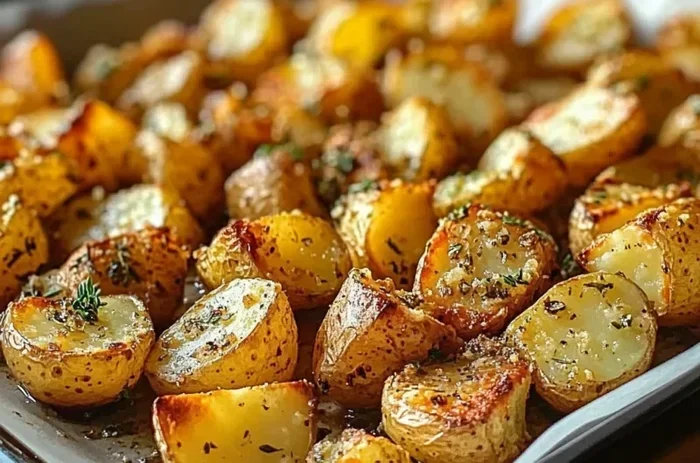
For roasted vegetables, the middle rack works beautifully. Toss your veggies with oil and seasoning, spread them in a single layer on a sheet pan, and place them in the center of the oven. The even heat caramelizes the natural sugars and creates tender, slightly crispy edges.
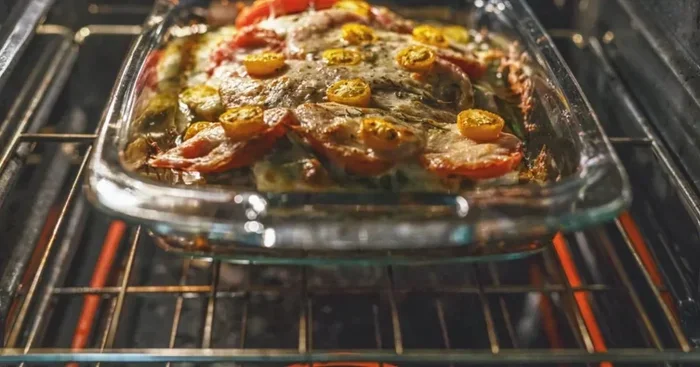
Casseroles and baked pasta dishes also do best on the middle rack. The balanced heat warms the dish through without burning the top or leaving the bottom cold. If your casserole has a cheese or breadcrumb topping that you want extra crispy, you can move it to the upper-middle rack for the last 5 to 10 minutes of cooking. This simple move adds a satisfying golden finish to any oven rack positioning strategy.
| Cooking Task | Best Rack Position | Why It Works |
|---|---|---|
| Cakes and cupcakes | Middle rack | Even heat promotes uniform rising and browning |
| Cookies and biscuits | Middle rack | Prevents over-browning on top or bottom |
| Bread and pizza | Bottom rack | Intense bottom heat creates crispy crust |
| Broiling meats and vegetables | Top rack | Direct heat from above sears and caramelizes |
| Roasting whole chicken or turkey | Middle rack | Balanced heat cooks meat evenly all around |
| Roasted vegetables | Middle rack | Even heat caramelizes edges consistently |
| Casseroles and baked pasta | Middle rack (upper for crispy topping) | Balanced heat warms through without burning |
| Pies with crispy bottom | Bottom rack (then middle to finish) | Strong bottom heat crisps the crust |
Common Mistakes in Oven Rack Positioning
Even experienced cooks make rack placement mistakes from time to time. These errors can lead to burnt food, undercooked centers, or inconsistent results. Learning what to avoid is just as important as learning what to do right.
Placing Racks Too Close to the Heating Element
One of the most common mistakes is placing a rack too close to the top or bottom heating element. This causes the food to burn on the side closest to the element while the rest remains undercooked. The intense direct heat overwhelms the food before the inside has time to cook through.
Always leave at least a few inches of space between your food and the heating element. If you are broiling, keep the rack in the top position but not so close that the food touches or nearly touches the element. For baking, the middle rack provides a safe buffer from both elements. Respecting this distance is one of the easiest ways to improve your cooking results.
Ignoring Hot Spots
Every oven has hot spots, which are areas that run hotter than others. These are usually caused by uneven heating element distribution or a lack of convection. Hot spots can burn one side of your dish while the other side stays pale and undercooked.
The best way to find your oven’s hot spots is the breadcrumb test. Spread a thin layer of breadcrumbs on a sheet pan and bake at 350 degrees for 5 to 10 minutes. The areas where the breadcrumbs brown fastest reveal your oven’s hot zones. Once you know where they are, you can adjust your rack position or rotate your food to compensate. This simple test transforms your understanding of oven rack positioning and helps you cook with confidence.
Overcrowding the Oven
Overcrowding is a silent cooking killer. When you pack too many pans into the oven, you block the flow of hot air. This creates steam pockets, uneven cooking, and longer bake times. Food on the top rack may cook fine while food on the bottom rack stays underdone.
Give your food room to breathe. If you need to bake multiple sheet pans, stagger them on different racks with enough space between them for air to circulate. Never stack pans directly on top of each other. For roasts, make sure the pan is not touching the sides of the oven or other dishes. Proper spacing is one of the simplest yet most overlooked aspects of good oven rack positioning.
Quick Tips for Perfect Results Every Time
Now that you understand the principles, here are some quick tips to put your knowledge into action. These small habits make a big difference in how your food turns out.
The Rotating Trick
No matter how good your oven is, it benefits from a little help. About halfway through cooking, rotate your pans 180 degrees. If you are using multiple racks, swap the pans between the top and bottom positions as well. This simple step compensates for any hot spots or uneven heat distribution.
The rotating trick takes just a few seconds but dramatically improves consistency. It is especially important for baked goods like cookies and cakes, where even a small temperature difference can cause one batch to brown faster than another. Make it a habit, and you will notice the difference in every dish you cook.
Using Multiple Racks
When cooking on multiple racks, think about how the heat will interact between the pans. Food on the top rack radiates heat downward, which can affect the cooking of food on the rack below. To avoid this, do not stack similar items directly above each other. Instead, offset them or use different rack levels for different foods.
For example, if you are baking cookies on two sheet pans, place one on the upper-middle rack and one on the lower-middle rack. Rotate and swap them halfway through. This way, both batches receive similar heat exposure and come out evenly baked. Mastering multiple-rack cooking takes your oven rack positioning skills to the next level.
Conclusion
Oven rack positioning is one of the simplest yet most powerful tools in your kitchen. The right rack placement can mean the difference between a perfectly golden cake and a burnt disappointment, between crispy pizza crust and a soggy disaster, between a beautifully seared steak and a gray, uneven piece of meat. Once you understand how heat moves through your oven and how each rack level affects your food, you will never look at cooking the same way again.
The middle rack is your default for most tasks. The top rack is your broiling powerhouse. The bottom rack is your crispy-bottom specialist. Use these guidelines as a starting point, then adjust based on your own oven’s quirks and your personal preferences. The breadcrumb test, the rotating trick, and proper spacing are habits that will serve you for years to come.
Take some time this week to experiment with different rack positions. Try baking the same recipe on the middle rack and then on the bottom rack and notice the difference. Broil a piece of chicken on the top rack and compare it to cooking it on the middle rack. These small experiments build your intuition and make you a more confident cook. With the right oven rack positioning, every meal you prepare will taste better and look more impressive. Your oven is a powerful tool, and now you know exactly how to use it to its full potential.
Frequently Asked Questions
Which oven rack position is best for baking cookies?
The middle rack is the best position for baking cookies. It provides even heat circulation around the baking sheet, which promotes uniform browning and prevents the bottoms from burning. If you are baking multiple trays at once, place one on the upper-middle rack and one on the lower-middle rack, and rotate them halfway through.
Can I bake on the bottom rack of the oven?
Yes, the bottom rack works well for foods that need a crispy or well-browned bottom, such as pizza, flatbreads, and pies with a crispy crust. The intense heat from the lower element rises up and creates that desirable golden finish on the bottom of your baked goods.
How close should food be to the broiler element?
Food should be about 4 to 6 inches below the broiler element. This distance provides enough intense heat to sear and caramelize the surface without burning the food. Always preheat the broiler for at least 5 minutes before placing food on the top rack.
Does rack position matter for convection ovens?
Rack position still matters in convection ovens, but you have more flexibility. The fan circulates hot air more evenly, which reduces hot spots and allows you to use multiple racks at once. However, the middle rack remains the safest and most consistent choice for general baking and roasting.
How do I find the hot spots in my oven?
Spread a thin, even layer of breadcrumbs on a sheet pan and bake at 350 degrees Fahrenheit for 5 to 10 minutes. The areas where the breadcrumbs brown the fastest reveal your oven’s hot spots. Once you identify them, you can adjust your rack position or rotate your food to compensate.
Should I use the top or bottom rack for roasting vegetables?
The middle rack is ideal for roasting vegetables. It provides even, balanced heat that caramelizes the edges without burning the tops or bottoms. Spread vegetables in a single layer on a sheet pan and place them in the center of the oven for the best results.
=== CONCLUSION ===
Mastering oven rack positioning is one of the easiest ways to elevate your everyday cooking. The middle rack handles most of your baking and roasting needs beautifully. The top rack delivers powerful broiling heat for searing and finishing. The bottom rack creates the crispy, golden bottoms that make pizza and crusty bread shine. By understanding how heat flows in your oven and matching it to the right rack level, you take control of your cooking results. Combine this knowledge with simple habits like rotating your pans and avoiding overcrowding, and you will notice a dramatic improvement in every dish you prepare. Start experimenting today, trust your instincts, and enjoy the rewards of smarter oven rack positioning in every meal you cook.