How To Clean Oven With Vinegar And Water Step By Step
Cleaning your oven with vinegar and water is one of the easiest and most affordable ways to keep your kitchen fresh. This natural method removes grease, baked-on food, and stubborn stains without harsh chemicals. You will learn the complete how to clean oven with vinegar and water process from start to finish. The technique works for all oven types and takes under an hour of active cleaning time. Follow these steps and your oven will look and smell like new again.
There is something satisfying about a clean oven. It makes every meal taste better and keeps your kitchen smelling fresh. But let us be honest. Cleaning an oven is nobody’s favorite chore. The grease. The baked-on food. The stubborn stains that just will not budge. Many people reach for expensive chemical cleaners that leave behind harsh fumes and strange tastes on their next baked dish.
Here is the good news. You can clean your oven effectively using just vinegar and water. This natural method is safe, affordable, and incredibly effective. It has been a trusted household cleaning hack for decades, and for good reason. Whether you have a standard oven, a convection oven, or even a self-cleaning model, this approach works wonders.
In this guide, we will walk you through every single step of the how to clean oven with vinegar and water process. You will learn the science behind why this combination works so well. You will discover exactly what supplies you need. And by the end, you will have a step-by-step plan that makes the entire job simple and stress-free. No special tools. No toxic chemicals. Just a clean, sparkling oven.
Key Takeaways
- Vinegar and water are safe, natural, and cost-effective alternatives to commercial oven cleaners that contain toxic fumes.
- The steam method loosens baked-on grease making it easy to wipe away without harsh scrubbing.
- You only need a few household items like white vinegar, warm water, dish soap, and a spray bottle.
- Cleaning oven racks separately ensures a thorough result and extends the life of your oven components.
- Regular maintenance prevents buildup and makes future oven cleaning sessions much faster and easier.
- This method is safe for self-cleaning ovens and conventional ovens alike when done correctly.
- Natural oven cleaning is eco-friendly and eliminates strong chemical odors from your kitchen.
📑 Table of Contents
- Why Vinegar and Water Work So Well for Oven Cleaning
- What You Need Before You Start
- Step-by-Step Guide: How To Clean Oven With Vinegar And Water
- Cleaning Oven Racks With Vinegar
- Dealing With Stubborn Grease and Baked-On Mess
- Keeping Your Oven Clean Afterward
- Common Mistakes to Avoid
- Expert Insights on Natural Oven Cleaning
- Key Takeaways
- Conclusion
Why Vinegar and Water Work So Well for Oven Cleaning
Before we dive into the steps, it helps to understand why this combination is so effective. Vinegar is a natural acid. White distilled vinegar contains about 5% acetic acid. This acid breaks down grease, grime, and food residue at a molecular level. When you heat vinegar and water together inside the oven, the steam helps lift dirt and grease off the surfaces.
The acetic acid in vinegar also acts as a disinfectant. It kills bacteria and neutralizes odors. This is especially helpful if your oven has absorbed the smell of last night’s roast or something that spilled over during baking. Unlike chemical cleaners, vinegar leaves no toxic residue behind. Your oven is safe to use immediately after cleaning.
The Science Behind Steam Cleaning
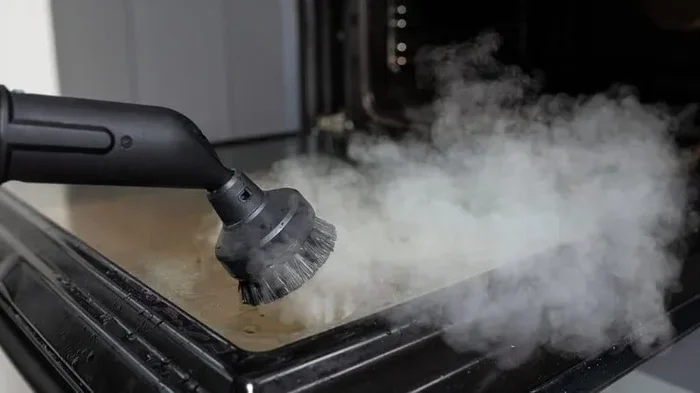
When you heat a mixture of vinegar and water inside the oven, the liquid turns into steam. This steam penetrates baked-on grime and softens it. Think of it like a gentle deep clean from the inside out. The steam loosens the bond between the grease and the oven surface. After heating, a simple wipe with a cloth removes most of the mess.
This steam cleaning oven method is gentle on the interior surfaces. It does not scratch or damage the enamel or glass. It is also much safer than chemical sprays that can release fumes into your home. For families with children or pets, this is a huge advantage. You get powerful cleaning results without the health risks.
Vinegar vs. Commercial Oven Cleaners
Commercial oven cleaners often contain harsh chemicals like sodium hydroxide or lye. These can irritate your skin, eyes, and lungs. The fumes can linger in your kitchen for hours. Some people even report chemical tastes on food cooked shortly after using these products. Vinegar and water offer a natural cleaning products alternative that is just as effective for regular maintenance.
That said, commercial cleaners may be better suited for extremely heavy, years-old buildup. For 90% of oven cleaning situations, the vinegar method works perfectly. It is also much cheaper. A bottle of white vinegar costs just a few dollars and lasts through many cleaning sessions.
What You Need Before You Start
One of the best things about this method is how simple the supply list is. You probably already have everything you need in your kitchen pantry. Here is your complete shopping list.
- White distilled vinegar — one to two cups
- Warm water — about one cup
- Spray bottle — for applying the solution
- Dish soap — a few drops for extra cleaning power
- Baking soda — optional, for extra scrubbing power
- Microfiber cloths or soft sponges — at least two
- A large heatproof bowl or baking dish — for the steam method
- Rubber gloves — to protect your hands
- Old toothbrush — for getting into corners and crevices
Tips for Choosing the Right Vinegar
Always use white distilled vinegar for oven cleaning. It is the most effective type because of its consistent acidity level. Apple cider vinegar or other varieties may contain sugars or additives that could leave a residue. Stick with plain white vinegar for the best oven cleaning solution results.
Step-by-Step Guide: How To Clean Oven With Vinegar And Water
Now for the part you have been waiting for. Here is the complete process broken down into simple steps. Follow them in order for the best results. The entire process takes about 30 to 60 minutes depending on how dirty your oven is.
Step One: Remove the Oven Racks
Start by pulling out all the oven racks. You will clean these separately, so set them aside on a protected surface like a bathtub or large sink. Removing the racks gives you full access to the oven interior. This makes the next steps much easier and more effective.
While the racks are out, take a moment to inspect the oven interior. Look for any large food debris or loose particles. Use a dry cloth to wipe these away before you begin the cleaning process. This prevents the debris from turning into a paste when you add moisture.
Step Two: Prepare the Vinegar and Water Solution
Mix equal parts white vinegar and warm water in a large heatproof bowl or baking dish. For a standard oven, use about one cup of each. If your oven is particularly dirty, you can increase the amount to two cups of each. The warm water helps the solution produce more steam, which is the key to loosening grease.
If you want to boost the cleaning power, add a few drops of dish soap to the mixture. This adds a surfactant that helps break down grease even faster. Stir the solution gently to combine everything. You do not need to shake it vigorously — just a gentle stir is enough.
Step Three: Heat the Solution to Create Steam
Place the bowl or dish on the bottom rack of the oven. Then set the oven temperature to 400°F (200°C). Let the solution heat for about 10 to 15 minutes. You want to see steam building up inside the oven. The steam will coat the interior surfaces and start softening the baked-on grime.
Do not leave the oven unattended during this step. You should be nearby to monitor the process. The goal is steam, not boiling over. If the solution starts bubbling over, reduce the temperature slightly or remove the bowl for a moment.
Step Four: Let the Steam Do Its Work
After 10 to 15 minutes, turn off the oven. Do not open the door right away. Let the bowl sit inside the closed oven for another 15 to 20 minutes. This allows the steam to penetrate deeply into the grease and food residue. The longer you let it sit, the easier the cleaning will be.
During this waiting period, you can use your time to prepare a cleaning paste. Mix baking soda with a small amount of water to form a thick paste. This paste is incredibly useful for scrubbing away any remaining tough spots after the steam treatment.
Step Five: Wipe Down the Interior
Put on your rubber gloves. Carefully remove the bowl from the oven — it will be hot. Use oven mitts to protect your hands. Now open the oven door and start wiping the interior surfaces with a damp microfiber cloth. The softened grease and grime should come off easily.
Work from the top of the oven down to the bottom. This prevents dirty water from dripping onto already-cleaned areas. Use a clean section of the cloth frequently. You will likely need to rinse the cloth in warm water several times during this process.
For stubborn spots that did not fully release during the steam treatment, apply your baking soda paste. Let it sit for 5 to 10 minutes, then gently scrub with a soft sponge or old toothbrush. The mild abrasion of the baking soda helps lift the remaining residue without scratching the oven surface.
Step Six: Final Rinse and Vinegar Spray
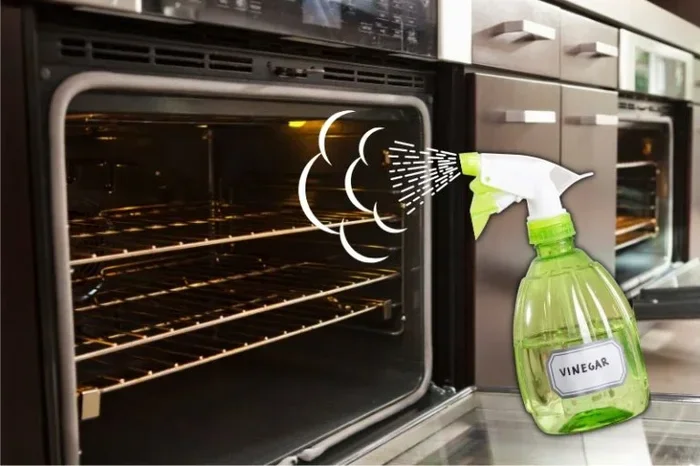
Once you have wiped down the entire interior, spray a light mist of straight vinegar over the surfaces. This final step neutralizes any remaining baking soda residue and gives the oven a fresh, clean scent. Wipe everything down one more time with a clean damp cloth.
Use a dry cloth to remove any remaining moisture. Leaving water inside the oven can lead to spots or rust over time. Your oven interior should now look clean and feel smooth to the touch.
Step Seven: Clean the Oven Door
The oven door is often overlooked during cleaning, but it accumulates just as much grease as the interior. Spray the vinegar and water solution directly onto the door glass and interior door panel. Let it sit for 5 minutes, then wipe clean with a microfiber cloth.
For the glass window on the oven door, spray the solution and let it sit for a few minutes. Use a non-abrasive sponge to gently scrub away any grime. The vinegar is safe for glass and will not cause scratches or damage. Rinse with a clean damp cloth and dry thoroughly.
Cleaning Oven Racks With Vinegar
Oven racks often need their own dedicated cleaning session. They collect a lot of grease and food particles over time. Here is how to handle them effectively using your vinegar and water solution.
The Baking Soda and Vinegar Method for Racks
Fill a bathtub or large sink with hot water. Add one cup of white vinegar and a generous amount of dish soap. Submerge the oven racks completely. Let them soak for at least 30 minutes. The hot water and vinegar will soften the baked-on grease and make it much easier to remove.
After soaking, use a non-abrasive sponge to scrub each rack. The grease should come off relatively easily at this point. For any remaining tough spots, apply a paste of baking soda and water directly to the problem area. Let it sit for 10 minutes, then scrub again. Rinse the racks thoroughly with clean water and dry them completely before placing them back in the oven.
Alternative Method: Cleaning Racks in the Oven
If your racks are too large to fit in a sink or bathtub, you can clean them right inside the oven. Place the racks on the bottom oven rack. Place a large bowl of vinegar and water on the middle rack. Heat the oven to 350°F for 15 minutes. The steam will help loosen the grease on the racks themselves. After heating, turn off the oven and let everything cool. Then wipe down the racks with a cloth.
Dealing With Stubborn Grease and Baked-On Mess
Sometimes even the best steam treatment leaves behind a few tough spots. This is especially common in ovens that have not been cleaned in a long time. Here is how to handle the most stubborn situations.
When Grease Just Will Not Budge
For extremely stubborn grease, make a thick paste using baking soda and a small amount of vinegar. The chemical reaction between the two creates a fizzy cleaning action that helps break down tough deposits. Apply the paste to the problem areas and let it sit for 15 to 30 minutes.
After the paste has had time to work, use a damp cloth to wipe it away. You may need to repeat this process for the worst spots. Be patient and gentle. Avoid using steel wool or abrasive pads, as these can damage the oven’s interior coating.
Handling Burnt Food Spills
Burnt food spills are one of the most common oven messes. The steam method handles most of these easily. For older, carbonized spills, the baking soda paste method works best. Apply the paste generously, cover it with a damp cloth, and let it sit for at least 30 minutes. The moisture and mild abrasion will help lift even the most stubborn burnt residue.
Keeping Your Oven Clean Afterward
Once you have put in the effort to deep clean your oven, you want to keep it that way. Regular maintenance makes future cleaning sessions much faster and easier. Here are some simple habits that will help.
- Clean up spills immediately — wipe away any food or liquid spills as soon as the oven has cooled.
- Use oven liners — place a silicone or aluminum liner on the bottom rack to catch drips and spills.
- Do a quick vinegar wipe monthly — spray the interior with a vinegar and water solution and wipe it down once a month.
- Cover food when baking — using foil or a lid prevents splatters from reaching the oven walls.
- Run the steam method quarterly — even if your oven looks clean, a quarterly steam session prevents buildup from accumulating.
These oven maintenance tips will save you a lot of time and effort in the long run. A little prevention goes a long way when it comes to keeping your oven in top shape.
Common Mistakes to Avoid
Even with a simple method like this, people sometimes make mistakes that reduce the effectiveness or even cause damage. Here are the most common ones to watch out for.
- Using too much vinegar — more is not always better. Excess vinegar can leave a lingering smell. Stick to the recommended ratio.
- Skipping the soaking step — patience is key. Letting the steam work for the full time makes a huge difference.
- Using abrasive scrubbers — steel wool and harsh scouring pads can scratch and damage oven surfaces.
- Not drying the interior — leaving moisture behind can lead to rust or mineral spots over time.
- Ignoring the racks — dirty racks affect how evenly your food cooks. Always clean them as part of the process.
- Using vinegar on self-cleaning cycles — never spray vinegar during the self-cleaning cycle. The extreme heat can create harmful fumes. Use vinegar only for manual cleaning.
Avoiding these mistakes ensures that your how to clean oven with vinegar and water experience is smooth and successful every time.
Expert Insights on Natural Oven Cleaning
Many professional cleaning experts agree that vinegar and water is one of the most underrated oven cleaning methods. The acidity of vinegar is scientifically proven to dissolve grease and mineral deposits effectively. Unlike chemical cleaners, it does not produce harmful fumes that require you to open windows and evacuate the kitchen.
Cleaning professionals also recommend combining vinegar with baking soda for the best results. The vinegar dissolves grease while the baking soda provides gentle abrasion. Together, they tackle both the greasy and the stuck-on components of oven grime. This combination has been a staple of eco-friendly oven cleaner routines for years.
Another expert tip is to clean your oven after it has cooled to room temperature but before any heavy cooking sessions. A warm oven (not hot) is ideal for the steam method. This timing ensures maximum effectiveness and makes the entire process more pleasant.
Key Takeaways
- Vinegar and water are safe, natural, and cost-effective alternatives to commercial oven cleaners that contain toxic fumes.
- The steam method loosens baked-on grease making it easy to wipe away without harsh scrubbing.
- You only need a few household items like white vinegar, warm water, dish soap, and a spray bottle.
- Cleaning oven racks separately ensures a thorough result and extends the life of your oven components.
- Regular maintenance prevents buildup and makes future oven cleaning sessions much faster and easier.
- This method is safe for self-cleaning ovens and conventional ovens alike when done correctly.
- Natural oven cleaning is eco-friendly and eliminates strong chemical odors from your kitchen.
Conclusion
Cleaning your oven does not have to be a dreaded chore. With the right approach, it can be quick, easy, and completely natural. The how to clean oven with vinegar and water method gives you powerful results using nothing more than ingredients you already have at home. It is safe, affordable, and gentle on both your oven and the environment.
By following the steps outlined in this guide, you can tackle grease, baked-on food, and stubborn stains with confidence. The steam method softens even the toughest messes, and the final vinegar spray leaves your oven smelling fresh and clean. Regular maintenance keeps your oven in great shape and makes each future cleaning session shorter and easier.
Give this method a try the next time your oven needs attention. You will be amazed at how well it works. A clean oven is not just about aesthetics. It is about cooking better, breathing cleaner air in your kitchen, and avoiding the harsh chemicals found in most commercial cleaning products. Your oven, your kitchen, and your family will all thank you.
Frequently Asked Questions
Can I use apple cider vinegar instead of white vinegar to clean my oven?
White distilled vinegar is the best choice because it has a consistent acidity level and no added sugars. Apple cider vinegar may leave a residue or scent behind. Stick with plain white vinegar for the most effective and streak-free oven cleaning results.
Is it safe to use vinegar and water in a self-cleaning oven?
Yes, it is safe for manual cleaning, but never use vinegar during the self-cleaning cycle. The extreme heat can cause the vinegar to produce strong fumes. Use the vinegar and water method only for regular manual maintenance, not during the high-heat self-cleaning mode.
How often should I clean my oven with vinegar?
For best results, do a deep vinegar steam clean every one to three months. A quick wipe with a vinegar solution once a month helps prevent buildup. The more regularly you maintain your oven, the less effort each cleaning session requires.
Will the vinegar smell linger in my oven after cleaning?
No. The vinegar smell dissipates completely once the oven cools and the interior is dried. Any temporary vinegar aroma fades within minutes. Your oven will smell fresh and clean, not like vinegar.
Can I use this method to clean a heavily soiled oven that has never been cleaned?
Yes, but you may need to repeat the steam and baking soda paste process two or three times for heavily soiled ovens. Be patient and let each steam session work for the full 15 to 20 minutes. Persistence will pay off with a thoroughly clean oven.
Do I need to rinse the oven after using vinegar and baking soda?
Yes, always rinse the interior with a clean damp cloth after using baking soda paste. This removes any remaining residue. A final spray of vinegar and a wipe with a clean damp cloth ensures no baking soda or vinegar residue is left behind before you use the oven again.