How To Cook Brisket In A Dutch Oven For Tender Results
Cooking brisket in a Dutch oven is the easiest way to get restaurant-quality tender meat at home. This method uses low, slow heat to break down tough fibers, creating a melt-in-your-mouth texture without any special equipment. You will learn how to choose the right cut, season it perfectly, and cook it to the ideal internal temperature. Whether you are a beginner or a seasoned home cook, this guide will help you achieve perfectly braised brisket every single time.
There is nothing quite like a perfectly cooked brisket. The kind that falls apart with just a touch of a fork. The kind that fills your kitchen with a rich, smoky aroma that makes everyone gather around the oven. If you have been wondering how to cook brisket in a Dutch oven, you have come to the right place.
A Dutch oven is hands down the best tool for this job. It is heavy, it holds heat beautifully, and it traps moisture inside like nothing else. This means you get tender, juicy brisket without needing a smoker or a fancy grill. Whether you are cooking for a family dinner or a weekend gathering, this method delivers consistent, impressive results.
In this guide, we will walk through every single step. From picking the right cut at the store to slicing and serving your finished masterpiece. You will learn the best seasoning techniques, the ideal cooking temperature, and how to tell when your brisket is perfectly done. By the end, you will feel confident enough to make this a regular part of your cooking routine.
Key Takeaways
- A Dutch oven is the best tool for cooking brisket at home because it traps moisture and heat evenly, creating tender results.
- Choose a well-marbled brisket with a good fat cap for the juiciest, most flavorful outcome.
- Sear the brisket first to build a rich, deep flavor base before braising.
- Low and slow cooking is the secret — aim for 275°F to 300°F for several hours.
- Rest the brisket for at least 30 minutes after cooking to let juices redistribute.
- Slice against the grain for the most tender, easy-to-chew slices every time.
- Use braising liquid like beef broth, wine, or beer to add layers of flavor during cooking.
📑 Table of Contents
Why Cook Brisket In A Dutch Oven
You might be thinking, why not just use a slow cooker or a grill? Both are great tools. But a Dutch oven offers something unique. It gives you the ability to sear meat directly on the stovetop before braising it in the oven. That sear creates a deep, caramelized crust that adds incredible flavor to the final dish.
Here is what makes Dutch oven brisket so special:
- Even heat distribution — the thick walls of a Dutch oven spread heat uniformly around the meat, so there are no hot spots.
- Moisture retention — the tight-fitting lid locks in steam, keeping the brisket juicy throughout the long cooking process.
- Versatility — you can go from stovetop to oven without transferring the meat to another pan.
- No special equipment needed — you do not need a smoker, a pellet grill, or any fancy gadgets.
- Consistent results — the enclosed environment makes it nearly impossible to overcook or dry out the meat.
When you braise brisket in a Dutch oven, the collagen in the meat slowly breaks down over several hours. This is what gives you that incredible, fall-apart texture. The braising liquid — whether it is beef broth, beer, or a mix of both — infuses the meat with rich, deep flavor from the inside out.
Choosing The Right Brisket
Understanding Brisket Cuts
Not all briskets are created equal. When you walk up to the meat counter, you will usually see two main options. The flat cut and the point cut. Each one has its own characteristics, and knowing the difference matters for your final result.
The flat cut is leaner and more uniform in shape. It is easier to slice and great for beginners. The point cut has more intramuscular fat, which means more flavor and juiciness, but it can be trickier to cook evenly. Many butchers sell a whole packer brisket, which includes both the flat and the point connected together.
For Dutch oven cooking, a whole packer brisket or a flat cut both work well. Look for a piece that has a thick layer of fat on one side. This fat cap melts during cooking and bastes the meat from within. Avoid any brisket that looks dry or has very little fat marbling.
What To Look For At The Store
When selecting your brisket, keep these tips in mind:
- Color: Look for a deep reddish-brown color. Avoid any meat that looks gray or dull.
- Fat distribution: Fine marbling throughout the meat means more flavor and tenderness.
- Size: A 3 to 5 pound brisket fits perfectly in most standard Dutch ovens.
- Freshness: Buy from a reputable butcher or meat counter whenever possible.
- Trimming: Some butchers will trim the fat for you. If not, you can do it at home before cooking.
A good rule of thumb is to plan for about half a pound of raw brisket per person. The meat shrinks quite a bit during the long cooking process, so keep that in mind when buying.
Preparing Your Brisket For Cooking
Trimming The Fat
Before you season your brisket, take a few minutes to trim the excess fat. You want to leave about a quarter-inch layer of fat on the surface. This thin layer will render down during cooking and keep the meat moist. Too much fat can make the braising liquid greasy, so trim carefully but do not remove everything.
Also, remove any hard, thick pockets of fat that are not marbled into the meat. These will not melt down during cooking and can leave unpleasant chewy pieces in your finished dish.
Seasoning Your Brisket
This is where the magic begins. A good BBQ rub transforms a simple cut of beef into something extraordinary. You can buy a pre-made brisket rub from the store, but making your own is incredibly easy and way more rewarding.
Here is a simple rub recipe that works beautifully:
- 2 tablespoons coarse black pepper
- 2 tablespoons kosher salt
- 1 tablespoon garlic powder
- 1 tablespoon onion powder
- 1 tablespoon smoked paprika
- 1 teaspoon cumin
- 1 teaspoon brown sugar
Mix all the ingredients together and rub the blend generously over all sides of the brisket. Press the seasoning into the meat so it sticks well. For the best results, let the seasoned brisket sit in the refrigerator overnight. This gives the flavors time to penetrate deep into the meat fibers.
If you do not have overnight time, even 30 minutes at room temperature will make a difference. The salt in the rub will start to break down the proteins and help the meat retain moisture during cooking.
Searing The Brisket
Searing is a step you should never skip. Place your Dutch oven on the stovetop over medium-high heat and add a small amount of oil. Once the oil is shimmering, carefully place the brisket fat side down in the pot. Let it sear for about 4 to 5 minutes until you get a deep golden-brown crust. Then flip it and sear the other sides.
This step does two important things. First, it creates a flavorful crust through the Maillard reaction. Second, it adds visual appeal to the final dish. Do not rush this step. A good sear is the foundation of incredible flavor.
The Cooking Process Step By Step
Building Your Braising Liquid
After searing, you will add a braising liquid to the Dutch oven. This liquid is what transforms a tough cut of meat into something tender and succulent. The most common options are beef broth, red wine, beer, or a combination of these.
For a classic approach, use a mix of beef broth and a splash of dark beer. Add a few whole garlic cloves, a couple of bay leaves, and a chopped onion to the liquid. These aromatics infuse the braising liquid with extra depth and complexity.
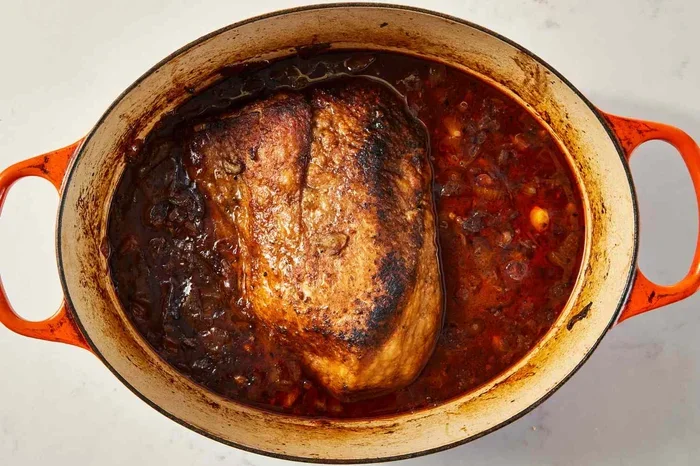
Pour the liquid around the brisket, not directly over the top. You want the liquid to come about halfway up the side of the meat. Too much liquid and you will end up with a boiled texture instead of a braised one.
Oven Temperature And Time
Preheat your oven to 275°F. This low temperature is the key to tender, juicy brisket. High heat will cause the muscle fibers to tighten and squeeze out moisture, leaving you with a tough, dry result. Low and slow is the motto here.
Place the Dutch oven with the lid on into the preheated oven. Cook the brisket for approximately 1 hour per pound of meat. So a 4-pound brisket will need roughly 4 hours. However, time alone is not the best indicator of doneness. More on that below.
Here is a general time and temperature guide:
- 275°F for 4 to 5 hours — ideal for a 3 to 4 pound brisket
- 275°F for 6 to 8 hours — ideal for a 5 to 7 pound brisket
- 300°F for 3 to 4 hours — a slightly faster option for a smaller flat cut
Resist the urge to open the lid and check on the meat too often. Every time you lift the lid, you release heat and moisture. Trust the process and let the Dutch oven do its work.
Checking For Doneness
The best way to tell if your brisket is done is with a meat thermometer. Insert it into the thickest part of the meat, avoiding any fat pockets. You are aiming for an internal temperature of 200°F to 205°F. At this temperature, the collagen has fully broken down and the meat will be incredibly tender.
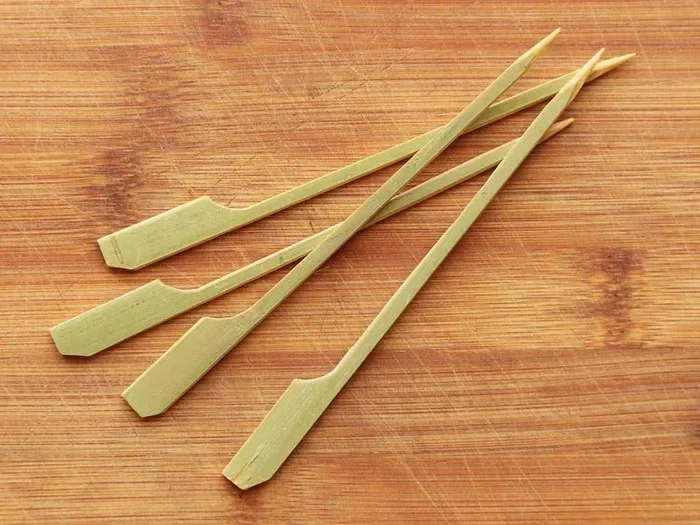
Another test is the probe test. Insert a toothpick or a thin skewer into the meat. If it slides in and out with no resistance, like it is going through butter, your brisket is ready. If you feel any firmness, give it more time.
Do not worry if the internal temperature seems lower than expected. The connective tissue in brisket needs to reach a certain level of breakdown, and sometimes the temperature plateaus before that happens. Patience is your best friend here.
Resting And Slicing Your Brisket
The Importance Of Resting
Once your brisket comes out of the oven, the most important thing you can do is let it rest. This might be the hardest part, especially when the smell is filling your entire house. But resting allows the juices to redistribute throughout the meat. If you cut into it right away, those juices will run out onto the cutting board instead of staying in the meat where they belong.
Wrap the brisket tightly in aluminum foil and let it rest for at least 30 minutes. For larger cuts, an hour of resting works even better. You can leave it in the turned-off oven with the door closed during this time. The residual heat will continue to gently cook the meat while keeping it warm.
How To Slice Properly
Slicing brisket correctly makes a huge difference in the eating experience. The key is to always cut against the grain. The grain is the direction of the muscle fibers in the meat. If you cut with the grain, each slice will be chewy and tough. Cut against it, and every bite will be melt-in-your-mouth tender.
Start by separating the flat from the point if you have a whole packer. The flat and the point have different grain directions, so slice each one separately. Use a sharp slicing knife and cut the slices about a quarter-inch thick. Do not press down hard on the meat. Let the knife do the work.
Serve the slices with some of the braising liquid spooned over the top. That liquid is pure gold — it is packed with beefy flavor and gelatin from the collagen breakdown. Your guests will not believe you made this in a Dutch oven.
Common Mistakes To Avoid
Even experienced cooks can run into trouble when making Dutch oven brisket. Here are the most common mistakes and how to avoid them:
- Skipping the sear: Searing builds foundational flavor. Do not rush past this step.
- Using too much liquid: The brisket should be half-submerged, not fully submerged. Too much liquid dilutes the flavor and creates a boiled texture.
- Cooking at too high a temperature: High heat turns tough cuts into dry, chewy meat. Keep it low and slow.
- Opening the lid too often: Every peek costs heat and moisture. Trust the process.
- Not resting the meat: Cutting too early means losing all those precious juices.
- Cutting with the grain: This is the number one mistake that makes brisket seem tough. Always slice against it.
- Using a Dutch oven that is too small: The brisket should fit comfortably with room for the braising liquid. Overcrowding leads to uneven cooking.
Expert Tips For The Best Dutch Oven Brisket
Want to take your brisket to the next level? Here are some pro tips that make a real difference:
- Dry brine overnight: Salt the brisket the night before and leave it uncovered in the fridge. This draws out moisture, which then gets reabsorbed with the seasoning, creating a deeper flavor and better bark.
- Add a splash of apple cider vinegar to the braising liquid: The acidity helps tenderize the meat and adds a subtle tangy brightness.
- Use smoked paprika or a touch of liquid smoke: This adds a smoky dimension that mimics the flavor of a traditional smoker without the equipment.
- Let the braising liquid reduce: After removing the brisket, pour the liquid into a saucepan and simmer it until it thickens. Use this as a rich, flavorful gravy.
- Experiment with different braising liquids: Try using stout beer, beef stock with a splash of Worcestershire sauce, or even a combination of coffee and broth for unique flavor profiles.
The beauty of cooking brisket in a Dutch oven is that it is forgiving. Even if you do not follow every tip perfectly, the low and slow cooking method will still produce tender, flavorful results. Do not be afraid to experiment and make it your own.
Storing And Reheating Leftover Brisket
Brisket leftovers are a gift that keeps on giving. The meat tastes even better the next day as the flavors continue to meld together. Store leftover brisket in an airtight container in the refrigerator for up to 4 days.
To reheat, place the slices in a baking dish, add a splash of the braising liquid or beef broth, and cover tightly with foil. Reheat in a 300°F oven for about 20 to 30 minutes. This gentle reheating method keeps the meat moist and prevents it from drying out.
You can also freeze cooked brisket for up to 3 months. Wrap it tightly in plastic wrap and then in aluminum foil, or place it in a freezer-safe bag. Thaw overnight in the refrigerator before reheating for the best results.
Final Thoughts
Cooking brisket in a Dutch oven is one of the most rewarding things you can do in the kitchen. It is a method that rewards patience and delivers incredible results. You do not need expensive equipment or years of experience. All you need is a good Dutch oven, a quality cut of beef, and the willingness to let time do the heavy lifting.
Once you master this technique, you will never go back to dry, overcooked brisket again. The low and slow approach in a Dutch oven creates meat that is tender, juicy, and full of flavor. It is comfort food at its finest, and it is easier than you might think.
So the next time you are planning a special meal or just want to treat yourself to something extraordinary, give Dutch oven brisket a try. Follow the steps in this guide, trust the process, and enjoy every bite of your perfectly cooked brisket in a Dutch oven. You will not be disappointed.
Frequently Asked Questions
Can I use a different type of oven-safe pot instead of a Dutch oven?
You can, but a Dutch oven works best because of its heavy walls and tight-fitting lid. These features create the perfect environment for low and slow braising. If you use a different pot, make sure it is oven-safe and has a lid that fits snugly to retain moisture.
How long does it take to cook brisket in a Dutch oven?
Plan for about 1 hour per pound of meat at 275°F. A 4-pound brisket will take roughly 4 hours. However, always use an internal temperature of 200°F to 205°F as your true indicator of doneness rather than time alone.
Do I need to flip the brisket while it cooks?
No, you do not need to flip the brisket. The sealed environment of the Dutch oven circulates heat evenly around the meat. Flipping can disrupt the braising process and release moisture. Just let it cook undisturbed for the entire time.
What is the best braising liquid for Dutch oven brisket?
A combination of beef broth and dark beer creates a rich, flavorful braising liquid. You can also use red wine, apple cider, or a mix of broth and Worcestershire sauce. The key is to avoid plain water, which will result in bland meat.
Can I cook brisket in a Dutch oven on the stovetop instead of the oven?
Yes, you can. Use the lowest heat setting on your stovetop and maintain a gentle simmer. However, the oven method is more consistent because the heat surrounds the pot evenly. If you cook on the stovetop, be sure to turn the meat occasionally for even cooking.
How do I know if my brisket is done without a meat thermometer?
The probe test is your best friend. Insert a toothpick or thin skewer into the thickest part of the meat. If it slides in with no resistance, the brisket is done. You can also press the meat with a fork — if it shreds easily, it is ready to come out of the oven.
=== CONCLUSION ===
Cooking brisket in a Dutch oven is the simplest and most reliable way to achieve tender, juicy, flavor-packed meat at home. By following the steps in this guide — from selecting the right cut to searing, seasoning, and braising at low heat — you will create a brisket that rivals anything from a professional pitmaster. The key is patience, good seasoning, and trusting the Dutch oven to do its job. Try this method for your next cook and experience the difference for yourself.