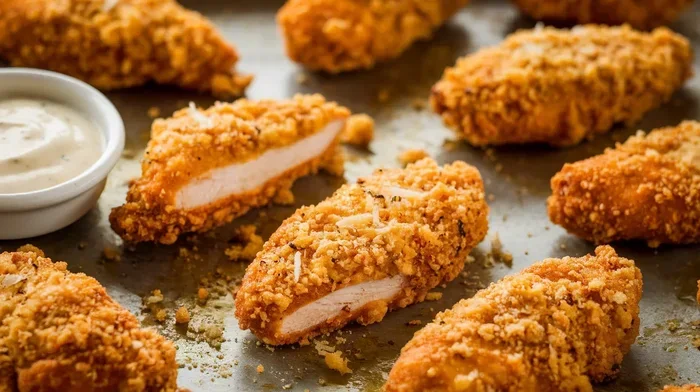
How Long For Chicken Strips In The Oven To Perfection
How Long For Chicken Strips In Oven is an essential topic that provides valuable insights.
Key Takeaways
- Standard bake time: Most chicken strips take 15 to 20 minutes at 400°F, depending on thickness.
- Use a meat thermometer: Always check that the internal temperature reaches 165°F for food safety.
- 400°F is the sweet spot: This temperature balances crispiness and cook time for the best results.
- Flip halfway through: Turning strips at the midpoint ensures even browning on both sides.
- Do not overcrowd the pan: Space strips at least half an inch apart for maximum crispiness.
- Rest before serving: Letting strips sit for 3 to 5 minutes keeps them juicy and tender.
- Reheat in the oven: Avoid the microwave to keep breading crispy when reheating leftovers.
📑 Table of Contents
- How Long To Bake Chicken Strips In The Oven
- The Best Oven Temperature For Chicken Strips
- Step-By-Step Guide To Perfect Chicken Strips
- Tips For Crispy And Juicy Chicken Strips
- Common Mistakes To Avoid When Baking Chicken Strips
- How To Tell When Chicken Strips Are Done
- Storage And Reheating Tips For Baked Chicken Strips
- Variations And Flavor Ideas For Oven Chicken Strips
How Long To Bake Chicken Strips In The Oven
The most important factor in cooking oven chicken strips is time. But time alone does not tell the whole story. Thickness, starting temperature, and whether you use breading all change the game. Let us break it down clearly.
For standard chicken breast strips that are about half an inch thick, baking at 400°F takes around 15 to 20 minutes. Thicker strips, closer to three-quarters of an inch, need closer to 22 to 25 minutes. Thin strips, like those from store-bought frozen packages, may be done in just 10 to 12 minutes.
Here is a quick reference based on strip thickness:
- Thin strips (1/4 inch): 10 to 12 minutes at 400°F
- Standard strips (1/2 inch): 15 to 20 minutes at 400°F
- Thick strips (3/4 inch): 22 to 25 minutes at 400°F
- Extra-thick or breaded strips: 25 to 30 minutes at 400°F
These times assume you are using a conventional home oven. If you have a convection oven, reduce the time by about 2 to 3 minutes. Convection fans circulate hot air more efficiently, so your crispy chicken strips cook faster.
Always use a meat thermometer to check internal chicken temperature. The safe minimum is 165°F at the thickest part of the strip. This is the only way to know for sure that your homemade chicken strips are fully cooked and safe to eat.
Why Temperature Matters So Much
Oven temperature directly affects both cook time and texture. A lower temperature, like 375°F, takes longer but can produce more even cooking. A higher temperature, like 425°F, speeds things up and creates a crispier exterior. Most chicken strip recipes call for 400°F because it hits the sweet spot between speed and crispiness.
If your oven runs hot or cold, you may need to adjust. An oven thermometer is a cheap and handy tool. Place it inside your oven and check it against the dial. Many ovens are off by 25 degrees or more. This small difference can change your baked chicken strips from perfect to overdone.
The Best Oven Temperature For Chicken Strips
Getting the right oven temperature for chicken strips sets the foundation for great results. Too low and the strips dry out before they brown. Too high and the outside burns while the inside stays raw.
400°F is the gold standard for oven-baked chicken strips. Here is why it works so well:
- It hot enough to trigger the Maillard reaction, which creates that golden-brown color and rich flavor
- It cooks the chicken through without requiring too much time
- It allows breading to crisp up nicely without burning
- It works well for both thin and thick strips
If you prefer a lighter, less crispy result, try 375°F. You will need to add a few extra minutes. This lower temperature is great for healthier chicken strips with less oil in the breading.
For extra crispy chicken strip cooking, crank it up to 425°F. Just watch them closely. At this temperature, breading can go from perfectly golden to burnt in just a few minutes. Use a timer and check early.
Should You Use Foil Or Parchment Paper?
Both options work well for baking chicken strips. Parchment paper is the better choice for crispiness. It allows air to flow underneath the strips, which helps the breading brown evenly. Foil traps more heat and moisture, which can make the bottom side softer.
If you use foil, lightly grease it first. This prevents the breading from sticking. Either way, always place strips on a wire rack over a baking sheet if possible. The rack lets hot air circulate all around the chicken, which is the secret to evenly golden brown chicken strips.
Step-By-Step Guide To Perfect Chicken Strips
Now that you know the times and temperatures, let us walk through the full process. Following these steps ensures your oven chicken strips come out flawless every time.
Step 1: Prep The Chicken
Start with boneless, skinless chicken breasts. Slice them into strips that are about half an inch thick. Uniform thickness is the key to even cooking. If one strip is much thinner than another, it will cook faster and may dry out while the thicker piece is still underdone.
Pat the strips dry with paper towels. Moisture is the enemy of crispiness. The drier the surface, the better the breading will stick and the crispier the result will be.
Step 2: Season Or Bread The Strips
For plain seasoned chicken strips, simply toss them with olive oil, salt, pepper, garlic powder, and paprika. This basic chicken strip seasoning blend adds big flavor with minimal effort.
For breaded crispy oven chicken, set up a three-step breading station:
- Flour seasoned with salt and pepper
- Beaten eggs or buttermilk
- Breadcrumbs or panko mixed with Parmesan cheese
Dip each strip in flour, then egg, then breadcrumbs. Place them on the prepared baking sheet. This method creates a thick, crunchy coating that rivals any fried version.
Step 3: Bake And Monitor
Place the baking sheet in the preheated oven. Set your timer for the minimum time based on strip thickness. At the halfway point, flip each strip using tongs. This ensures both sides brown evenly.
Check the internal temperature at the end of the cook time. Once it hits 165°F, pull the pan out immediately. The chicken will continue to cook slightly from residual heat. This carryover cooking can add 3 to 5 degrees to the final temperature.
Step 4: Rest And Serve
Let the strips rest on the pan for 3 to 5 minutes. This rest period allows the juices to redistribute throughout the meat. Cutting into them right away releases those juices onto the cutting board instead of keeping them inside the chicken.
Serve with your favorite dipping sauces. Honey mustard, ranch, barbecue sauce, and hot sauce all pair wonderfully with warm baked chicken strips.
Tips For Crispy And Juicy Chicken Strips
Even with perfect timing, small details make a huge difference. These chicken strip cooking tips will elevate your results from good to restaurant-quality.
Use Panko Instead Of Regular Breadcrumbs
Panko breadcrumbs create a lighter, crunchier coating than standard breadcrumbs. They are larger and flakier, which means more surface area for crispiness. Look for Japanese-style panko in the international aisle of your grocery store. It works beautifully for homemade chicken strips.
Don’t Crowd The Baking Sheet
Space matters. When strips are packed too close together, steam gets trapped between them. That steam makes the coating soggy instead of crispy. Leave at least half an inch of space between each strip. If you need to cook more, use two baking sheets and rotate them halfway through.
Brush With A Thin Layer Of Oil
A light spray or brush of olive oil on top of the breading helps it brown faster and more evenly. It also adds a subtle richness to the crust. Use a cooking spray or a silicone brush for the most even application.
Double Dip For Extra Crunch
For the thickest, crunchiest coating, double dip your strips. After the egg wash, go through the breadcrumb coating twice. This creates a thicker crust that stays crispy even after resting. It is a technique used by many restaurant-style chicken strip recipes.
Let The Breaded Strips Rest Before Baking
This is a pro trick many people skip. After breading, let the strips sit on the sheet pan for 10 to 15 minutes before baking. This allows the coating to set and adhere to the chicken. When they go in the oven, the breading is less likely to slide off, and you get a more even crust.
Common Mistakes To Avoid When Baking Chicken Strips
Even experienced cooks make mistakes with oven-baked chicken. Knowing what to avoid saves time, ingredients, and frustration.
Skipping The Thermometer
This is the single biggest mistake people make. Guessing doneness by time alone is unreliable. Ovens vary, strip thickness varies, and starting temperature varies. A digital instant-read thermometer costs under fifteen dollars and takes the guesswork out completely. Always check the thickest part of the strip.
Using Strips That Are Too Thick Or Too Thin
Inconsistent thickness leads to uneven cooking. Some strips will be dry while others are still undercooked. Aim for uniform strips, and if you must mix sizes, group thin and thick strips on separate pans. This way, you can pull each batch out at the right moment.
Not Preheating The Oven
Putting chicken strips into a cold oven throws off your timing significantly. The chicken starts cooking slowly at a low temperature, which can dry it out before the breading has a chance to crisp. Always preheat to the target temperature before placing the strips inside.
Overbaking For Crispiness
It is tempting to leave the strips in a little longer to get extra crunch. But there is a fine line between crispy and dried out. Once the internal temperature reaches 165°F, pull them out. The breading will continue to firm up as they rest on the hot pan.
Forgetting To Flip The Strips
Flipping halfway through ensures both sides get equal exposure to the heat. Without flipping, the top side may be pale while the bottom side over browns. Use tongs to gently turn each strip. It takes just a few seconds but makes a noticeable difference in even golden chicken strips.
How To Tell When Chicken Strips Are Done
Visual cues help, but they are not foolproof. Here is how to know your baked chicken strips are truly ready:
- Color: The breading should be deep golden brown, not pale or dark brown
- Internal temperature: 165°F at the center, measured with a meat thermometer
- Juices: When you cut into the thickest strip, the juices should run clear, not pink
- Texture: The breading should feel firm and sound slightly hollow when tapped
- Shrinkage: The strips will shrink slightly as moisture cooks out
Trust the thermometer above all else. Color can be misleading, especially with heavily breaded strips. The internal chicken temperature is the only reliable indicator of safety and doneness.
Storage And Reheating Tips For Baked Chicken Strips
Got leftovers? Proper storage keeps your oven chicken strips tasting great for days.
Store cooked strips in an airtight container in the refrigerator for up to four days. Reheat them in the oven at 375°F for 8 to 10 minutes. Avoid microwaving if you want to keep the breading crispy. The microwave steams the coating and makes it soggy.
For longer storage, freeze cooked strips in a single layer on a baking sheet first. Once frozen, transfer them to a freezer bag. They keep for up to three months. Reheat from frozen in the oven at 400°F for about 12 to 15 minutes.
Pro tip: Undercook the strips slightly if you plan to freeze and reheat them later. They will finish cooking during reheating and stay juicier. This is a great strategy for meal prep chicken strips that stay delicious all week long.
Variations And Flavor Ideas For Oven Chicken Strips
Once you master the basic chicken strip recipe, it is fun to experiment with flavors. Here are some popular variations:
- Buffalo style: Toss baked strips in hot sauce and butter after cooking. Serve with blue cheese dip.
- Honey garlic: Brush strips with a honey-garlic glaze during the last 5 minutes of baking.
- Italian herb: Add dried oregano, basil, and Italian seasoning to the breading mixture.
- Spicy BBQ: Coat strips in barbecue seasoning and serve with ranch for dipping.
- Lemon pepper: Season strips with lemon zest, black pepper, and a touch of garlic powder.
Each variation follows the same basic timing and temperature guidelines. The flavor additions happen either during the breading process or in the last few minutes of baking. This flexibility makes homemade chicken strips endlessly customizable for every palate.
Frequently Asked Questions
Can I bake frozen chicken strips directly from the freezer?
Yes, you can bake frozen chicken strips without thawing them first. Simply increase the bake time by about 5 to 10 minutes. Check the internal temperature to make sure they reach 165°F. The strips may not brown as evenly as fresh ones, but they will cook through safely.
What is the best way to make chicken strips crispy in the oven?
Use panko breadcrumbs, place strips on a wire rack, and bake at 400°F. Brushing the tops lightly with oil also helps. Do not crowd the pan, and flip the strips halfway through for even crispiness on all sides.
How do I know if chicken strips are done without a thermometer?
The safest way is to use a thermometer. But if you do not have one, cut into the thickest strip. The meat should be white all the way through with no pink remaining. The juices should run clear, not cloudy or pink.
Can I use chicken thighs instead of breasts for oven chicken strips?
Absolutely. Chicken thighs are more forgiving because they contain more fat, which keeps them juicy. Slice them into strips and follow the same timing and temperature guidelines. They may need 1 to 2 extra minutes due to the higher fat content.
How long do baked chicken strips last in the fridge?
Cooked chicken strips stay fresh in the refrigerator for up to four days when stored in an airtight container. Reheat them in the oven at 375°F for 8 to 10 minutes to maintain the best texture.
Why are my baked chicken strips dry?
Dry strips usually result from overbaking or using strips that are too thin. Always check the internal temperature and pull them out as soon as they hit 165°F. Brushing the strips with a little oil or butter before baking also helps retain moisture.
=== CONCLUSION ===
Knowing how long for chicken strips in oven is the foundation for perfect results every time. The basic answer is 15 to 25 minutes at 400°F, but the details make all the difference. Strip thickness, breading type, and oven accuracy all play a role in the final outcome.
Use a meat thermometer, flip your strips halfway, and give them space on the pan. These simple habits transform baked chicken strips from average to outstanding. The crispy golden coating and juicy, tender interior are entirely achievable at home with nothing more than your oven and a baking sheet.
Now you have all the tools to make homemade chicken strips that rival any takeout or restaurant version. Experiment with flavors, try different breading styles, and make this recipe your own. The beauty of oven-baked chicken strips is their simplicity and versatility. They work for dinner, lunch, snacks, or game day appetizers.
Put this knowledge to work in your kitchen today. Preheat that oven, slice some chicken, and enjoy the satisfying process of making perfect crispy chicken strips from scratch. Your family, your coworkers, or your dinner guests will be impressed. And you will have leftovers for tomorrow too.