How To Make A Double Oven Mitt With This Easy Guide
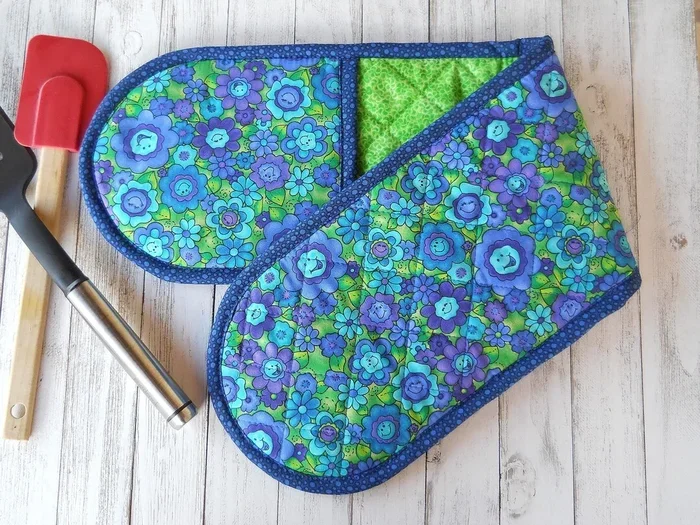
A double oven mitt gives you extra insulation and a cozy, custom fit. This guide walks you through choosing the right materials, sewing the layers, and personalizing your design. You’ll end up with a heat-resistant mitt that keeps your hands safe and your kitchen style on point.
Have you ever pulled a steaming casserole from the oven and felt the heat burn through your old mitt? A double oven mitt solves that problem instantly. It’s a simple sewing project that adds an extra layer of protection to your hands. With just a few materials and some basic stitching, you can create a custom mitt that fits perfectly. This guide makes the process fun and easy for beginners.
Making a double oven mitt is more than a craft project. It’s a practical way to boost kitchen safety and express your personal style. You’ll learn how to choose the right fabrics, add insulation, and finish the edges so they look professional. Whether you’re a seasoned sewer or trying your first project, this step-by-step approach works for everyone.
The goal is to give you a clear, oven mitt pattern you can follow without frustration. I’ll share tips on insulation, fabric pairing, and common pitfalls to avoid. By the end, you’ll have a DIY oven mitt that’s both functional and beautiful. Let’s get started.
Key Takeaways
- A double oven mitt is simple to make: You only need basic sewing skills and a few household materials.
- Double insulation matters: Adding a middle layer of batting or fleece dramatically improves heat resistance.
- Customization is easy: You can pick fabrics, add pockets, and choose decorative trims to match your kitchen.
- Safety first: Always use heat-resistant fabrics and test your mitt before regular use.
- Cost-effective gift idea: A homemade double oven mitt makes a thoughtful, practical present for cooks.
- Durability comes from proper care: Washing gently and storing correctly extends the life of your mitt.
📑 Table of Contents
Why You Need a Double Oven Mitt
A single-layer oven mitt might feel okay at first, but it often fails when the heat spikes. A double oven mitt adds a second layer of fabric and insulation. This extra barrier slows down heat transfer and gives you more time to react. It’s the difference between a comfortable grip and a painful burn.
The Problem with Single-Layer Mitts
Thin cotton or polyester mitts let heat pass through quickly. You might feel the warmth within seconds. Over time, this can cause discomfort or even minor burns. A double oven mitt traps air between layers, which acts as a natural insulator. This simple design change makes a big safety difference.
Benefits of Double Insulation
- Better heat resistance: Two layers plus batting block more warmth.
- Longer comfortable hold: You can grip hot pans for several extra seconds.
- Soft, cushioned feel: The extra padding feels gentle on your hands.
- Custom thickness: You can adjust the layers to match your comfort level.
Quick Tip: If you’re new to sewing, start with a simple rectangle shape. You can always add curves and pockets later. The double-layer design works the same way no matter the shape.
Materials You’ll Need
Gathering the right materials is the first step to a successful DIY oven mitt. You don’t need expensive supplies. Most items are easy to find at fabric stores or around your home. The key is choosing heat-resistant fabric for the outer layer and soft material for the lining.
Fabric Choices
For the outside, use cotton canvas, denim, or a heavy cotton blend. These fabrics resist heat well and hold up to frequent washing. For the inner lining, choose flannel, fleece, or soft cotton. The lining should feel comfortable against your skin. Avoid synthetic materials that can melt or scorch easily.
Insulation Options
The middle layer is what makes your double oven mitt special. Here’s a quick comparison of common insulation choices:
| Insulation Type | Heat Resistance | Softness | Cost |
|---|---|---|---|
| Batting (cotton or polyester) | High | Medium | Low |
| Fleece | Medium | Very Soft | Low |
| Wool Felt | High | Firm | Medium |
| Thermal Quilted Fabric | Very High | Medium | Medium |
Batting is the most popular choice for a double oven mitt. It’s affordable, easy to sew, and provides excellent thermal protection. If you want a softer feel, fleece works well as both insulation and lining. Wool felt offers a natural, heat-resistant option for eco-friendly projects.
Other Essential Supplies
- Scissors or a rotary cutter
- Fabric marker or chalk
- Thread that matches your fabric
- Pins or clips
- A sewing machine (hand-sewing works too)
- Optional: decorative trim, buttons, or a pocket
Quick Tip: Pre-wash your fabrics before cutting. This prevents shrinkage after your oven mitt pattern is complete. It also softens the material for a more comfortable fit.
Step-by-Step Sewing Instructions
Now it’s time to bring your double oven mitt to life. Follow these steps carefully, and you’ll have a professional-looking result. Take your time, and don’t worry about perfection—handmade items have charm.
Cutting the Pattern
Draw a simple mitt shape on paper. Make it about 9 inches long and 5 inches wide. Add a half-inch seam allowance all around. Cut out the paper pattern. Then place it on your outer fabric, batting, and lining. Trace and cut two pieces from each material. You’ll end up with six layers total: two outer, two batting, and two lining.
Sewing the Layers
Start by pinning the outer fabric right side to right side. Place the batting layer on top of one outer piece. Then add the second outer piece on top, right side out. Pin the lining pieces together with right sides facing. Sew around the edges, leaving a 3-inch opening on the side for turning. Use a straight stitch or a narrow zigzag for strength.
Quick Tip: Use a heat-resistant fabric for the outer layer and a cotton blend for the lining. This combination gives you the best balance of safety and comfort.
Turning and Finishing
Carefully turn the mitt right side out through the opening. Use a chopstick or pencil to push out the fingers. Press the seams flat with an iron. Then topstitch around the entire edge, closing the opening as you go. This final stitch gives your double oven mitt a polished look and reinforces the seams.
Expert Insight: For extra durability, use a French seam. This technique encloses the raw edges inside, preventing fraying. It takes a little more time, but the result is a clean, professional finish that lasts for years.
Customizing Your Double Oven Mitt
The beauty of a DIY oven mitt is that you can make it uniquely yours. Personal touches make the mitt more useful and more fun to use. Here are some ideas to elevate your project.
Adding Pockets and Loops
Consider adding a small pocket on the side to hold a recipe card or a thermometer. You can also sew a loop to hang the mitt on a hook. These small additions make your mitt more convenient. Just remember to keep the pocket and loop away from the hottest areas.
Decorative Touches
Use contrasting thread for a decorative topstitch. Add appliqué shapes like vegetables or fruits for a playful kitchen theme. You can also use fabric paint to write a fun message. If you’re making a set, coordinate the fabrics for a cohesive look. A decorative oven mitt also makes a wonderful gift.
Expert Insight: When adding embellishments, avoid placing them on the palm area. Thick decorations can make the mitt bulky and reduce your grip. Keep the functional areas smooth and flat.
Choosing the Right Thickness
The thickness of your double oven mitt depends on personal preference. If you have sensitive hands, add an extra layer of fleece. If you prefer a slimmer fit, use a single layer of batting. Test different combinations to find what works best for you. The goal is a mitt that feels secure and comfortable.
Care, Safety, and Key Takeaways
A well-made double oven mitt will serve you for years if you care for it properly. Simple maintenance keeps the mitt looking great and performing safely. Here’s how to get the most from your creation.
Washing and Drying
Wash your oven mitt in cold water on a gentle cycle. Avoid harsh detergents that can break down the fabric fibers. Hang it to dry or tumble dry on low heat. High heat can damage the insulation over time. Always check the care label on your chosen fabrics before washing.
Safety Checks
Before using a new oven mitt pattern, test it with a warm pan. Hold it for 10 to 15 seconds and check for any heat transfer. If you feel warmth, add another layer of batting. A heat-proof mitt should feel completely cool on the outside even when holding a hot dish. Replace your mitt if the fabric becomes thin or worn.
Common Mistakes to Avoid
- Using the wrong fabric: Never use nylon or thin polyester for the outer layer. They melt easily.
- Skipping the batting: A single layer of fabric doesn’t provide enough insulation.
- Making the mitt too small: Leave room for your fingers to move comfortably.
- Ignoring seam strength: Use reinforced stitches at the fingertips and palm.
- Not pre-washing fabric: This can lead to shrinkage after your first wash.
Quick Tip: Keep a spare double oven mitt in your kitchen drawer. Having a backup means you’re never stuck with a hot pan and no protection.
Key Takeaways
- A double oven mitt is simple to make: You only need basic sewing skills and a few household materials.
- Double insulation matters: Adding a middle layer of batting or fleece dramatically improves heat resistance.
- Customization is easy: You can pick fabrics, add pockets, and choose decorative trims to match your kitchen.
- Safety first: Always use heat-resistant fabrics and test your mitt before regular use.
- Cost-effective gift idea: A homemade double oven mitt makes a thoughtful, practical present for cooks.
- Durability comes from proper care: Washing gently and storing correctly extends the life of your mitt.
Conclusion: Creating a double oven mitt is a rewarding project that combines safety, comfort, and creativity. You’ve learned how to choose the right fabrics, add insulation, and sew a durable mitt that fits your hands perfectly. This DIY oven mitt is more than a kitchen accessory—it’s a handmade gift that anyone would appreciate. Now you have the skills to make as many as you like. Enjoy your new mitt and the confidence that comes with protecting your hands in the kitchen.
Frequently Asked Questions
What is the best fabric for a double oven mitt?
Heavy cotton canvas or denim works great for the outer layer because they resist heat well. For the lining, use soft flannel or fleece. Always avoid synthetic fabrics that can melt when exposed to high temperatures.
How thick should the insulation be in a double oven mitt?
A single layer of batting, about 1/8 inch thick, provides good protection. You can add a second layer of batting or use fleece for extra softness. The goal is to block heat while keeping the mitt comfortable to wear.
Can I machine wash a homemade oven mitt?
Yes, you can. Wash it in cold water on a gentle cycle and hang it to dry. Avoid high heat, which can damage the insulation. Pre-washing your fabrics before sewing also helps prevent shrinkage.
Is a double oven mitt really safer than a single one?
Yes, the extra layer of insulation significantly reduces heat transfer. A double oven mitt traps air between layers, which slows down the heat reaching your hands. This gives you more time to react and reduces the risk of burns.
How long does it take to make a double oven mitt?
Most beginners can complete a simple oven mitt pattern in about one to two hours. Experienced sewers may finish faster. The key is to take your time with the cutting and sewing steps for the best results.
Can I sell the double oven mitts I make?
Yes, handmade oven mitts make great gifts and can be sold at craft fairs or online. Just make sure to use quality, heat-resistant materials. Label them clearly as handmade and include care instructions for your customers.