How To Heat Fully Cooked Ham In Oven The Right Way
Heating fully cooked ham in oven is simple when you follow the right steps. This guide covers everything from prep and temperature to glazing and serving. You will learn how to reheat ham perfectly so it stays moist and tender. Whether it is a holiday spiral ham or a weekday dinner, we have you covered. Read on to master the art of oven-baked ham at home.
There is nothing quite like a warm, savory ham filling the kitchen with its rich aroma. Whether you are preparing a holiday ham for Thanksgiving or a quick Sunday dinner, knowing how to heat fully cooked ham in oven the right way makes all the difference. A fully cooked ham is convenient, but it can turn dry or bland if you do not handle it properly. The good news is that heating ham in the oven is straightforward once you know a few key techniques.
This guide will walk you through every step of the process. You will learn the ideal oven temperature, how long to cook the ham, and how to add a delicious glaze. We will also cover common mistakes to avoid so your ham turns out perfect every single time. By the end, you will feel confident heating any fully cooked ham like a pro.
Key Takeaways
- Right Temperature Matters: Always heat fully cooked ham in oven at 325°F for best results.
- Cover With Foil: Wrapping ham in aluminum foil keeps it juicy and prevents drying out.
- Use a Meat Thermometer: Check that the internal temperature reaches 140°F before serving.
- Glaze in the Last 15 Minutes: Adding glaze too early can burn it before the ham is heated through.
- Rest Before Slicing: Let the ham rest for 10-15 minutes to lock in moisture.
- Plan for 10-15 Minutes Per Pound: Heating time varies by ham size and oven type.
- Avoid Common Mistakes: Skipping the thermometer or using too high heat are the top errors people make.
📑 Table of Contents
- Why You Should Know How To Heat Fully Cooked Ham In Oven
- Preparing Your Fully Cooked Ham for the Oven
- The Best Oven Temperature for Heating Ham
- Step-by-Step Guide to Heating Fully Cooked Ham In Oven
- Glazing and Flavoring Your Ham
- Common Mistakes to Avoid When Heating Ham
- Serving Suggestions for Heated Ham
- Expert Tips for Perfect Ham Every Time
- Conclusion
Why You Should Know How To Heat Fully Cooked Ham In Oven
A fully cooked ham has already been cured, smoked, or baked by the manufacturer. This means it is safe to eat right out of the package. However, most people prefer to heat it before serving. Warming the ham brings out its flavors and gives it a better texture. Cold ham straight from the fridge can taste flat and feel dense.
Heating ham in the oven is the best method for several reasons. First, the oven provides even heat distribution. Unlike a microwave, which can create hot and cold spots, an oven warms the ham gently and consistently. Second, the oven allows you to add a glaze that caramelizes beautifully. Third, it keeps the meat moist when done correctly. If you want tender, juicy oven-baked ham, the oven is your best friend.
Many families have traditions built around baked ham during holidays and special gatherings. A beautifully heated ham with a shiny glaze is a centerpiece that everyone looks forward to. Learning the proper technique ensures you become the go-to person for the perfect ham at every family event.
Preparing Your Fully Cooked Ham for the Oven
Choose the Right Ham
Not all hams are the same. When you buy a fully cooked ham, check the label carefully. Some hams come bone-in, which adds more flavor. Others are boneless, which is easier to slice. Spiral-cut hams are popular because they are already sliced and easy to serve. Whatever type you choose, make sure it is labeled as fully cooked or ready to eat.
Before you place the ham in the oven, remove it from the refrigerator about 30 minutes ahead. Letting it sit at room temperature helps it heat more evenly. Take off any plastic wrapper or netting. Some hams come with a small packet of glaze mix inside the packaging. You can use that or make your own from scratch.
Score the Ham for Better Glazing
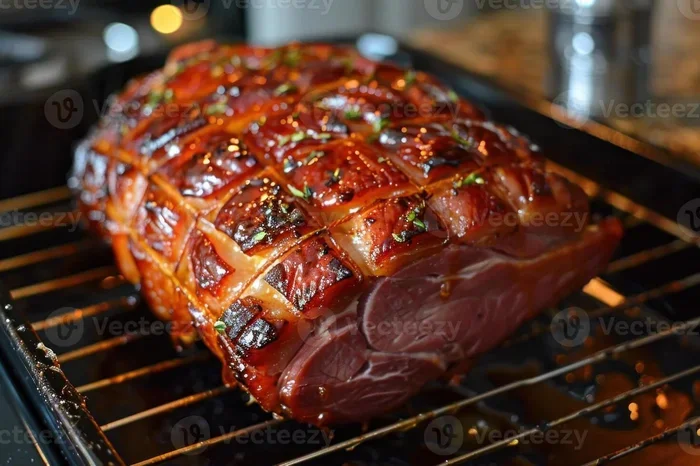
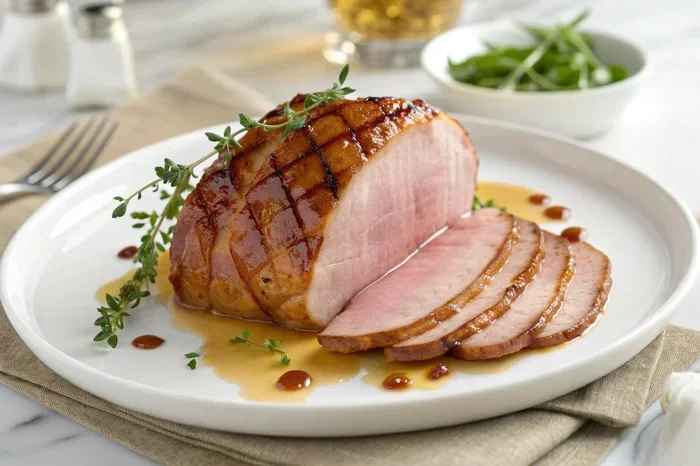
Scoring the ham means cutting shallow diamond patterns into the surface. Use a sharp knife to make cuts about a quarter-inch deep. This step is important because it allows the glaze to seep into the meat. The cuts also create more surface area for caramelization. When the ham heats up, the glaze will settle into the scores and create a beautiful, glossy finish.
Place the ham cut-side down in an oven-safe pan. A roasting pan works great for this. If you do not have a roasting pan, a deep baking dish also works well. The pan should be large enough to hold the ham comfortably without crowding it.
Add Liquid for Moisture
One secret to keeping ham moist is adding liquid to the bottom of the pan. Pour about a half-cup of water, apple juice, or ham broth into the pan. This creates steam that keeps the oven environment humid. The steam prevents the ham from drying out during the heating process. You can also place whole cloves or a cinnamon stick in the liquid for extra flavor.
The Best Oven Temperature for Heating Ham
The ideal oven temperature for heating fully cooked ham is 325°F. This moderate heat warms the ham thoroughly without overcooking it. Higher temperatures can cause the outside to dry out before the inside is warm. Lower temperatures will take too long and may leave the ham sitting in the danger zone for too long.
Here is a quick reference for oven temperatures and their effects:
- 325°F: The recommended temperature. Heats ham evenly and keeps it moist.
- 350°F: Works in a pinch but watch closely to prevent drying.
- 300°F: Good for very large hams that need gentle, slow heating.
- Above 375°F: Not recommended. Too high and the glaze burns before the ham heats through.
Always preheat your oven before placing the ham inside. A preheated oven ensures the ham starts cooking immediately at the right temperature. This small step makes a big difference in the final result.
Step-by-Step Guide to Heating Fully Cooked Ham In Oven
Step One: Wrap the Ham in Foil
Take a large sheet of aluminum foil and wrap it loosely around the ham. The foil traps moisture and creates a steaming effect. Do not wrap it too tightly. You want some air circulation so the ham does not steam too aggressively. The loose foil cover also lets the glaze breathe during the final stage of cooking.
Step Two: Place in the Oven
Put the wrapped ham in the preheated oven on the middle rack. The middle position ensures even heat exposure on all sides. Set a timer based on the weight of your ham. A good rule of thumb is to heat for about 10 to 15 minutes per pound. So a 10-pound ham will need roughly 1.5 to 2.5 hours.
Step Three: Monitor the Internal Temperature
Use a meat thermometer to check the internal temperature of the ham. Insert the probe into the thickest part of the meat, avoiding the bone if your ham has one. You want the internal temperature to reach 140°F. This is the sweet spot where the ham is warm throughout but not overcooked.
Check the temperature every 30 minutes after the first hour. This helps you track progress and avoid overcooking. If the ham is heating too fast on the outside, lower the oven temperature by 10 to 15 degrees.
Step Four: Remove the Foil for Glazing
Once the ham reaches about 130°F internally, remove the aluminum foil. This is the moment you add your glaze. Removing the foil allows the heat to caramelize the sugar in the glaze and create that beautiful sticky coating. Return the ham to the oven uncovered for the final 15 to 20 minutes.
Step Five: Let the Ham Rest
When the ham reaches 140°F internally, take it out of the oven. Let it rest for 10 to 15 minutes before slicing. Resting allows the juices to redistribute throughout the meat. If you slice too soon, the juices will run out and the ham will be drier. A rested ham is tender, juicy, and much easier to slice cleanly.
Glazing and Flavoring Your Ham
Classic Brown Sugar Glaze
The most popular glaze for baked ham is a simple brown sugar mixture. Mix one cup of brown sugar with two tablespoons of mustard and a tablespoon of apple cider vinegar. Spread this over the ham during the last 15 minutes of cooking. The heat will melt the sugar into a sticky, sweet, and tangy coating that everyone loves.
Honey and Pineapple Glaze
For a tropical twist, try a honey and pineapple glaze. Combine half a cup of honey with a quarter cup of pineapple juice and a tablespoon of soy sauce. Brush this onto the ham in the last 10 minutes. The result is a glossy, sweet glaze with a hint of savory depth. This glaze pairs wonderfully with ham slices on a dinner plate.
Maple and Cloves Glaze
A maple and clove glaze brings a warm, autumnal flavor. Mix three tablespoons of maple syrup with a teaspoon of ground cloves and a tablespoon of butter. This glaze works especially well on bone-in hams. The cloves add a subtle spice that complements the natural sweetness of the maple. Apply it during the final 15 minutes for best results.
No matter which glaze you choose, apply it only during the last 10 to 20 minutes of cooking. Sugar burns easily at high temperatures, so adding the glaze too early will ruin it. A late application ensures a perfectly caramelized finish without any bitterness.
Common Mistakes to Avoid When Heating Ham
Using Too High a Temperature
The biggest mistake people make is turning the oven up too high. They think a hotter oven will heat the ham faster. In reality, high heat dries out the outer layers while the inside may still be cold. Stick to 325°F and be patient. The ham will heat through evenly and stay moist.
Skipping the Meat Thermometer
guessing when the ham is done is a recipe for disappointment. Without a meat thermometer, you might overcook or undercook the ham. A thermometer takes the guesswork out of the process. It gives you a precise reading so you know exactly when the ham is ready. Keep one in your kitchen drawer at all times.
Not Covering the Ham Properly
Some people skip the foil wrap entirely. While the ham will still heat, it will lose moisture much faster. The foil acts as a protective barrier that traps steam and keeps the meat tender. Always wrap the ham loosely in foil for the majority of the heating time.
Adding the Glaze Too Early
As mentioned earlier, adding glaze too early leads to burning. The sugar in most glazes caramelizes quickly and can turn bitter if exposed to heat for too long. Wait until the ham is nearly done before applying any glaze. This simple timing change makes a huge difference in the final flavor and appearance.
Cutting Into the Ham Too Soon
It is tempting to slice into the ham as soon as it comes out of the oven. Resist that urge. The ham needs time to rest so the juices settle back into the meat. Cutting too soon releases all those juices onto the cutting board instead of keeping them in the slices. Patience pays off with a much better eating experience.
Serving Suggestions for Heated Ham
Once your ham is perfectly heated, it is time to serve it. Here are some ideas to make your ham meal memorable. Slice the ham against the grain for the most tender pieces. Serve it with scalloped potatoes, green beans, or a fresh garden salad. A classic combination is ham with pineapple rings and cherry sauce on the side.
For a more casual setting, use ham slices in sandwiches. Layer the heated ham on toasted bread with Swiss cheese, lettuce, and honey mustard. You can also chop leftover ham and add it to omelets, pasta dishes, or soups. The possibilities are endless when you start with a properly heated ham.
Store any leftovers in an airtight container in the refrigerator. Reheated ham keeps well for up to four days. You can reheat individual slices in the microwave or warm them back up in the oven at 325°F for 10 minutes. Proper storage ensures you enjoy that delicious ham flavor for days after the initial meal.
Expert Tips for Perfect Ham Every Time
Here are a few bonus tips from experienced cooks to elevate your ham game. First, save the juices from the bottom of the pan after cooking. Drizzle them over the sliced ham for extra moisture and flavor. Second, if you like a crunchy exterior, uncover the ham for the last 20 minutes and increase the temperature to 375°F briefly. This creates a beautiful caramelized crust without drying out the rest of the meat.
Third, always buy more ham than you think you need. A fully cooked ham reheats beautifully, and leftovers make fantastic next-day meals. Fourth, experiment with different glazes each time you cook. Once you master the basic technique, you can get creative with flavors like bourbon, jalapeno, or herb-infused butters. The more you practice, the better your results will be.
Heating ham is one of those cooking skills that seems intimidating at first but becomes second nature with practice. Once you understand the basics of temperature, timing, and glazing, you will never second-guess yourself again. The oven does most of the work for you.
Conclusion
Learning how to heat fully cooked ham in oven the right way is easier than you think. Start with the correct temperature of 325°F, wrap the ham in foil, and heat it for about 10 to 15 minutes per pound. Use a meat thermometer to check that the internal temperature reaches 140°F. Add your favorite glaze during the last 15 minutes and let the ham rest before slicing. Follow these steps and you will serve a moist, flavorful, and beautifully glazed ham every time.
Whether it is a holiday feast or a simple family dinner, a perfectly heated ham brings everyone to the table with excitement. The techniques in this guide work for spiral hams, bone-in hams, and boneless hams alike. Now that you have all the knowledge, go ahead and put it into practice. Your family and guests will thank you for the delicious oven-baked ham on the table.
Frequently Asked Questions
Can you heat a fully cooked ham in the oven without foil?
Yes, you can, but the ham may dry out faster. Foil helps trap moisture and creates a steaming effect that keeps the meat tender. If you prefer not to use foil, add more liquid to the bottom of the pan and reduce the heating time slightly.
How long does it take to heat a fully cooked ham in the oven?
It generally takes about 10 to 15 minutes per pound at 325°F. A 10-pound ham will need roughly 1.5 to 2.5 hours. Always use a meat thermometer to confirm the internal temperature reaches 140°F before serving.
What is the best temperature to reheat a fully cooked ham?
The best temperature is 325°F. This moderate heat warms the ham evenly without drying it out or burning the glaze. Avoid temperatures above 375°F, as they can cause the outside to overcook before the inside is warm.
Do you need to cover ham with foil when heating it in the oven?
Yes, covering the ham with aluminum foil is recommended for most of the heating time. The foil locks in moisture and prevents the surface from drying out. Remove the foil during the last 15 to 20 minutes to allow the glaze to caramelize.
Can you glaze a fully cooked ham before heating it in the oven?
It is better to apply the glaze during the last 10 to 20 minutes of heating. Sugar-based glazes can burn if exposed to heat for too long. Adding the glaze late ensures a perfectly caramelized finish without any bitter flavors.
How do you know when a fully cooked ham is heated through?
The best way to tell is by using a meat thermometer. Insert it into the thickest part of the ham and check that the internal temperature reaches 140°F. The ham should feel warm throughout when you press it, and the juices should run clear.