How To Dry Lemon Balm In Oven And Preserve Its Freshness
Drying lemon balm in the oven is the fastest and most reliable way to preserve this fragrant herb for year-round use. With the right temperature and timing, you can lock in the bright citrus flavor and calming benefits of fresh lemon balm leaves. This guide walks you through every step, from harvesting to storage, so your dried herbs stay potent and delicious.
There is something truly special about growing your own herbs. Lemon balm, with its bright lemon scent and calming properties, is one of the easiest and most rewarding plants to cultivate. But what happens when you have more lemon balm than you can use before it wilts? That is where drying lemon balm in oven comes in.
Whether you are a seasoned gardener or just starting out, learning how to dry lemon balm in oven is a game changer. You get to enjoy the fresh flavor and health benefits of this wonderful herb long after the growing season ends. In this guide, we will walk you through every single step, from harvesting your leaves to storing them properly. By the end, you will feel confident and ready to preserve your lemon balm harvest like a pro.
Key Takeaways
- Oven drying is quick and efficient: It takes just 2-4 hours to fully dry lemon balm leaves at low heat.
- Temperature matters a lot: Keep your oven between 95°F and 200°F to preserve flavor and oils.
- Proper preparation prevents mold: Wash, pat dry, and remove stems before placing leaves on the baking sheet.
- Storage determines shelf life: Airtight containers in a cool, dark place keep dried lemon balm fresh for up to a year.
- Dried lemon balm has many uses: From teas and tinctures to cooking and aromatherapy, dried leaves are incredibly versatile.
- Avoid common mistakes: Too much heat, overcrowding the tray, and skipping the conditioning step can ruin your harvest.
📑 Table of Contents
- Why You Should Dry Lemon Balm
- How To Prepare Lemon Balm For Oven Drying
- Step By Step: How To Dry Lemon Balm In Oven
- Best Oven Temperature And Timing Guide
- How To Store Dried Lemon Balm Properly
- Creative Ways To Use Your Dried Lemon Balm
- Common Mistakes People Make When Drying Lemon Balm In The Oven
- Oven Drying Vs Other Drying Methods Compared
- Final Thoughts On Drying Lemon Balm In The Oven
Why You Should Dry Lemon Balm
Lemon balm (Melissa officinalis) belongs to the mint family. It grows abundantly in gardens and containers around the world. The leaves have a mild lemon aroma and a slightly minty taste. People have used lemon balm for centuries in herbal medicine, cooking, and natural remedies.
Fresh lemon balm is wonderful, but it does not last forever. The leaves wilt within days, and the flavor fades quickly. Drying lemon balm in oven solves this problem completely. It removes moisture while keeping the essential oils intact. These oils are what give lemon balm its distinctive scent and therapeutic properties.
Here are some great reasons to dry your lemon balm:
- Longer shelf life: Dried lemon balm can last 6 to 12 months when stored correctly.
- Year-round availability: You can enjoy lemon balm tea even in the middle of winter.
- Concentrated flavor: Dried leaves pack a stronger punch in recipes and beverages.
- Easy to store: Dried herbs take up very little space in your kitchen pantry.
- Multiple uses: Dried lemon balm works for teas, cooking, potpourri, and natural remedies.
- No waste: You make the most of every harvest without letting herbs go to waste.
Compared to air drying or dehydrating, oven drying offers speed and consistency. Air drying can take one to two weeks and depends heavily on humidity levels. A food dehydrator works well but requires a dedicated appliance. The oven method gives you control and gets the job done in just a few hours.
How To Prepare Lemon Balm For Oven Drying
Proper preparation makes all the difference. Taking a few extra minutes before drying will result in better flavor, color, and texture. Here is exactly what you need to do.
When To Harvest Lemon Balm
The best time to harvest lemon balm is in the morning, after the dew has dried but before the sun gets too hot. At this point, the essential oils in the leaves are at their peak. Look for healthy green leaves without spots or yellowing. You can harvest up to one-third of the plant at a time without harming it.
Washing And Drying The Leaves
Rinse the leaves gently under cool running water. This removes dirt, insects, and any residue. After washing, spread the leaves out on a clean kitchen towel. Pat them dry carefully. You want the leaves to be completely dry before they go into the oven. Any remaining water will extend the drying time and may cause mold.
Removing Stems And Damaged Leaves
Strip the leaves from the stems. Discard any leaves that are brown, wilted, or damaged. Only use the healthy, vibrant green ones. You can save the stems for composting or adding to your garden soil.
Optional: Chopping The Leaves
For smaller, more uniform drying, you can tear or chop the leaves into small pieces. Whole leaves take slightly longer to dry. Chopped leaves dry more evenly and are easier to store and use later. However, keep in mind that chopped leaves release their oils faster, so handle them gently.
Quick Tips For Preparation
- Always harvest on a dry, sunny day for the best results.
- Do not soak the leaves in water. A quick rinse is all you need.
- Use a salad spinner for gentle and efficient drying after washing.
- Work quickly once the leaves are cut to preserve their aromatic oils.
Step By Step: How To Dry Lemon Balm In Oven
Now comes the fun part. Drying lemon balm in oven is straightforward, but paying attention to the details ensures perfect results every time. Follow these steps carefully.
Step 1: Set Your Oven To The Right Temperature
Preheat your oven to the lowest setting. Most ovens go as low as 170°F. For the best results, aim for around 170°F to 200°F. Going higher than 200°F risks cooking the leaves instead of drying them. This destroys the delicate oils and dulls the flavor. If your oven does not go below 170°F, you can prop the door open slightly with a wooden spoon to let moisture escape.
Step 2: Arrange The Leaves On A Baking Sheet
Line a baking sheet with parchment paper. This prevents the leaves from sticking and makes cleanup easier. Spread the lemon balm leaves in a single layer. Do not stack or overlap them. Overcrowding traps moisture and leads to uneven drying. If you have a lot of leaves, use multiple baking sheets and rotate them during the process.
Step 3: Place The Tray In The Oven
Put the baking sheet on the middle rack of your oven. The middle position allows for even heat distribution. If you are drying a large batch, rotate the tray every 30 minutes. This ensures all sides dry at the same rate.
Step 4: Dry For 2 To 4 Hours
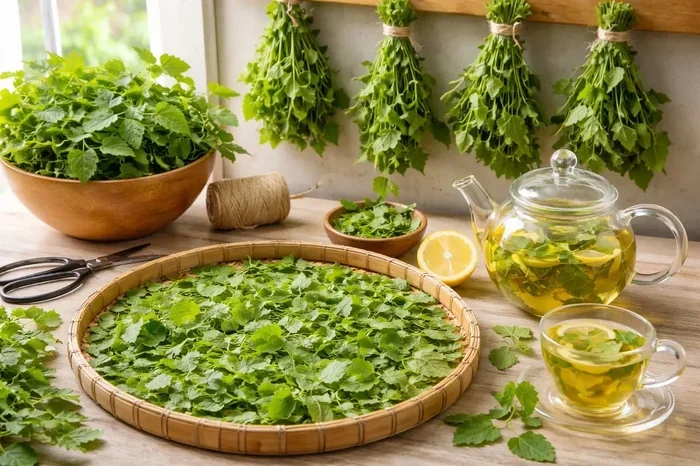
Check the leaves after two hours. They are done when they feel crispy and crumble easily between your fingers. The leaves should be completely dry but should still retain their green color. If they feel even slightly leathery or flexible, they need more time. Total drying time usually ranges from two to four hours depending on leaf thickness and oven temperature.
Step 5: Cool The Leaves Completely
Remove the baking sheet from the oven and let the leaves cool on the counter. This is an important step many people skip. Cooling allows any remaining moisture to redistribute evenly, a process called conditioning. Leave the leaves out for about 30 minutes to an hour before moving on to storage.
Expert Insight From A Herbalist
“The biggest mistake I see people make is using too much heat,” says herbalist Sarah Collins. “Low and slow is the golden rule for oven drying herbs. You want to draw out the moisture, not cook the leaves. If you can smell the herbs getting toasted instead of gently dehydrated, your oven is too hot.”
Best Oven Temperature And Timing Guide
Getting the temperature and timing right is the key to preserving the flavor and medicinal properties of your lemon balm. Too much heat destroys the volatile oils that give lemon balm its citrusy aroma and calming effects. Too little heat and the leaves may not dry fully, leading to mold and spoilage.
| Oven Temperature | Drying Time | Result |
|---|---|---|
| 170°F | 3-4 hours | Best flavor retention, gentle drying |
| 200°F | 2-3 hours | Faster drying, slight risk of flavor loss |
| 250°F | 1-2 hours | Not recommended, may cook the leaves |
For the best results, stick with 170°F to 180°F. This low temperature slowly pulls moisture from the leaves without damaging the delicate compounds inside. You will know the leaves are ready when they snap easily and crumble to a fine consistency.
Keep in mind that every oven is slightly different. Some ovens run hot, while others run cool. Use an oven thermometer if you have one to get an accurate reading. This small tool can make a big difference in the quality of your dried herbs.
How To Store Dried Lemon Balm Properly
Drying is only half the battle. Proper storage is what keeps your dried lemon balm fresh and flavorful for months. Even perfectly dried herbs can lose their potency if stored incorrectly.
Choosing The Right Container
Use airtight containers for storage. Glass jars with tight-fitting lids work perfectly. Mason jars are a popular and affordable choice. You can also use resealable glass bags or metal tins. Avoid plastic containers if possible, as they can absorb the essential oils over time and affect the flavor.
Where To Store Your Dried Lemon Balm
Store your containers in a cool, dark, and dry place. A pantry or cupboard away from the stove and sunlight is ideal. Heat, light, and moisture are the enemies of dried herbs. Exposure to any of these will cause the leaves to lose their color, aroma, and health benefits faster.
How Long Does Dried Lemon Balm Last?
When stored properly, dried lemon balm can last 6 to 12 months. After that, the flavor and potency gradually decline. To test if your dried lemon balm is still good, crush a leaf between your fingers and smell it. If the lemon aroma is strong and clear, it is still fresh. If the smell is weak or musty, it is time to replace it.
Common Storage Mistakes To Avoid
- Storing in clear jars on the counter: Light degrades the essential oils quickly.
- Using containers that are not airtight: Moisture from the air will rehydrate the leaves and cause mold.
- Crushing leaves before storage: Whole leaves retain their oils longer. Crush or chop only when you are ready to use them.
- Storing near the stove or oven: Heat accelerates the breakdown of flavor compounds.
Creative Ways To Use Your Dried Lemon Balm
Once you have successfully dried your lemon balm, the fun really begins. Dried lemon balm is incredibly versatile. Here are some wonderful ways to put it to use.
Lemon Balm Tea
This is the most popular use for dried lemon balm. Simply steep one to two teaspoons of dried leaves in hot water for five to ten minutes. The resulting tea is calming, citrusy, and wonderfully soothing. Many people drink lemon balm tea to help with relaxation and better sleep.
Cooking With Dried Lemon Balm
Add dried lemon balm to salads, soups, and marinades. It pairs beautifully with fish, chicken, and vegetable dishes. Use it sparingly at first, as the flavor is more concentrated than fresh leaves. A little goes a long way in enhancing the taste of your favorite recipes.
Natural Remedies And Herbal Supplements
Lemon balm has been used in traditional herbal medicine for centuries. Dried leaves can be used to make tinctures, salves, and herbal supplements. Many people turn to lemon balm for stress relief, digestive comfort, and promoting restful sleep.
Aromatherapy And Potpourri
The bright, uplifting scent of dried lemon balm makes it a wonderful addition to homemade potpourri. You can also place dried leaves in small sachets and tuck them into drawers, closets, or pillowcases for a natural, fresh fragrance.
Infused Oils And Vinegars
Steep dried lemon balm in olive oil or apple cider vinegar to create flavorful infusions. These work beautifully in salad dressings, marinades, and even as natural skin care products.
Common Mistakes People Make When Drying Lemon Balm In The Oven
Even with the best intentions, mistakes can happen. Knowing what to avoid will save you time, herbs, and frustration.
Using Too High A Temperature
This is the number one mistake. High heat cooks the leaves instead of drying them. You lose the delicate lemon flavor and the beneficial oils. Always use the lowest heat setting on your oven and be patient.
Overcrowding The Baking Sheet
Stacking or piling leaves traps moisture. The center leaves will not dry properly and may develop mold. Always spread leaves in a single layer with space between them for air to circulate.
Skipping The Cooling Step
Some people move dried leaves straight into storage containers while they are still warm. This traps residual moisture inside the jar, which leads to mold and spoilage. Always let the leaves cool completely first.
Not Checking The Leaves Regularly
Ovens vary, and drying times differ. Check your leaves every 30 minutes after the first two hours. Pull out any leaves that are already crispy so they do not burn while waiting for the rest to finish.
Ignoring Humidity Levels
If you live in a humid climate, your drying time may be longer. In very dry climates, it may be shorter. Adjust your approach based on the conditions in your kitchen. Using the oven light or cracking the door slightly can help in humid environments.
Quick Tips To Avoid Common Mistakes
- Use an oven thermometer to verify your actual temperature.
- Rotate trays every 30 minutes for even drying.
- Let leaves cool completely before storing.
- Check for doneness by crumbling a leaf. It should break easily.
- Store dried herbs in small batches so you use them while they are at peak freshness.
Oven Drying Vs Other Drying Methods Compared
There are several ways to dry lemon balm. Each method has its pros and cons. Here is a quick comparison to help you decide which method works best for you.
| Method | Time Required | Flavor Retention | Effort Level | Best For |
|---|---|---|---|---|
| Oven drying | 2-4 hours | Very good | Low | Quick results, medium to large batches |
| Air drying | 1-2 weeks | Excellent | Very low | Small batches, dry climates |
| Dehydrator | 2-4 hours | Excellent | Low | Consistent results, frequent drying |
| Microwave drying | 2-5 minutes | Good | Very low | Tiny batches, urgent needs |
Oven drying strikes a great balance between speed, convenience, and quality. You probably already have an oven at home, so there is no extra equipment to buy. Air drying produces excellent results but takes much longer and works best in low-humidity environments. A food dehydrator offers the most consistent results but requires a dedicated appliance. Microwave drying is fast but can be tricky and may scorch the leaves if you are not careful.
For most home cooks and herb enthusiasts, drying lemon balm in oven is the most practical and reliable method. It gives you control over temperature, timing, and batch size. You can check the progress at any time and adjust as needed.
Final Thoughts On Drying Lemon Balm In The Oven
Drying lemon balm in oven is one of the simplest and most rewarding kitchen skills you can learn. It takes just a few hours and requires nothing more than your oven, some parchment paper, and fresh lemon balm from your garden or local market.
The process is forgiving and flexible. You do not need to be a perfectionist. As long as you keep the temperature low, spread the leaves in a single layer, and dry them until they are crispy, you will end up with beautiful, flavorful dried lemon balm. Use it in teas, cook with it in your favorite recipes, or share it with friends and family as a thoughtful homemade gift.
Remember, the key to success is patience and attention to detail. Low heat, proper preparation, and smart storage will give you the best results. Once you try oven drying lemon balm, you will wonder why you did not start sooner. Your herb garden (or farmers market haul) will never go to waste again.
So go ahead and give it a try. Pick some fresh lemon balm, preheat your oven, and enjoy the satisfying process of preserving nature’s bounty. Your future self will thank you when you are sipping a warm cup of homemade lemon balm tea in the dead of winter, knowing exactly how it was made and that it is packed with natural goodness.
Frequently Asked Questions
Can I dry lemon balm in the oven at 250 degrees?
It is not recommended. Temperatures above 200°F can cook the leaves instead of drying them, which destroys the delicate oils and flavor. Stick to 170°F to 200°F for the best results.
How do I know when dried lemon balm is ready?
The leaves should feel crispy and crumble easily between your fingers. They should still be green in color, not brown or burnt. If they feel even slightly leathery or flexible, they need more time in the oven.
Can I dry lemon balm with the stems attached?
It is best to remove the stems before drying. Stems take longer to dry and do not have the same flavor as the leaves. Strip the leaves and discard the stems or compost them.
How long does dried lemon balm last in storage?
When stored in an airtight container in a cool, dark place, dried lemon balm can last 6 to 12 months. Check the aroma periodically. If the lemon scent fades, the potency has diminished and it is time to replace it.
Is oven dried lemon balm as good as air dried?
Yes, oven drying produces excellent results when done correctly. The key is using low heat and not overcooking the leaves. Oven drying is much faster than air drying, which can take one to two weeks.
What is the best way to use dried lemon balm?
Dried lemon balm is most commonly used to make tea, but it also works wonderfully in cooking, herbal tinctures, potpourri, and infused oils. Start with one to two teaspoons per cup of tea or a small pinch in recipes and adjust to taste.