How To Dehydrate Potatoes In Oven Step By Step Guide
Discover the simple process of how to dehydrate potatoes in oven at home. This guide walks you through every step from choosing the right potatoes to storing your crispy creations. You will learn slicing techniques, oven settings, and pro tips for perfect dried potatoes every time.
Have you ever wanted to make your own crispy potato chips without buying expensive equipment? Learning how to dehydrate potatoes in oven is one of the easiest and most rewarding kitchen skills you can pick up. Whether you want to snack on homemade potato chips, prep meals for camping trips, or preserve your harvest for the winter months, oven dehydration is the way to go.
This method is incredibly simple. You do not need a fancy food dehydrator or any special tools. All you need is a regular oven, some potatoes, a few basic supplies, and a little patience. In this guide, we will walk you through every single step so you can achieve perfect results right from your own kitchen. By the end, you will feel confident enough to make oven dried potatoes like a pro.
The beauty of dehydrating food at home is that it saves money, reduces food waste, and gives you full control over what goes into your snacks. Store-bought dried potato chips often contain preservatives and excess salt. When you make them yourself, you decide the ingredients. Plus, shelf stable potatoes are incredibly lightweight, making them perfect for hiking, road trips, and emergency food supplies. Let us dive right in and explore everything you need to know.
Key Takeaways
- Easy Process: Dehydrating potatoes in oven is simple, affordable, and requires no special equipment.
- Perfect Slicing: Thin, even slices dry faster and more evenly for the best results.
- Right Temperature: Low heat between 200°F and 250°F is the sweet spot for proper dehydration.
- Smart Storage: Airtight containers keep your dried potatoes fresh for up to 12 months.
- Versatile Uses: Dried potatoes work great for chips, soups, stews, and camping meals.
- Avoid Common Mistakes: Overcrowding the pan and skipping pre-treatment are the top errors to avoid.
📑 Table of Contents
Why Dehydrate Potatoes in the Oven?
Benefits of Using Your Oven for Dehydration
You might be wondering why you should use an oven instead of a dedicated food dehydrator. The answer is simple. Most people already own an oven. Using what you have makes food dehydration accessible to everyone. You do not need to buy another appliance or find extra counter space.
Oven dehydration also gives you more control. You can check on your potatoes anytime, adjust the heat, and rotate pans for even drying. Here are some key benefits of using your oven for potato dehydration:
- No extra equipment needed. Your oven does all the work.
- Faster drying time. Ovens generate more heat than most dehydrators.
- Better for small batches. Perfect for a few pounds of potatoes at a time.
- Easy to monitor. You can see and touch your food throughout the process.
- Cost effective. Save money by not buying a separate dehydrator.
Who Should Try This Method?
This technique works great for beginners and experienced cooks alike. If you are new to dried potato slices, the oven method is the most forgiving. You can experiment with temperatures and timing without worrying about expensive equipment. Gardeners with excess potatoes will also love this method. It is a fantastic way to preserve root vegetables for long-term storage.
Campers and hikers benefit too. Homemade potato chips made through oven dehydration are lightweight and compact. They make excellent trail snacks that do not spoil easily. Preppers and survival enthusiasts also swear by low heat drying for building shelf-stable food supplies. No matter your reason, oven dehydration is a practical and rewarding approach.
Choosing the Right Potatoes for Dehydration
Best Potato Varieties for Drying
Not all potatoes are created equal when it comes to dehydration. The type of potato you choose affects the texture, taste, and drying time of your final product. Some varieties work much better than others for making oven dried potatoes.
Here are the best potato varieties to use:
- Russet potatoes: These are the most popular choice. They have a starchy texture that dries beautifully and becomes crispy when rehydrated.
- Yukon Gold potatoes: Slightly waxy with a buttery flavor. They make delicious dried chips with a richer taste.
- Red potatoes: Great for thinner slices. They hold their shape well during the drying process.
- White potatoes: A reliable all-around option. They dry evenly and taste great.
Avoid waxy potatoes like fingerlings for dehydration. They tend to stay too chewy even after drying. Stick with starchy or all-purpose varieties for the best crispy potato chips. Also, choose potatoes that are firm and free of bruises or green spots. Fresh potatoes give you the best flavor and texture in the final product.
Preparing Your Potatoes for Dehydration
Proper preparation is the foundation of great dehydrated potato slices. Skipping this step can lead to uneven drying, off-flavors, or spoilage. Take your time with preparation and the results will speak for themselves.
Start by washing your potatoes thoroughly under cold running water. Use a vegetable brush to remove any dirt from the skin. You can peel the potatoes if you prefer, but leaving the skin on adds nutrients and a rustic texture. Many people love the skin-on approach for homemade potato chips.
Next, trim away any eyes, sprouts, or damaged spots. These areas can taste bitter and may not dry properly. Once your potatoes are clean and trimmed, pat them completely dry with a clean towel. Excess moisture on the surface can slow down the drying process significantly.
How To Slice Potatoes for Dehydration
Thickness Matters More Than You Think
Slice thickness is one of the most important factors in successful potato dehydration. Too thick and your slices will not dry through. Too thin and they will burn or become brittle. The ideal thickness for dried potato slices is about 1/8 inch or 3 millimeters.
At this thickness, your potato chips will dry evenly and develop a satisfying crunch. Consistency is key here. If some slices are thick and others are thin, they will dry at different rates. This leads to some chips being overdone while others are still moist. Take your time and aim for uniform slices throughout.
Best Tools for Slicing Potatoes
You have several options for slicing potatoes. A sharp kitchen knife works perfectly fine if you are careful and patient. A mandoline slicer is the best tool for achieving consistent thickness quickly. It takes practice to use safely, but the results are worth it.
Some people also use food processors with slicing discs. These are convenient for large batches of oven dried potatoes. Whatever tool you use, make sure your blades are sharp. Dull blades crush the potato cells instead of cutting cleanly. This affects both the drying time and the final texture of your chips.
Quick Tip: Soak your sliced potatoes in cold water for 15 to 30 minutes after cutting. This removes excess starch and helps prevent the slices from sticking together. It also leads to crispier results. Pat them completely dry before placing them on your baking sheets.
The Step by Step Oven Dehydration Process
Pre-Treatment Options for Better Results
Before you place your potato slices in the oven, consider a pre-treatment step. This is optional but highly recommended. Pre-treatment improves flavor, color, and shelf life of your dehydrated potatoes. There are several simple methods to choose from.
The most common pre-treatment is blanching. Bring a pot of water to a boil and drop your potato slices in for 3 to 5 minutes. Then immediately transfer them to a bowl of ice water. This stops enzyme activity that can cause off-flavors during storage. After blanching, pat the slices dry thoroughly with paper towels.
Another popular option is a light salt water soak. Dissolve one tablespoon of salt in a bowl of cold water. Soak your slices for 10 to 15 minutes, then drain and pat dry. This adds subtle flavor and helps draw out moisture. Some people also dip slices in lemon juice to prevent browning. Each method works well for potato chips oven style dehydration.
Oven Settings and Timing
Now for the main event. Setting up your oven correctly is essential for successful how to dehydrate potatoes in oven results. The goal is low, steady heat that removes moisture slowly without cooking the potatoes.
Set your oven to the lowest temperature possible, ideally between 200°F and 250°F. If your oven does not go below 200°F, that is perfectly fine. Many ovens have a minimum of 170°F, which also works well. Avoid higher temperatures because they will cook the potatoes instead of drying them. You want gentle, consistent warmth.
Follow these steps for the oven dehydration process:
- Line baking sheets with parchment paper or silicone mats. This prevents sticking and makes cleanup easy.
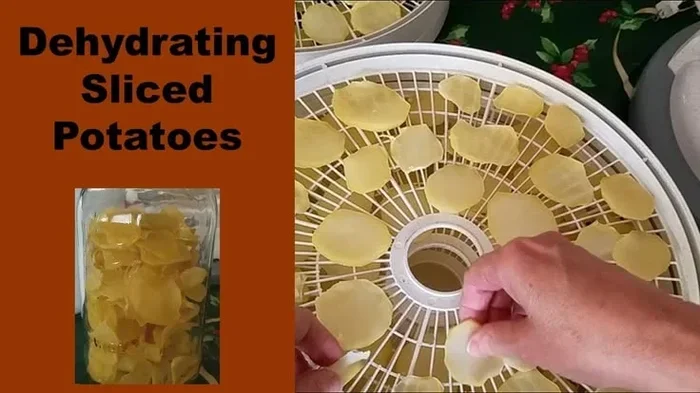
- Arrange potato slices in a single layer with space between each piece. Do not overlap or crowd the pan.
- Place the baking sheets on oven racks, ideally in the center position.
- Prop the oven door open slightly with a wooden spoon. This allows moisture to escape and improves air circulation.
- Set a timer for 2 hours and check your potatoes regularly.
Total drying time typically ranges from 2 to 6 hours depending on your oven, potato thickness, and humidity levels. Thin slices at 200°F may be done in 2 hours. Thicker slices might need 4 to 6 hours. The key is patience and regular checking.
Checking for Doneness
Knowing when your oven dried potatoes are ready is crucial. Under-dried potatoes will spoil quickly in storage. Over-dried potatoes become too brittle and lose their pleasant crunch. The perfect dried potato slice should be dry and crisp but still slightly flexible.
To test for doneness, let a slice cool completely. Then try to bend it. It should snap cleanly without feeling leathery or soft in the center. If it bends without breaking, it needs more time. Check multiple slices from different pans because drying can be uneven.
Another test is the touch test. Properly dried slices should feel dry to the touch with no moisture or tackiness. If they feel even slightly damp, they need more time in the oven. Trust your senses here. Your nose can also help. Properly dried potatoes have a mild, earthy aroma. If they smell musty or off, something went wrong with the process.
Storing Your Dried Potatoes Properly
Best Containers for Long-Term Storage
Proper storage is just as important as the drying process itself. Even perfectly dried potato dehydration results can spoil if stored incorrectly. The goal is to keep moisture out and prevent your dried potatoes from absorbing humidity from the air.
Here are the best storage options for shelf stable potatoes:
- Airtight glass jars: Mason jars work wonderfully. They are easy to see through and seal tightly.
- Vacuum-sealed bags: These remove all air and provide the longest shelf life. Great for bulk storage.
- Heavy-duty zip-lock bags: Squeeze out as much air as possible before sealing. A budget-friendly option.
- Mylar bags with oxygen absorbers: The gold standard for long-term food storage. Perfect for preppers.
Store your containers in a cool, dark, and dry place. A pantry or cupboard works great. Avoid storing dried potatoes near the stove, oven, or in direct sunlight. Heat and light degrade the quality of dried foods over time. Properly stored homemade potato chips can last 6 to 12 months without any loss of quality.
Shelf Life and Freshness Tips
How long do dried potato slices last? The answer depends on storage conditions and moisture content. If your potatoes are completely dry before storage, they can last up to a year. If there is even a small amount of residual moisture, the shelf life drops significantly and mold can develop.
Always label your storage containers with the date. This helps you rotate your supply and use the oldest batches first. If you notice any moisture inside a container, remove the affected chips immediately and dry them for another 30 minutes in the oven. It is better to re-dry a few chips than to lose an entire batch to mold.
Quick Tip: Add a food-safe desiccant packet to your storage container. This absorbs any residual moisture and keeps your dried potatoes perfectly crisp for longer. You can find these packets online or reuse them from store-bought products.
Creative Ways to Use Dried Potatoes
Rehydrating Your Potatoes
One of the best things about dehydrating food at home is the versatility of the final product. Dried potatoes are not just for snacking. You can rehydrate them and use them in countless recipes. Rehydration is simple. Just add hot water and let the slices soak for 15 to 30 minutes until they soften.
Rehydrated potatoes work beautifully in soups, stews, casseroles, and gratins. They cook faster than fresh potatoes and absorb the flavors of whatever liquid they are in. Many campers and hikers rehydrate dried potatoes directly in their meal pouches over a campfire. It is a convenient and delicious way to enjoy potatoes in the backcountry.
Recipes and Snack Ideas
The most popular use for oven dried potatoes is, of course, as a snack. Homemade potato chips are healthier and more flavorful than store-bought versions. You can season them with garlic powder, paprika, ranch seasoning, or simply sea salt. Get creative with flavors and make batches that suit your personal taste.
Here are some fun ideas for using your dried potatoes:
- Seasoned chips: Toss dried slices with olive oil and your favorite spices before the final drying phase.
- Potato powder: Blend completely dried chips in a blender to make instant potato flakes for cooking.
- Campfire hash: Rehydrate with diced onions and bell peppers for a hearty trail meal.
- Soup thickener: Add dried potato slices to soups for natural thickening and extra nutrition.
- Survival food: Lightweight, calorie-dense, and shelf-stable for emergency preparedness.
Each of these uses highlights why root vegetable dehydration is such a valuable kitchen skill. Once you start making dried potatoes, you will find new ways to use them every week. They are a pantry staple that pays for itself over time.
Common Mistakes to Avoid
Overcrowding the Baking Sheet
The most common mistake people make when learning how to dehydrate potatoes in oven is overcrowding the pan. When slices touch or overlap, moisture gets trapped between them. This leads to uneven drying and can cause some slices to become soggy or even moldy.
Always arrange your potato slices in a single layer with plenty of space between each piece. Air needs to flow freely around every slice for even drying. If you have more potatoes than your oven can handle, use multiple baking sheets and rotate them throughout the drying process. This small change makes a huge difference in your final results.
Wrong Temperature Settings
Temperature control is critical for successful potato dehydration. Too high and the outside of the slices will burn before the inside is dry. Too low and the process takes forever and may not remove enough moisture. The ideal range is 200°F to 250°F for most ovens.
Avoid the temptation to increase the temperature to speed things up. This is the fastest way to ruin a batch of dehydrated potato slices. Slow and steady wins the race. Low heat removes moisture gradually while preserving the flavor, color, and nutritional value of the potatoes. Patience is your best friend in the dehydration process.
Skipping the Pre-Treatment
While pre-treatment is optional, skipping it entirely can lead to disappointing results. Unblanched potato slices may develop off-flavors over time in storage. They can also darken or discolor during the drying process. A quick blanching or soaking step takes only minutes but significantly improves the quality and shelf life of your final product.
Expert Insight: Professional food preservation experts always recommend at least a brief blanching step for root vegetables. It inactivates enzymes that cause spoilage and helps maintain the natural color and flavor of your oven dried potatoes. This one small step separates good dried potatoes from great ones.
Key Takeaways
- Simple and Accessible: Dehydrating potatoes in oven requires no special equipment, just a standard oven and basic supplies.
- Right Potatoes Matter: Russet and Yukon Gold varieties produce the best crispy potato chips with great flavor.
- Slice Thin and Even: 1/8 inch slices dry consistently and develop the ideal crunch for homemade potato chips.
- Low and Slow Heat: Keep your oven between 200°F and 250°F for proper moisture removal without burning.
- Store Smart: Use airtight containers in a cool, dark place to keep your shelf stable potatoes fresh for up to 12 months.
- Get Creative: Rehydrated dried potatoes work in soups, stews, casseroles, and make excellent trail snacks for camping trips.
- Avoid Common Errors: Do not overcrowd your pans, skip pre-treatment, or use too high a temperature for the best results.
Conclusion
Learning how to dehydrate potatoes in oven is a genuinely useful skill that anyone can master. It does not matter if you are a complete beginner or an experienced home cook. The process is straightforward, forgiving, and incredibly rewarding. You get to enjoy delicious homemade potato chips, reduce food waste, and build a pantry of shelf stable potatoes that serve you throughout the year.
From choosing the right potatoes to slicing them evenly, from setting the correct oven temperature to storing the finished product properly, every step matters. Follow the guidelines in this guide and you will produce oven dried potatoes that rival or even surpass store-bought versions. The flavor is superior, the texture is perfect, and you know exactly what went into making them.
Start with a small batch this weekend. Experiment with different potato varieties, slice thicknesses, and seasoning combinations. Once you see how easy and satisfying the process is, you will want to make it a regular part of your kitchen routine. Dehydrating food at home is one of the simplest ways to take control of what you eat and extend the life of your favorite ingredients. Grab some potatoes, preheat your oven, and get started today.
Frequently Asked Questions
What is the best temperature to dehydrate potatoes in the oven?
The best temperature range is between 200°F and 250°F. This low heat removes moisture slowly without cooking the potatoes. Higher temperatures will burn the outside before the inside dries properly.
How long does it take to dehydrate potatoes in the oven?
Most batches take between 2 and 6 hours depending on potato thickness, oven temperature, and humidity levels. Thin slices at 200°F may be done in 2 hours while thicker slices can take up to 6 hours. Check regularly for best results.
Do I need to peel potatoes before dehydrating them?
No, peeling is optional. Leaving the skin on adds nutrients and a rustic texture to your homemade potato chips. Just wash the potatoes thoroughly and remove any blemishes or green spots before slicing.
Can I use a toaster oven to dehydrate potatoes?
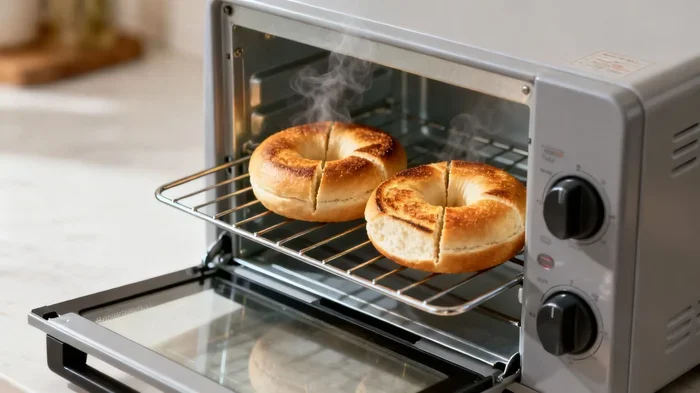
Yes, a toaster oven works well for small batches of oven dried potatoes. Use the lowest temperature setting and prop the door open for air circulation. Toaster ovens are great for making a few slices of crispy potato chips at a time.
How do I rehydrate dried potato slices?
Simply place your dried potato slices in hot water and let them soak for 15 to 30 minutes. They will soften and be ready to use in soups, stews, or casseroles. Drain and add them to your recipe as you would fresh potatoes.
How long do dehydrated potatoes last in storage?
Properly dried and stored shelf stable potatoes can last 6 to 12 months in airtight containers. Store them in a cool, dark, and dry place. If you notice any moisture or off smells, discard the batch to avoid spoilage.