How Long Should Clay Be In The Oven For Best Results
Knowing how long to keep clay in the oven is the key to durable, beautiful crafts. Most polymer clay projects need 15 to 30 minutes at 275°F, but thickness and brand matter a lot. This guide walks you through every step so your clay cures evenly and turns out flawless.
Have you ever wondered how long clay should actually be in the oven? It is a question that comes up a lot among craft lovers and DIY beginners. Getting the bake time right makes the difference between a piece that lasts for years and one that crumbles apart. Whether you are making earrings, figurines, or home decor, the curing process matters a lot. This guide will show you exactly how to get perfect results every single time.
Baking clay might seem simple on the surface. You shape it, pop it in the oven, and wait. But there is more to it than that. The wrong temperature or time can ruin your hard work. Underbaked clay stays soft and crumbly. Overbaked clay turns brittle and cracks easily. That is why understanding the basics of clay baking is so important. Let us walk through everything you need to know.
Key Takeaways
- Standard baking time: Most clay needs 15-30 minutes per quarter inch of thickness at 275°F.
- Temperature control is critical: Always use an oven thermometer to avoid underbaking or burning.
- Thickness changes everything: Thicker pieces need longer bake times, but not higher temperatures.
- Follow brand instructions: Different clay brands have slightly different curing requirements.
- Check for doneness: Properly cured clay should be hard and cool to the touch.
- Avoid common mistakes: Overbaking causes brittleness, and uneven thickness leads to cracking.
- Safety first: Never use a microwave or toaster oven for clay baking unless the brand allows it.
📑 Table of Contents
- Understanding How Long Clay Should Be In The Oven
- How to Calculate the Right Baking Time
- Common Mistakes When Baking Clay
- Best Practices for Even Baking
- How Different Clay Brands Compare
- How to Tell If Your Clay Is Fully Cured
- Safety Tips for Baking Clay
- Expert Tips for Perfect Clay Baking Results
- Frequently Asked Questions
- Conclusion
Understanding How Long Clay Should Be In The Oven
The short answer is that most polymer clay needs about 15 minutes per quarter inch of thickness at 275 degrees Fahrenheit. But that is just a starting point. Many factors change the actual bake time. The brand of clay, the size of your project, and even your oven type all play a role. Let us break this down so you feel confident every time you bake.
Why Bake Time Matters So Much
Baking time directly affects how well your clay cures. Curing is the process where the PVC particles in polymer clay soften and fuse together. When this happens correctly, you get a solid, durable piece. If the time is too short, the clay will not fully cure. It will remain soft in the center or crumble under pressure. If the time is too long, the clay can burn or become too brittle to handle.
Think of it like baking bread. Too little time and the inside stays gooey. Too much time and it turns hard and dry. Clay works in a similar way. The goal is to find that sweet spot where the cure is complete but not overdone.
The Role of Temperature in Clay Curing
Temperature and time go hand in hand. Most polymer clay brands recommend 275 degrees Fahrenheit as the standard. This is a low temperature compared to ceramic clay firing. The low heat allows the PVC particles to soften gradually and bond properly. If you crank the temperature up to speed things along, you will get the opposite result. The outside burns while the inside stays uncured.
This is why a good oven thermometer is your best friend. Many home ovens run hot or cold. The dial on your oven might say 275, but the actual temperature could be 250 or 300. That small difference can change your results dramatically. Always place a thermometer inside your oven and check it before you put your clay in.
How to Calculate the Right Baking Time
Figuring out the correct bake time is easier than you might think. The general rule of thumb is 15 minutes per quarter inch of thickness. Let us look at some common examples so you can plan your projects better.
Thickness Guide for Baking Clay
Thickness is the biggest factor in determining bake time. Here is a simple breakdown to help you plan:
- Quarter inch (6mm): 15 minutes at 275 degrees Fahrenheit
- Half inch (12mm): 30 minutes at 275 degrees Fahrenheit
- Three-quarter inch (19mm): 45 minutes at 275 degrees Fahrenheit
- One inch (25mm): 60 minutes at 275 degrees Fahrenheit
These times work well for most standard polymer clay brands like Sculpey, Fimo, and Kato. If your piece is thicker than one inch, you might need to bake it in stages. Bake for 30 minutes, let it cool, then bake again. This helps the heat reach the center without burning the outside.
Adjusting Time for Different Projects
Not all projects are the same thickness throughout. A pendant might be thin all the way through, so it bakes quickly. A sculpture might have thin arms and a thick body. In cases like this, you need to think about the thickest part of your piece. That determines your total bake time.
For example, if you are making a small figurine with thin legs and a thick torso, you should bake it for the time needed for the torso. The thin parts will cure just fine in that time. You do not need to bake longer. In fact, baking longer could cause the thin parts to become too brittle.
Common Mistakes When Baking Clay
Even experienced crafters make mistakes sometimes. The good news is that most baking errors are easy to avoid. Let us look at the most common pitfalls and how to steer clear of them.
Underbaking Your Clay
Underbaking is one of the most common problems people face. It happens when you do not bake the clay long enough. The piece might feel firm on the outside but soft or crumbly on the inside. Underbaked clay is weak and will break easily. It also does not hold paint or glaze well.
Signs of underbaked clay include:
- The clay feels soft or flexible after cooling
- The piece crumbles when you press on it
- The color looks pale or uneven
- The surface feels waxy rather than solid
If you notice any of these signs, you can rebake the clay. Simply put it back in the oven for another 15 minutes at the correct temperature. Just make sure you do not increase the temperature to make up for lost time. That will only make things worse.
Overbaking and Burning
On the other side of the coin, overbaking can destroy your project. Clay that bakes too long or at too high a temperature becomes brittle and yellow. It can also release unpleasant fumes. Burnt clay cannot be fixed. Once it is overbaked, you will need to start over with a new piece.
To avoid overbaking, always set a timer. Do not rely on your memory or guess how long the clay has been in the oven. Even five extra minutes can make a big difference. Keep your oven thermometer visible so you can monitor the temperature throughout the bake.
Skipping the Oven Thermometer
This might sound like a small detail, but it makes a huge difference. Many ovens have temperature inaccuracies of 25 degrees or more. That means your oven could be running at 250 or 300 degrees when the dial says 275. A cheap oven thermometer from the dollar store can save your projects. Place it inside your oven and check it every time you bake clay.
Best Practices for Even Baking
Getting the time and temperature right is only part of the equation. How you place your clay in the oven matters too. A few simple habits can help you achieve even, consistent results every time.
Use a Clay Baking Tile or Parchment Paper
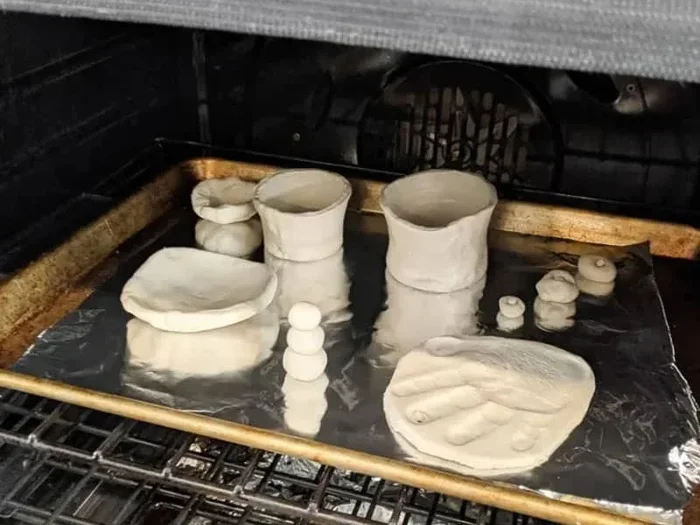
Never place your clay directly on a bare baking sheet. The metal can create hot spots that burn the bottom of your piece. Instead, use a ceramic tile, glass dish, or parchment paper. These materials distribute heat more evenly and protect your clay from direct contact with the metal surface.
Some crafters also like to use aluminum foil to wrap their clay pieces. Foil can help reflect heat and create a more uniform baking environment. Just make sure the foil is not touching the clay directly if you are using a dark-colored baking surface, as this can cause scorching.
Let Your Oven Preheat Fully
Always preheat your oven before placing your clay inside. Putting clay into a cold or warming oven leads to uneven curing. The outside might start to cure while the inside is still cold. This creates stress in the material and can cause cracks later on. Wait until your oven reaches the target temperature before you slide your piece in.
Avoid Opening the Oven Door Too Often
Every time you open the oven door, you let out a significant amount of heat. The temperature can drop by 25 degrees or more. This fluctuation can affect how your clay cures. Try to resist the urge to check on your piece too frequently. If you need to check, do it quickly and close the door right away.
How Different Clay Brands Compare
Not all clay is created equal. Different brands have slightly different curing requirements. While most follow the 275 degrees Fahrenheit standard, some have unique needs. Here is a quick look at popular brands and their recommended settings.
| Brand | Temperature | Time Per 1/4 Inch | Notes |
|---|---|---|---|
| Sculpey Original | 275°F | 15 minutes | Most popular brand, great for beginners |
| Fimo Professional | 265°F | 30 minutes | Slightly lower temp, longer cure time |
| Kato Polyclay | 300°F | 10 minutes | Higher temp, shorter bake time |
| Cernit | 275°F | 15 minutes | Smooth finish, good for jewelry |
Always check the package instructions for your specific clay brand. The manufacturer knows their product best. If you are mixing brands, stick to the lower temperature to avoid burning the more heat-sensitive clay.
How to Tell If Your Clay Is Fully Cured
Knowing when your clay is done baking is an important skill. You cannot just go by the clock alone. Here are some reliable ways to check if your clay has cured properly.
- Color check: Properly cured clay should have a consistent, rich color. If it looks pale or has white spots, it may be underbaked.
- Hardness test: Press a fingernail gently into the bottom of the piece. It should not leave an indent. If it does, it needs more time.
- Cool to the touch: Properly cured clay feels cool and solid, not warm or waxy.
- No smell: If you can still smell the clay after it comes out of the oven, it might not be fully cured.
Once your clay passes these checks, let it cool completely before handling. The curing process continues slightly as the clay cools. Handling it too early can leave fingerprints or dents.
Can You Rebake Clay?
Yes, you can rebake clay if needed. This is actually a common practice in the crafting world. If you discover that a piece is underbaked, simply place it back in the oven at the correct temperature for another 15 minutes. You can rebake clay multiple times without harming it. This is great news for beginners who are still learning the ropes.
However, you should never rebake clay that has already been painted or glazed before baking. The paint or glaze may not withstand a second round of heat. Always do any painting or decorating after the final bake.
Safety Tips for Baking Clay
Baking clay is generally very safe, but a few precautions go a long way. Follow these simple tips to keep yourself and your workspace safe.
- Ventilate your kitchen: Even though polymer clay fumes are minimal, good ventilation is always a good idea. Open a window or turn on a fan while baking.
- Use a dedicated oven: If possible, use an oven that you do not also use for food. Clay fumes, while not highly toxic, can affect the taste of food baked afterward.
- Clean your oven regularly: Wax and residue from clay can build up over time. Wipe down your oven with a damp cloth after each use.
- Never use a microwave: Microwaves heat clay unevenly and can cause fires. Always use a conventional oven for baking clay.
- Keep clay away from children: Raw clay contains chemicals that should not be ingested. Supervise young crafters at all times.
Expert Tips for Perfect Clay Baking Results
Here are some pro tips that experienced clay artists use to get the best results. These small adjustments can make a big difference in the quality of your finished pieces.
- Sandwich your clay between tiles: Place your clay piece between two ceramic tiles. This prevents the bottom from burning and promotes even heat distribution.
- Bake on a higher rack: Position your clay on the upper third of the oven. Heat rises, so this helps the top cure evenly.
- Use a convection setting: If your oven has a convection mode, use it. The fan circulates hot air and reduces hot spots. This leads to more even curing.
- Cool slowly: After baking, turn off the oven and let the clay cool inside with the door closed. This gradual cooling prevents thermal shock and reduces cracking.
- Test with a scrap piece: If you are trying a new brand or thickness, bake a small scrap first. This helps you dial in the perfect time and temperature before committing to your main project.
Frequently Asked Questions
Can I bake clay at a lower temperature for a longer time?
Yes, you can. Baking at a slightly lower temperature for a longer period can actually produce better results for thick pieces. This approach allows heat to penetrate the center without burning the outside. Just stay within 10-15 degrees of the recommended temperature and adjust your time accordingly.
What happens if I bake clay at the wrong temperature?
Baking at too high a temperature burns the clay and releases harmful fumes. The piece becomes brittle and yellow. Baking at too low a temperature leaves the clay undercured and crumbly. Always use an oven thermometer to verify your oven’s actual temperature before placing clay inside.
How do I know if my oven runs hot or cold?
The easiest way is to use an independent oven thermometer. Place it inside your oven and compare the reading to the dial setting. If there is more than a 10-degree difference, you should adjust your baking temperature to match what the thermometer shows rather than what the dial says.
Can I bake polymer clay in a toaster oven?
You can, but it requires extra care. Toaster ovens heat unevenly and can have hot spots. If you must use a toaster oven, rotate your piece halfway through the bake time. Also, make sure the toaster oven is dedicated to clay and not used for food afterward, as residue can linger.
Why does my clay crack after baking?
Cracking usually happens for one of three reasons: the clay was too thick, the bake time was insufficient, or the clay cooled too quickly. Make sure your thickest part is no more than one inch and follow the recommended bake time for that thickness. Let the piece cool slowly inside the turned-off oven to prevent thermal shock.
How long can I store unbaked clay before it goes bad?
Properly stored polymer clay can last for years. Keep it wrapped in plastic or stored in airtight containers away from heat and direct sunlight. If the clay becomes too hard to work with, you can condition it by kneading it or running it through a pasta machine a few times.
Conclusion
Now you know everything you need about how long clay should be in the oven. The key is to pay attention to thickness, temperature, and time. Stick to the 15-minutes-per-quarter-inch rule at 275 degrees Fahrenheit as your starting point. Use an oven thermometer, preheat fully, and avoid opening the door too often. These simple habits will transform your clay projects from mediocre to magnificent.
Remember that practice makes perfect. Your first few bakes might not be flawless, and that is okay. Every project teaches you something new about your oven, your clay, and your technique. Before long, you will be able to look at a piece and know exactly how long it needs in the oven without even thinking about it.
So go ahead and start your next clay project with confidence. You have the knowledge, the tips, and the tools to get it right. Happy crafting, and enjoy the satisfying feeling of pulling a perfectly cured piece out of the oven.