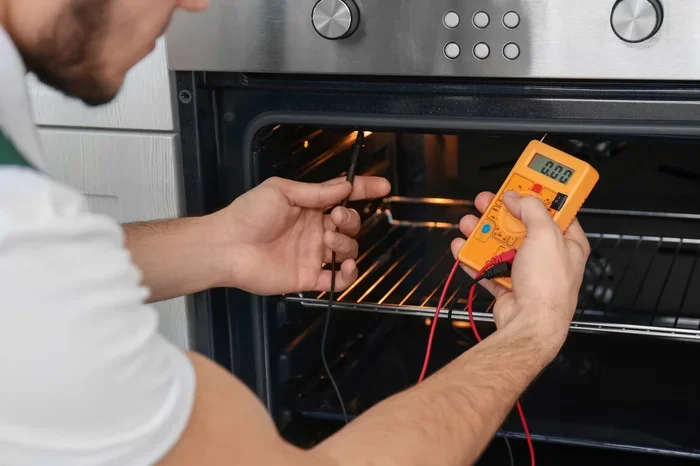
How To Test Your Oven Temperature Without Thermometer
Testing your oven temperature without a thermometer is easier than you think. You can use the flour burn test, sugar test, or bread dough method to check if your oven is running hot or cold. These simple oven temperature accuracy checks help you get better baking results every time.
Ever pulled out a batch of cookies and wondered why they burned on the edges but stayed raw in the middle? Or maybe your bread never seems to rise right, no matter how carefully you follow the recipe. The culprit might be your oven’s temperature accuracy.
Most people assume their oven heats to exactly the right degree. But the truth is, many ovens run hotter or colder than what the dial says. A DIY oven test can reveal a lot about what’s really happening inside. And the best part? You do not need a fancy oven thermometer to find out.
In this guide, we walk you through several easy methods to check your oven temperature using things you already have in your kitchen. From the classic flour burn test to the clever sugar test oven trick, each method gives you real, usable information. By the end, you will know exactly how to test oven temperature without any special tools.
These baking tips work whether you are baking bread, cookies, or a Sunday roast. Understanding your oven’s true behavior helps you adjust times and temperatures for better baking results every single time.
Key Takeaways
- The Flour Burn Test: A simple and reliable way to check your oven’s actual temperature using just flour.
- The Sugar Test: Watch how sugar behaves at different temperatures to gauge oven accuracy.
- The Bread Dough Rise Test: Use bread dough behavior as a natural temperature indicator.
- Understand Temperature Variance: Most ovens have a 25 to 50 degree swing, which affects your baking results.
- Know When to Call a Pro: Persistent temperature gauge issues may signal a failing oven sensor or oven thermostat.
- Regular Oven Calibration Matters: Keeping your oven accurate improves every baking temperature you cook at.
- DIY Oven Tests Are Free: No special tools needed — just basic kitchen ingredients and a watch.
📑 Table of Contents
- Why Oven Temperature Accuracy Matters
- The Flour Burn Test: A Classic DIY Oven Test
- The Sugar Test: A Simple Way to Check Oven Calibration
- The Bread Dough Rise Test: Baking Knowledge You Can Taste
- Comparing the Three Methods
- The Role of Your Oven Heating Element and Sensor
- Common Mistakes People Make When Testing Oven Temperature
- When to Call a Professional for Oven Repair
- How Often Should You Test Your Oven?
- Final Thoughts on Oven Temperature Accuracy
Why Oven Temperature Accuracy Matters
Your oven’s dial is just a guess. It tells you one number, but the actual baking temperature inside the cavity can be very different. This gap between what you set and what your food actually experiences is called temperature variance.
Even a 25-degree difference can change how your food cooks. Cookies spread too much. Cakes sink in the middle. Chicken skin takes forever to crisp. These problems all point back to oven temperature accuracy.
How Much Can Ovens Drift?
Most home ovens have a natural swing of about 25 to 50 degrees Fahrenheit. This means if you set your oven to 350 degrees, the actual temperature might bounce between 325 and 400 degrees. That is a huge range for delicate recipes.
Older ovens tend to drift more over time. The oven thermostat wears out, the oven heating element weakens, and the oven sensor loses its precision. Newer ovens are not perfect either. Factory settings can be off by 10 to 15 degrees right out of the box.
The Cost of Inaccurate Temperatures
When your oven runs hot, food cooks faster on the outside while staying raw inside. When it runs cold, you end up overbaking things to compensate. Either way, you waste ingredients, time, and money.
For serious home bakers, oven calibration is not optional. It is a basic skill that separates good results from frustrating ones. A simple oven accuracy test takes just minutes and can save you hours of trial and error.
The Flour Burn Test: A Classic DIY Oven Test
The flour burn test is one of the oldest and most reliable ways to check oven temperature without any special tools. It works because flour has a very specific burning point that tells you exactly how hot your oven is.
How the Flour Burn Test Works
Plain white flour starts to brown at around 300 degrees Fahrenheit. It turns dark brown and burns at about 350 degrees. By watching how flour behaves on a baking sheet, you can estimate your oven’s true temperature.
Here is how to do it step by step:
- Preheat your oven to 350 degrees.
- Spread a thin, even layer of all-purpose flour on a plain baking sheet.
- Place the sheet on the middle rack and close the door.
- Watch the flour carefully for 5 to 10 minutes.
- Note exactly when spots start to brown and when they turn dark.
Reading Your Results
If the flour starts browning within 2 to 3 minutes, your oven is running hot. It is probably closer to 375 or 400 degrees. If the flour takes more than 10 minutes to show any color, your oven is running cold.
The ideal result is gradual, even browning over about 5 to 7 minutes. This tells you your oven temperature accuracy is right on target. Use this information to adjust your future baking temperature settings accordingly.
Tips for Accurate Flour Test Results
- Use a thin, even layer. Thick clumps will burn unevenly and give false readings.
- Do not open the oven door too often. Every time you open it, you lose heat and throw off the temperature gauge.
- Repeat the test two or three times for consistency.
- Do this test on a day when your kitchen is not very hot or cold, as room temperature can play a small role.
The Sugar Test: A Simple Way to Check Oven Calibration
The sugar test oven method is another fantastic trick for checking oven temperature accuracy. Sugar reacts to heat in very predictable ways, making it a natural temperature gauge for your oven.
What You Need
You only need a small amount of granulated sugar and a light-colored baking sheet or piece of aluminum foil. That is it. No special equipment required for this DIY oven test.
Step-by-Step Sugar Test
- Preheat your oven to 350 degrees.
- Place about one tablespoon of white sugar on a piece of foil or a light-colored sheet pan.
- Put it on the middle rack and set a timer for 5 minutes.
- Observe what happens to the sugar.
Interpreting the Sugar Test
At exactly 350 degrees, sugar should start to melt and turn golden after about 3 to 5 minutes. If the sugar melts and browns very quickly, your oven is running hot. If the sugar barely changes after 5 minutes, your oven is running cold.
You can also try this test at 300 degrees for a slower, more controlled observation. The baking temperature of sugar makes it a wonderfully simple tool for checking your oven’s true behavior.
Why This Test Works So Well
Sugar has a melting point around 320 degrees and begins to caramelize around 340 degrees. These are well-known scientific facts that make the sugar test a reliable oven accuracy test. Unlike flour, sugar gives you a very clear visual signal — it goes from white to golden to brown in a way that is easy to track.
Baking tips: Use white granulated sugar for the most consistent results. Brown sugar contains moisture and will behave differently. Also, make sure your baking sheet is light-colored so you can clearly see the sugar’s color changes.
The Bread Dough Rise Test: Baking Knowledge You Can Taste
If you bake bread regularly, you already have the perfect temperature gauge in your kitchen. Bread dough reacts very predictably to heat, and its behavior can tell you a lot about your oven’s temperature accuracy.
Why Bread Dough Is a Great Indicator
Yeast is very sensitive to temperature. At the right baking temperature, dough rises steadily and predictably. When the oven is too cold, the dough rises slowly or not at all. When the oven is too hot, the dough rises too fast and then collapses.
This makes bread dough an excellent tool for a DIY oven test, especially for bread baking enthusiasts who want to understand their oven’s true behavior.
How to Perform the Bread Dough Test
- Prepare a simple bread dough using active dry yeast, flour, water, and a pinch of sugar.
- Let the dough rise at room temperature until it doubles in size.
- Shape it into a small loaf and place it in a greased pan.
- Preheat your oven to 350 degrees.
- Place the dough in the oven and watch it closely.
- Note how quickly it rises and whether the top browns evenly.
What Your Results Mean
A well-calibrated oven will cause the dough to rise steadily for about 10 to 15 minutes before the crust sets. The top should brown evenly without dark spots or burning. If the dough rises very fast and the top browns in under 8 minutes, your oven is likely running hot.
If the dough barely rises and stays pale, your oven is running cold. This kind of oven calibration check is especially useful because it combines a visual indicator with a timing reference that bakers already understand.
Quick Tips for the Bread Dough Method
- Use the same recipe each time for consistent results.
- Do not use too much yeast, as an overactive dough can mask temperature issues.
- This test works best for checking oven hot spots too. Try placing dough portions in different oven zones and compare results.
- Combine this test with the flour or sugar test for a more complete picture of your oven’s temperature variance.
Comparing the Three Methods
Each oven temperature accuracy test has its own strengths. Here is a quick comparison to help you decide which method fits your needs best.
| Method | Best For | Time Needed | Accuracy Level |
|---|---|---|---|
| Flour Burn Test | Quick check of oven calibration | 5 to 10 minutes | Good |
| Sugar Test | Checking baking temperature at specific settings | 5 to 10 minutes | Very Good |
| Bread Dough Rise Test | Overall oven accuracy test and oven hot spots | 20 to 30 minutes | Excellent |
The flour test gives you a fast snapshot. The sugar test offers a more precise visual cue at a specific temperature. The bread dough test provides the most complete picture because it combines rise behavior, browning, and timing into one assessment.
For the best results, try all three methods. Together, they give you a thorough understanding of your oven’s true temperature gauge behavior. This combination approach is one of the most effective baking tips for serious home bakers.
The Role of Your Oven Heating Element and Sensor
Sometimes, oven temperature accuracy problems come from hardware issues. Understanding the basic parts of your oven helps you figure out whether a DIY oven test is enough or if you need professional help.
The Heating Element
The oven heating element is the part that actually generates heat. In electric ovens, there is usually a bake element on the bottom and a broil element on the top. If one of these elements is damaged or worn out, your oven will not heat evenly.
You can sometimes spot a faulty element by looking at it during preheat. If the bake element does not glow red evenly, or if parts of it stay dark, it may be time for oven repair. A damaged element is one of the most common causes of poor oven calibration.
The Oven Sensor
The oven sensor is a small metal rod usually located at the back of the oven cavity. Its job is to monitor the internal temperature and tell the oven when to turn the heat on or off.
When the sensor gets coated with grease or food residue, it loses its accuracy. A dirty sensor can cause your oven to run 25 degrees or more off from the set temperature. A quick wipe-down with a mild cleaner can sometimes fix this issue and restore proper temperature gauge function.
The Thermostat
The oven thermostat controls the overall temperature regulation. Over time, thermostats can drift out of calibration. This is especially common in older ovens that have been used for many years.
If your DIY oven test consistently shows large temperature swings, the thermostat may need recalibration or replacement. This is a job for a professional appliance technician, not a DIY oven test.
Common Mistakes People Make When Testing Oven Temperature
Even simple oven accuracy tests can give wrong results if you make certain mistakes. Here are the most common errors to avoid.
Opening the Oven Door Too Often
Every time you open the oven door, you release a significant amount of heat. This can drop the internal temperature by 25 to 50 degrees and throw off your test results. Keep the door closed as much as possible during any DIY oven test.
Testing in the Wrong Rack Position
Ovens have oven hot spots — areas that are hotter or cooler than others. Testing on the top rack, bottom rack, or a side rack can give different results. Always place your test items on the middle rack for the most consistent baking temperature reading.
Not Preheating Long Enough
Many ovens take 15 to 20 minutes to fully preheat. If you start your test too early, you are measuring a warming oven, not a fully heated one. Wait until the oven’s preheat signal goes off before beginning any oven accuracy test.
Using the Wrong Type of Ingredient
Not all flour or sugar is the same. Bleached white flour behaves differently from unbleached flour. The same goes for sugar. Stick to plain white granulated sugar and standard all-purpose flour for the most reliable baking results during your tests.
Testing Only Once
Ovens are not perfectly consistent from one preheat cycle to the next. A single test gives you one data point. For a true picture of your oven’s temperature variance, run each test at least two or three times on different days.
When to Call a Professional for Oven Repair
Most DIY oven tests will tell you whether your oven is accurate or not. But sometimes, the problem goes beyond what a simple test can reveal. Knowing when to seek help saves you from wasted food and frustration.
Call a professional if you notice any of these signs:
- Your oven consistently runs more than 50 degrees off from the set temperature, even after recalibration.
- The oven heating element glows unevenly or does not glow at all.
- Your oven makes unusual clicking, buzzing, or humming sounds during preheat.
- The oven sensor area is visibly damaged or corroded.
- You have tried multiple oven accuracy test methods and all show wildly different results.
A professional technician can check the oven thermostat, replace faulty sensors, and recalibrate the control board. For older ovens, it may be more cost-effective to replace the unit entirely. But for newer models, a simple oven repair can restore proper oven calibration and bring back reliable baking results.
How Often Should You Test Your Oven?
Getting your oven temperature accuracy right is not a one-time thing. Ovens change over time. The oven thermostat drifts, the heating element weakens, and the sensor collects grime.
As a general rule, test your oven at least twice a year. A good schedule is to check at the start of summer and the start of winter. Seasonal temperature changes can affect how your oven performs, and testing at different times of the year gives you a fuller picture.
If you bake frequently, consider testing once a month. Professional bakers and serious home cooks rely on regular oven calibration to maintain consistent baking results. Even casual bakers benefit from a seasonal checkup.
After any oven repair or replacement of parts, always run a fresh DIY oven test to confirm everything is working correctly. This simple habit keeps your baking temperature reliable and your food tasting great.
Final Thoughts on Oven Temperature Accuracy
Testing your oven without a thermometer is not just a clever trick. It is a fundamental baking tip that every home cook should know. Whether you use the flour burn test, the sugar test oven method, or the bread dough rise approach, each test gives you valuable insight into how your oven really works.
Understanding your oven’s true temperature gauge behavior transforms the way you cook. You stop guessing. You stop blaming recipes. You start making confident adjustments that lead to better baking results every time.
Take a few minutes this week to run one or more of these DIY oven test methods. You will be surprised at what you discover. Once you know your oven’s quirks, you can work with them instead of against them. That is the real power of oven calibration and temperature accuracy testing.
Your kitchen, your recipes, and your food will all thank you. Start testing today and bake with confidence from this moment forward.
Frequently Asked Questions
Can I use these methods for a gas oven?
Yes, all three methods work for both gas and electric ovens. The flour burn test, sugar test, and bread dough rise test rely on how food reacts to heat, not on the type of oven. Gas ovens may have slightly different temperature variance patterns, but these tests still give you accurate readings.
How accurate are these DIY oven tests compared to a real thermometer?
These methods are surprisingly close to a proper oven thermometer. The flour and sugar tests give you a general range, while the bread dough test offers the most precise picture. They are not laboratory-perfect, but they are more than accurate enough to help you adjust your baking temperature and get better results.
Why does my oven have hot spots?
Oven hot spots happen because heat does not distribute evenly inside the cavity. The oven heating element heats one area more than others, and air circulation plays a role too. Rotating your pans halfway through cooking helps, but running a DIY oven test with bread dough in different zones can map out exactly where the hot spots are.
How do I fix an oven that runs too hot?
First, try recalibrating your oven if it has a calibration setting in the manual. If that does not work, the oven thermostat or oven sensor may need replacement. A professional oven repair technician can diagnose the exact cause and recommend the right fix for your oven calibration issue.
Can I combine multiple tests for better results?
Absolutely. Combining the flour burn test, sugar test, and bread dough rise test gives you a comprehensive view of your oven’s temperature gauge behavior. Each method highlights different aspects of oven temperature accuracy, and together they provide the most reliable oven accuracy test results.
What is the ideal oven temperature for most baking?
Most baking recipes call for 350 degrees Fahrenheit. This is a versatile baking temperature that works well for cookies, cakes, and casseroles. However, every oven is different, and knowing your oven’s true temperature through a DIY oven test helps you set the right dial position for perfect baking results every time.