How To Shrink Plastic Without an Oven at Home Today
Shrinking plastic at home is easier than you think, and you do not need an oven to get the job done. Whether you want to create shrink plastic jewelry, keychains, or custom art, there are several simple methods you can use with everyday tools. This guide walks you through every technique, tip, and mistake to avoid so you can start your DIY shrink plastic projects with confidence right away.
Have you ever wanted to try shrink plastic crafting but did not have an oven? Maybe you live in a small apartment, or you just do not want to heat up your kitchen. Whatever the reason, there are plenty of ways to shrink plastic without an oven that work beautifully at home.
Shrink plastic is one of the most fun and rewarding craft materials out there. You draw a design, cut it out, apply heat, and watch it transform into a tiny, durable piece of art. The magic of watching your flat drawing curl up and shrink into a solid charm is something every crafter should experience. And the good news is, you do not need a fancy oven to make it happen.
In this guide, we will cover every method you can use to shrink plastic at home. From the simple boiling water technique to using a heat gun or stovetop, we have you covered. You will learn how each method works, what tools you need, and how to avoid the common mistakes that trip up beginners. By the end, you will be ready to start your very own DIY shrink plastic projects with confidence.
Key Takeaways
- Multiple oven-free methods work great: boiling water, heat guns, stovetops, and heat press machines all shrink plastic effectively.
- Preparation matters: using the right type of shrink plastic sheets and drawing before shrinking gives the best results.
- Safety comes first: always work in a ventilated area and use heat-resistant tools when applying heat to plastic.
- Common mistakes are easy to avoid: overheating, using the wrong plastic type, and skipping the pre-shrink drawing step are the top errors.
- Creative possibilities are endless: from shrink plastic charms to ornaments and jewelry, the craft world is your oyster.
- Start simple and experiment: beginner-friendly methods like the boiling water technique are perfect for first-time crafters.
📑 Table of Contents
- Why People Choose to Shrink Plastic Without an Oven
- Understanding How Plastic Shrinking Works
- Methods To Shrink Plastic Without an Oven
- Step-by-Step Guide: Shrinking Plastic at Home
- Common Mistakes and How To Avoid Them
- Creative Projects You Can Make with Shrunk Plastic
- Expert Tips for Perfect Results Every Time
- Frequently Asked Questions
- Conclusion
Why People Choose to Shrink Plastic Without an Oven
The Growing Trend of DIY Plastic Shrinking
Shrink plastic crafting has exploded in popularity over the last few years. People love the idea of turning a simple drawing into a wearable piece of jewelry or a cute keychain. The process is satisfying, affordable, and incredibly creative. And thanks to social media, more and more people are discovering how easy it is to get started.
Not everyone has access to an oven, though. Maybe you live in a dorm room, a tiny apartment, or a rental home where you cannot install a toaster oven. Some people simply do not want to use their kitchen oven for crafting because of lingering odors or the hassle of cleaning up. These are all valid reasons, and they are exactly why plastic shrinking techniques that do not require an oven have become so popular.
Common Uses for Shrunk Plastic
The uses for shrunk plastic projects are almost endless. Here are some of the most popular things people make:
- Shrink plastic jewelry: pendants, earrings, brooches, and rings
- Shrink plastic keychains: custom keys for bags, backpacks, and car keys
- Magnets: fridge magnets with personal designs or photos
- Ornaments: Christmas tree ornaments, birthday decorations, and seasonal décor
- Bookmarks: durable, waterproof bookmarks with unique designs
- Game pieces: custom tokens for board games or card games
- Stickers and pins: enamel-style pins and decorative stickers
Each of these projects can be made using oven-free methods, which makes shrink plastic crafting accessible to everyone.
Understanding How Plastic Shrinking Works
The Science Behind Plastic Shrinkage
To get great results, it helps to understand what is happening when plastic shrinks. Shrink film is made from a special type of plastic that has been stretched during manufacturing. This stretching locks the plastic molecules into a stretched-out state. When you apply heat, those molecules relax back to their original, compact form. That is what causes the plastic shrinkage you see.
The plastic shrinkage ratio typically ranges from about 50% to 70%, depending on the brand and type of shrink plastic you use. This means a 6-inch piece might shrink down to about 2 or 3 inches. This ratio is important to keep in mind when you are designing your artwork, because everything you draw will become smaller.
The good news is that you do not need to understand the chemistry to get great results. You just need to know that heat causes the plastic to relax and shrink, and that different heat sources can achieve this same effect.
Different Types of Shrink Plastic Sheets
Not all shrink plastic is the same. Here are the most common types you will encounter:
- PET (Polyethylene Terephthalate): the most common type, safe, and widely available
- PS (Polystyrene): shrinks more aggressively and is often used for thick charms
- Clear vs. white: clear shrink plastic lets you see your design, while white gives a more finished look
- Rough vs. smooth side: one side is usually rough for drawing, and the other is smooth and shiny
For oven-free methods, PET shrink plastic works best because it responds well to lower heat sources like boiling water and hair dryers. Always check the manufacturer’s instructions for the best results with your specific shrink plastic sheets.
Methods To Shrink Plastic Without an Oven
Now let us get to the fun part. There are several proven methods you can use to shrink plastic at home without an oven. Each method has its own advantages, and some work better for certain types of projects than others.
Method 1: Using Boiling Water
The boiling water method is the simplest and most accessible way to shrink plastic without an oven. You probably already have everything you need in your kitchen.
What you need:
- A pot of boiling water
- Tongs or a slotted spoon
- A heat-resistant surface like a silicone mat
- Your pre-drawn and cut shrink plastic
How to do it:
- Bring a pot of water to a rolling boil.
- Use tongs to gently place your shrink plastic sheet into the water.
- Watch as the plastic curls and shrinks. This usually takes about 15 to 30 seconds.
- Use tongs to remove the plastic and place it on a heat-resistant surface.
- If it does not lie flat, you can gently press it down with a spoon or spatula while it is still warm.
- Let it cool completely before handling.
This method works wonderfully for shrink plastic charms and flat pieces like bookmarks or ornaments. The boiling water provides even, gentle heat that prevents burning.
Method 2: Using a Heat Gun or Hair Dryer
A heat gun or a regular hair dryer gives you more control over the shrinking process. This is a great method if you want to shrink plastic pieces one at a time or if you are working on a project that requires precision.
What you need:
- A heat gun or hair dryer
- Heat-resistant gloves
- A pair of tongs
- A heat-resistant surface
How to do it:
- Set up your workspace with a heat-resistant surface underneath.
- Hold the shrink plastic with tongs or wear heat-resistant gloves.
- Direct the heat gun or hair dryer at the plastic from about 6 inches away.
- Move the heat source back and forth evenly across the surface.
- Watch as the plastic begins to curl and then flatten out as it shrinks.
- Once it has shrunk to your desired size, remove the heat and let it cool.
A heat gun works faster than a hair dryer, but a regular hair dryer can also get the job done. This method is ideal for shrink plastic art pieces where you want more control over the final shape.
Method 3: Using a Stovetop or Hot Plate
If you have a stovetop or hot plate, you can use it as a direct heat source for shrinking plastic. This method is similar to using an oven but gives you more control and works well for small batches.
What you need:
- A stovetop or hot plate
- A flat, heat-resistant pan or griddle
- Tongs
- A spatula or flat tool for pressing
How to do it:
- Place a flat pan or griddle on the stovetop over medium heat.
- Let the pan heat up for a minute or two.
- Place your shrink plastic sheet directly on the pan.
- Watch it carefully as it begins to curl and shrink.
- Once it has flattened out and stopped shrinking, remove it with tongs.
- Press it flat with a spatula while it is still warm if needed.
This method gives you excellent results and is very similar to how an oven works. The key is to use medium heat and watch the plastic closely. Heat shrink tubing and other thin plastic materials also respond well to this method.
Method 4: Using a Heat Press Machine
If you have a heat press machine or a Clamshell press, you are in luck. These machines are designed for even heat distribution and work beautifully for shrinking plastic.
What you need:
- A heat press machine
- Parchment paper
- Tongs
How to do it:
- Place your shrink plastic between two sheets of parchment paper.
- Put the assembly in the heat press.
- Set the temperature to around 325°F to 350°F (check your plastic’s instructions).
- Press for about 30 to 60 seconds.
- Open the press and use tongs to remove the shrunk plastic.
A heat press gives you the most consistent results because the heat is applied evenly across the entire surface. This is the best method if you are making multiple shrink plastic keychains or pieces at once.
Comparison of Oven-Free Shrinking Methods
| Method | Ease of Use | Speed | Best For | Equipment Needed |
|---|---|---|---|---|
| Boiling Water | Very Easy | Fast (15-30 sec) | Flat charms, bookmarks | Pot, tongs, boiling water |
| Heat Gun / Hair Dryer | Easy | Moderate | Art pieces, detailed work | Heat gun or hair dryer, tongs |
| Stovetop / Hot Plate | Moderate | Fast (30-60 sec) | Multiple pieces, thick plastic | Stovetop, flat pan, tongs |
| Heat Press | Easy (if you own one) | Fast (30-60 sec) | Batch projects, consistent results | Heat press machine, parchment paper |
Step-by-Step Guide: Shrinking Plastic at Home
No matter which method you choose, the preparation steps are the same. Follow this guide to get the best results every time.
Preparing Your Plastic Sheets
Before you apply any heat, proper preparation is essential. Here is what you need to do:
- Choose your plastic: select a high-quality shrink plastic sheet that is meant for crafting.
- Draw your design: use permanent markers or colored pencils on the rough side of the plastic. Remember that your design will shrink, so draw larger than your final desired size.
- Color both sides: coloring both sides gives your finished piece a richer, more vibrant look.
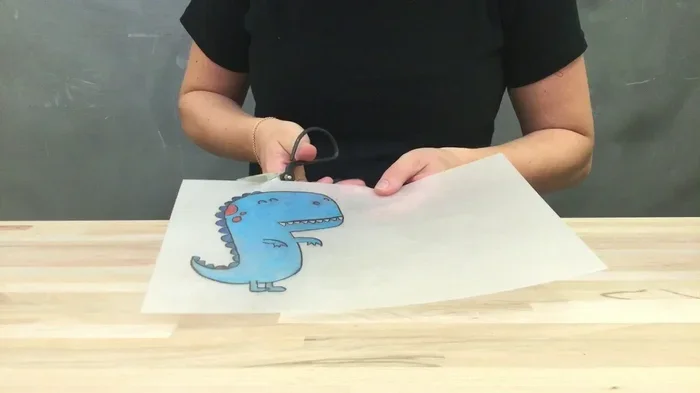
- Cut out your shape: use scissors or craft scissors to cut along your design lines. Cut close to the artwork for a clean finish.
- Punch holes if needed: if you are making keychains or jewelry, punch a hole before shrinking using a standard hole punch.
Important: always draw on the rough or matte side of the plastic. The smooth side is designed to face out after shrinking for a glossy finish.
Applying Heat Safely
Safety matters when you are working with heat and plastic. Follow these guidelines:
- Work in a well-ventilated area. Some plastics can release mild fumes when heated.
- Use tongs or heat-resistant gloves to handle hot plastic.
- Never touch the plastic directly with your bare hands while it is hot.
- Keep a bowl of cold water nearby in case you need to cool a piece quickly.
- Supervise children at all times during the heating process.
- Work on a heat-resistant surface to protect your table or countertop.
Finishing and Using Your Shrunk Plastic
Once your plastic has shrunk and cooled, you can finish it in several ways:
- Add a jump ring: thread a metal jump ring through the hole for a pendant or keychain.
- Attach a bail: use jewelry glue or wire to create a loop for necklaces.
- Seal with clear nail polish: this adds a protective glossy layer and makes colors pop.
- Add adhesive backing: stick magnets to the back for fridge magnets.
- Attach a keychain ring: for bags, backpacks, or car keys.
Your shrink plastic craft supplies are now ready to use. The finished pieces are durable, waterproof, and surprisingly strong for their size.
Common Mistakes and How To Avoid Them
Even experienced crafters make mistakes when working with shrink plastic. Here are the most common errors and how to avoid them.
Overheating Your Plastic
One of the biggest mistakes is applying too much heat for too long. When plastic overheats, it can bubble, warp, or even release unpleasant fumes. The plastic should shrink quickly and then stop. If it keeps bubbling or turning brown, you have left the heat on too long.
How to avoid it: use medium heat and watch the plastic closely. As soon as it has flattened out and stopped shrinking, remove the heat source. It is always better to underheat slightly and apply a little more heat if needed.
Using the Wrong Type of Plastic
Not all plastic shrinks. Regular plastic bags, food containers, or packaging will not work for shrink plastic projects. You need to use plastic that is specifically designed for shrinking. Look for sheets labeled “shrink plastic,” “shrink film,” or “shrink art plastic.”
How to avoid it: always purchase your plastic from a reputable craft supplier. Check the packaging to confirm it is meant for shrinking. Using the wrong type of plastic is a waste of time and can be frustrating.
Drawing Too Small
It is easy to forget that your design will shrink significantly. If you draw your artwork too small, the final piece will be tiny and details may be lost.
How to avoid it: remember the plastic shrinkage ratio. If your plastic shrinks to 50%, draw your design at twice the size you want the final piece to be. A simple rule of thumb is to draw about twice as large as your desired finished size.
Skipping the Test Piece
Many beginners jump straight into their final project without testing first. This can lead to unexpected results with colors, size, or shrinkage.
How to avoid it: always cut a small test square, draw on it, and shrink it first. This gives you a preview of the final result and helps you adjust your approach before committing to your main project.
Creative Projects You Can Make with Shrunk Plastic
The best part about shrink plastic crafting is the wide range of projects you can create. Here are some ideas to get you started.
Shrink Plastic Jewelry
Shrink plastic jewelry is one of the most popular uses for this craft material. You can make pendants, earrings, brooches, and even rings. The shrunk plastic is lightweight and durable, making it perfect for everyday wear. Use permanent markers for vibrant colors, or try watercolor paints for a more artistic look. Add a clear sealant for extra durability and shine.
Keychains and Magnets
Shrink plastic keychains make wonderful gifts and personal accessories. Draw your favorite characters, symbols, or patterns, shrink them down, and attach a keychain ring. For magnets, simply glue a small magnet to the back of your finished piece. These make great party favors, teacher gifts, or sellable craft items at markets and online.
Custom Ornaments and Art
During the holiday season, shrink plastic ornaments are a big hit. Draw festive designs, shrink them, and attach a ribbon for hanging. You can also create a collection of shrunk art pieces and frame them for a unique wall display. The glossy finish of shrunk plastic looks stunning when displayed in a frame or on a shelf.
Bookmarks and Card Toppers
Shrunk plastic bookmarks are durable and waterproof, which makes them practical as well as beautiful. Draw patterns, shrink them, punch a hole at the top, and add a tassel or ribbon. Card toppers work the same way and add a personal touch to handmade greeting cards.
Expert Tips for Perfect Results Every Time
Here are some pro tips that will help you get the best results with your shrink plastic without oven projects:
- Use permanent markers: they adhere better to shrink plastic and do not bleed when heated. Water-based markers can smear and fade.
- Color both sides evenly: this prevents one side from looking lighter than the other after shrinking.
- Keep the heat moving: never hold the heat source in one spot for too long. Constant movement prevents burning and bubbling.
- Work in small batches: shrinking one or two pieces at a time gives you more control and better results.
- Store your plastic properly: keep sheets flat in a cool, dry place to prevent warping before you use them.
- Experiment with colors: some colors shift during the shrinking process. Test your favorite color combinations on a test piece first.
- Sand the finished piece lightly: if you want a matte finish instead of glossy, gently sand the surface with fine-grit sandpaper after it cools.
Frequently Asked Questions
Can I use regular plastic bags to shrink plastic?
No, regular plastic bags are not designed for shrinking and will not produce good results. You need to use plastic sheets specifically made for shrinking, often labeled as shrink plastic or shrink film. These are available at most craft stores and online. Using the wrong type of plastic can be frustrating and may even release harmful fumes when heated.
Is it safe to shrink plastic indoors without an oven?
Yes, it is generally safe as long as you follow basic precautions. Work in a well-ventilated area, use heat-resistant surfaces, and avoid inhaling any fumes. Most DIY shrink plastic methods like boiling water or using a hair dryer produce minimal fumes. If you notice any strong odors, move to a more ventilated space immediately. Always supervise children and pets in the workspace.
What is the best method for beginners who want to shrink plastic without an oven?
The boiling water method is the best starting point for beginners. It requires no special equipment, uses items you already have in your kitchen, and provides gentle, even heat. Simply boil water, use tongs to submerge your pre-cut plastic, and watch it shrink in seconds. It is forgiving, easy to control, and produces consistent results every time.
How much does shrink plastic shrink?
Most shrink plastic sheets shrink to about 50% to 70% of their original size, depending on the brand and type. This is known as the plastic shrinkage ratio. Always check the packaging for the specific shrinkage percentage of your plastic. A good rule of thumb is to draw your design at twice the size you want the finished piece to be.
Can I reuse shrink plastic scraps?
Yes, you can reuse scraps and leftover pieces of shrink plastic. Simply collect your trimmings, cut them into new shapes, and apply heat again. This is a great way to get more value out of your shrink plastic craft supplies and reduces waste. Just make sure the scraps are not too small to handle safely with tongs.
What tools do I need besides an oven to shrink plastic?
You can use a variety of common household tools depending on the method you choose. A pot of boiling water with tongs works great for beginners. A heat gun or hair dryer gives you more control. A stovetop with a flat pan is another excellent option. If you want the most consistent results, a heat press machine is worth the investment. All of these methods let you enjoy shrink plastic crafting without ever turning on an oven.
Conclusion
How To Shrink Plastic Without Oven is not only possible, it is also fun, affordable, and incredibly rewarding. Whether you choose the boiling water method, a heat gun, a stovetop, or a heat press machine, you have everything you need to create beautiful shrink plastic projects right at home. The key is to start with quality shrink plastic sheets, prepare your designs carefully, apply heat safely, and learn from the common mistakes that beginners make.
Remember that practice makes perfect. Your first few pieces may not be flawless, but each project teaches you something new. Soon you will be creating stunning shrink plastic jewelry, keychains, ornaments, and art with ease. The creative possibilities are truly limitless when you know how to work with plastic shrinking techniques that do not require an oven.
So gather your shrink plastic craft supplies, pick a method that suits your needs, and start creating today. Your next masterpiece is just a heat source away. Happy crafting!