How Long To Bake Wings At 425 In Oven For Crispy Perfection
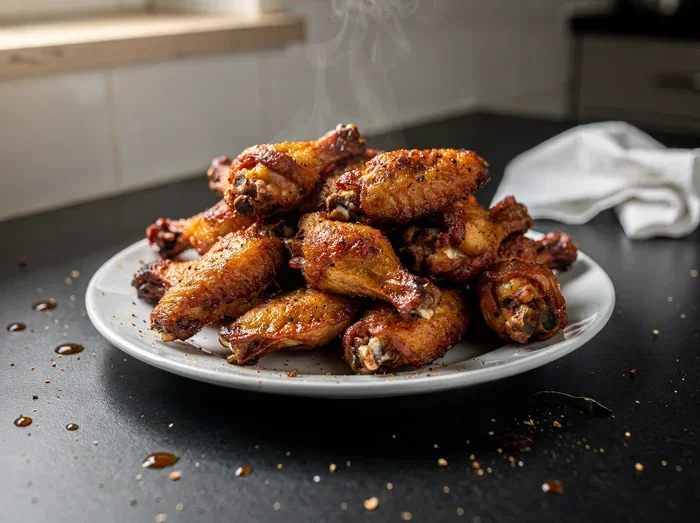
Learning how long to bake wings at 425 in oven is the key to achieving crispy, golden, and juicy chicken wings every single time. At this high temperature, wings cook through beautifully in about 40 to 50 minutes, giving you that perfect crunch without deep frying. Whether you are using fresh or frozen wings, this guide covers timing, seasoning, and pro tips for perfect oven-baked wings that will impress everyone at your table.
There is something truly special about crispy chicken wings fresh out of the oven. They are crunchy on the outside, juicy on the inside, and absolutely perfect for game nights, family dinners, or a simple weekend treat. If you have been wondering how long to bake wings at 425 in oven, you have come to the right place. This guide walks you through everything — timing, temperature, seasoning ideas, and common mistakes to avoid. By the end, you will feel confident enough to whip up a batch of perfect baked wings anytime you want.
Baking wings at 425°F is one of the best methods for getting that deep golden color and satisfying crunch. Unlike deep frying, this approach uses less oil and is much easier to manage. The high heat quickly renders the fat under the skin, leaving you with crispy skin wings that taste just as good as anything from a restaurant. Let us dive into the details and make your next batch of wings absolutely unforgettable.
Key Takeaways
- Bake Time: Fresh wings take 40–50 minutes at 425°F, while frozen wings need 55–65 minutes for safe, crispy results.
- Crispy Skin Secret: Pat wings dry and use a wire rack on a baking sheet for even airflow and maximum crunch.
- Internal Temperature: Wings are done when the thickest part reaches 165°F, measured with a meat thermometer.
- Seasoning Flexibility: You can season before baking or toss in sauce after, depending on your preferred flavor style.
- Avoid Overcrowding: Space wings apart on the pan so hot air circulates freely and every piece gets crispy.
- Resting Matters: Let wings rest for 5 minutes after baking to lock in juices and keep them moist.
📑 Table of Contents
- Why 425°F Is the Ideal Temperature for Baking Wings
- How Long to Bake Wings at 425 in Oven — The Complete Guide
- Step-by-Step Instructions for Perfect Baked Wings
- Best Seasoning and Sauce Options for Baked Wings
- Common Mistakes to Avoid When Baking Wings
- Expert Tips for the Crispiest Baked Wings Ever
- How to Tell When Wings Are Done
- Serving Suggestions and Side Dishes
- Storing and Reheating Leftover Wings
- Frequently Asked Questions
- Conclusion
Why 425°F Is the Ideal Temperature for Baking Wings
Choosing the right oven temperature makes all the difference when you are baking chicken wings. 425°F strikes the perfect balance between cooking the meat through and crisping up the skin. Here is why this temperature works so well.
High Heat Creates Crispy Skin
At 425°F, the oven delivers enough heat to quickly render the fat beneath the chicken skin. As the fat melts and drips away, the skin shrinks and tightens, turning golden and crunchy. Lower temperatures tend to steam the skin instead of crisping it, which leads to soggy results. Higher temperatures can burn the outside before the inside cooks through. 425°F hits the sweet spot every time.
Even Cooking Without Drying Out
Chicken wings are small and cook relatively fast. At 425°F, they spend just enough time in the oven to become fully cooked while staying moist. The meat firms up nicely, and the juices stay locked inside. This means you get tender, flavorful wings with a beautiful crispy exterior.
Energy Efficient and Convenient
Baking at 425°F is also time-efficient. You do not need to wait forever for the oven to preheat or for the wings to cook. Most batches are done in under an hour, which makes this method perfect for weeknight dinners or quick entertaining. It is one of the easiest oven-baked wing recipes you can try at home.
How Long to Bake Wings at 425 in Oven — The Complete Guide
The answer to how long to bake wings at 425 in oven depends on a few factors. Fresh wings, frozen wings, wing size, and whether you use a rack all play a role. Let us break it down so you can plan your cooking with confidence.
Fresh Chicken Wings
Fresh, thawed wings bake beautifully at 425°F. Here is the standard timing you can follow:
- Small wings (drumettes only): 35–40 minutes
- Standard mixed wings: 40–50 minutes
- Large wings or jumbo size: 50–60 minutes
For the best results, flip the wings halfway through cooking. This ensures both sides get evenly crispy and golden. Use a meat thermometer to check that the internal temperature reaches 165°F in the thickest part of the wing.
Frozen Chicken Wings
If you are working with frozen wings, add about 10–15 extra minutes to the baking time. Here is what to expect:
- Small frozen wings: 45–50 minutes
- Standard frozen wings: 55–65 minutes
- Large frozen wings: 65–75 minutes
It is important to cook frozen wings thoroughly. The outside might start to crisp while the inside is still thawing, so the extra time ensures food safety. You can also pat the surface dry with paper towels before baking to help kickstart the crisping process.
Wing Size and Cut Matter
Not all wings are created equal. Drumettes and wingettes cook a bit differently because of their shape and thickness. Drumettes are denser and may need a few extra minutes. Wingettes are thinner and tend to crisp faster. If you are mixing different cuts on one tray, keep an eye on the thinner pieces and remove them as they finish. This prevents overcooking while the larger pieces catch up.
Step-by-Step Instructions for Perfect Baked Wings
Now that you know the timing, let us walk through the process step by step. Following these simple instructions will give you restaurant-quality wings right in your own kitchen.
Step 1: Preheat the Oven
Start by preheating your oven to 425°F. Give it at least 15–20 minutes to reach the right temperature. A properly preheated oven is essential for even cooking and crispy skin. Placing wings in a cold oven will result in uneven baking and less crunch.
Step 2: Prep the Wings
Take your wings out of any packaging and pat them completely dry with paper towels. This is one of the most important steps for getting crispy skin. Moisture on the surface creates steam, which prevents the skin from crisping up. The drier the wings, the crunchier the result.
Step 3: Season Generously
Toss the wings with olive oil or melted butter first. This helps the seasoning stick and adds flavor. Then add your favorite spices. A simple mix of salt, pepper, garlic powder, and paprika works wonders. For something bolder, try smoked paprika, onion powder, and a pinch of cayenne pepper. Get creative with your wing seasoning ideas — this is where you can make the recipe your own.
Step 4: Arrange on a Wire Rack
Place a wire rack over a baking sheet lined with foil or parchment paper. Arrange the wings in a single layer with space between each piece. Overcrowding traps steam and leads to soggy skin. The wire rack allows hot air to flow underneath every wing, giving you evenly crispy wings on all sides.
Step 5: Bake and Flip
Put the tray in the oven and set your timer. At 425°F, bake for 20 minutes, then open the oven and flip each wing carefully. Return to the oven and bake for another 20–30 minutes depending on size. The wings are done when the skin is deep golden and the internal temperature reads 165°F.
Step 6: Sauce or Serve Plain
If you like sauced wings, toss them in your favorite sauce right after they come out of the oven. The hot wings absorb the sauce beautifully. Classic options include buffalo sauce, honey garlic, barbecue, or teriyaki. For a lighter option, serve them with a side of wing dipping sauce like ranch or blue cheese.
Best Seasoning and Sauce Options for Baked Wings
One of the great things about oven-baked wing recipes is how versatile they are. You can go from mild and savory to spicy and bold with just a few simple ingredients. Here are some popular options to try.
Dry Rub Seasonings
- Classic Salt and Pepper: Simple, clean, and lets the natural chicken flavor shine.
- Buffalo Style: Paprika, garlic powder, onion powder, cayenne, and salt for a spicy kick.
- Asian-Inspired: Sesame seeds, ginger powder, five-spice, and a touch of brown sugar.
- Herb Garden: Dried rosemary, thyme, oregano, garlic powder, and sea salt for an earthy flavor.
Sauce Options for Tossing After Baking
- Buffalo Sauce: Hot sauce mixed with melted butter. The classic choice for a reason.
- Honey Garlic: Honey, minced garlic, soy sauce, and a splash of vinegar. Sweet and savory perfection.
- BBQ Glaze: Your favorite barbecue sauce brushed on during the last 10 minutes of baking.
- Lemon Herb: Olive oil, lemon juice, fresh herbs, garlic, and a pinch of salt. Light and refreshing.
Common Mistakes to Avoid When Baking Wings
Even experienced home cooks make mistakes when baking wings. Knowing what to avoid will save you time and help you get better results every time.
Skipping the Drying Step
This is the number one mistake people make. If you do not pat your wings dry, the skin will steam instead of crisp. Take the extra two minutes to blot each wing thoroughly. The difference in texture is remarkable.
Overcrowding the Baking Sheet
It can be tempting to fit as many wings as possible on one tray. But when wings touch or overlap, steam gets trapped between them. This leads to uneven cooking and soft, soggy spots. Use two baking sheets if you need to. Your wings will thank you.
Not Using a Wire Rack
Placing wings directly on a baking sheet is the quickest method, but it comes at a cost. The bottom of the wings sits in its own rendered fat and moisture, which prevents crisping. A wire rack solves this problem completely and is a small investment that makes a big difference.
Opening the Oven Door Too Often
Every time you open the oven door, heat escapes and the temperature drops. This slows down cooking and can affect how crispy the skin gets. Check on the wings only when it is time to flip them. Trust the process and let the oven do its work.
Underseasoning the Wings
Baked wings rely on seasoning for flavor since they do not have the deep-fried exterior to add richness. Be generous with salt and spices. The flourless, simple nature of oven-baked wings means the seasoning carries the entire flavor profile.
Expert Tips for the Crispiest Baked Wings Ever
Want to take your crispy wings in oven game to the next level? These expert tips will help you achieve restaurant-quality results with every batch.
Try the Baking Powder Trick
Tossing wings with a small amount of baking powder (not baking soda) before seasoning helps raise the skin’s pH level. This promotes faster browning and extra crispiness. Use about one teaspoon of baking powder per pound of wings. Rinse and dry them after 30 minutes for the best effect.
Brine for Extra Juiciness
If you want incredibly moist wings, try a quick brine. Soak the wings in salted water for 30 minutes to an hour before baking. This adds flavor deep into the meat and helps it retain moisture during cooking. Pat them completely dry before seasoning and baking.
Use Parchment Paper Under the Rack
Line the baking sheet with parchment paper before placing the wire rack on top. This makes cleanup a breeze and prevents any sticking. The foil-and-parchment combo also helps catch drips and keeps your tray in great shape for future use.
Bake in Batches
If you are cooking a large quantity, resist the urge to bake everything at once. Baking in batches ensures proper airflow around each wing. Crowded wings steam instead of roast, and you end up with inconsistent texture. A little patience goes a long way toward perfect baked wings.
Broil for Extra Crunch
For an extra-crispy finish, switch your oven to broil during the last 2–3 minutes of baking. Watch them carefully — broiling happens fast and can go from perfectly crispy to burnt in seconds. This trick adds an extra layer of crunch that is absolutely worth the extra attention.
How to Tell When Wings Are Done
Timing is helpful, but the most reliable way to know your wings are done is by checking the internal temperature. Here are the key signs to look for.
- Internal Temperature: Use a meat thermometer inserted into the thickest part of the wing, avoiding the bone. The temperature should read 165°F.
- Visual Cues: The skin should be deep golden brown and look slightly charred in spots. This is a great indicator of crispiness.
- Juices Run Clear: When you pierce the thickest part, the juices should be clear, not pink or cloudy.
- Firm Texture: Gently press the thickest part of the wing. It should feel firm and spring back slightly.
Never rely on color alone. Chicken can sometimes appear fully cooked on the outside while still being undercooked inside. A meat thermometer is your best friend when it comes to food safety and perfectly baked wings.
Serving Suggestions and Side Dishes
Crispy baked wings pair wonderfully with a variety of side dishes. Here are some ideas to complete your wing night spread.
- Celery and Carrot Sticks: The classic pairing that adds freshness and crunch to the plate.
- Blue Cheese or Ranch Dip: A creamy dipping sauce balances the heat and adds richness.
- Coleslaw: Cool and crunchy, coleslaw is a perfect complement to spicy or tangy wings.
- Cornbread or Garlic Bread: Great for soaking up any extra sauce on the plate.
- Baked Potatoes or Fries: A hearty side that makes the meal feel complete and satisfying.
- Fresh Fruit Salad: A light, refreshing option that cuts through the richness of the wings.
No matter what sides you choose, the combination of crispy skin wings with a cool dip and fresh vegetables creates a balanced and satisfying meal that everyone will enjoy.
Storing and Reheating Leftover Wings
If you have leftovers — and let us be honest, that rarely happens — storing and reheating them properly keeps the texture as close to fresh as possible.
Storage Tips
- Let wings cool completely before storing.
- Place them in an airtight container and refrigerate within two hours of cooking.
- Leftover wings keep well in the fridge for up to 3–4 days.
- Do not freeze sauced wings, as the sauce can make the skin soggy when reheated.
Reheating for Maximum Crispiness
- Preheat your oven to 400°F.
- Place wings on a wire rack over a baking sheet.
- Reheat for 10–15 minutes until warmed through and the skin is crispy again.
- Avoid using the microwave, as it will steam the skin and make them soft.
Reheating in the oven is the only method that preserves the crunch. It takes a little extra time, but the result is worth it. Your oven-baked wings can taste almost as good as the day you made them.
Frequently Asked Questions
Can I bake wings at 400°F instead of 425°F?
Yes, you can. Baking at 400°F will take about 5–10 minutes longer than at 425°F. The wings will still turn out delicious, but the skin may not be quite as crispy. If you have the option, 425°F gives the best texture and color for crispy chicken wings.
Should I use fresh or frozen wings for baking?
Fresh wings give you more control over seasoning and crispiness, but frozen wings work perfectly fine too. Just add extra baking time when using frozen wings. Thawing them first is not necessary, but patting them dry is essential regardless of whether they are fresh or frozen.
Do I need to flip wings while baking?
Yes, flipping is highly recommended. It ensures both sides get equally crispy and golden. Flip the wings once at the halfway point of cooking. If you skip this step, one side will be crispier than the other, which is fine but not ideal for perfect baked wings.
Can I bake wings on a regular baking sheet without a rack?
You can, but the results will not be as crispy. Without a wire rack, the bottom of the wings sits in pooled fat and moisture, which steams the skin. If you do not have a rack, try propping the wings up on a bed of chopped onions or potatoes to allow airflow underneath.
What is the best way to keep wings warm after baking?
Place baked wings on a wire rack set over a baking sheet and keep them in a warm oven (around 200°F) for up to 30 minutes. This keeps them warm without continuing to cook or soften the skin. Avoid covering them with foil, as trapped steam will make the skin lose its crunch.
How do I make wings less greasy after baking?
To reduce greasiness, use a wire rack so fat can drip away from the wings during baking. You can also blot the wings lightly with paper towels right after they come out of the oven. Choosing smaller wings with less fat content also helps reduce overall greasiness.
Conclusion
Baking wings at 425°F is one of the simplest and most rewarding ways to enjoy crispy, juicy chicken wings at home. The key is getting the timing right, keeping the skin dry, and giving each wing enough space to breathe in the oven. Whether you are baking fresh wings or working with frozen ones, this guide gives you everything you need for perfect oven-baked wings every single time.
Remember to pat your wings dry, season generously, use a wire rack, and flip halfway through. These small steps make a huge difference in texture and flavor. With the right approach, your homemade wings will rival anything from your favorite restaurant. So preheat that oven, gather your ingredients, and get ready to enjoy a plate of crispy, golden perfection. Happy baking!