How to Cook Corn in Husk in the Microwave Like a Pro
Cooking corn in husk in the microwave is the fastest way to enjoy tender, juicy ears of corn without any fuss. This method locks in moisture, preserves the natural sweetness, and saves you from heating up your kitchen. Whether you have fresh sweet corn from the farmers market or frozen corn on the cob, the microwave delivers amazing results in just minutes.
There is something magical about biting into a perfectly cooked ear of corn. The kernels pop with sweetness, the texture is tender yet slightly crisp, and the juices flow down your chin. Now imagine getting all of that in just a few minutes using nothing but your microwave. That is exactly what corn in husk cook microwave delivers, and once you try it, you will never go back to boiling again.
For years, people have been boiling corn on the cob, shucking it, and standing over a hot stove. It works, sure. But it also drains the flavor, wastes time, and creates a big pot to clean. The microwave method changes everything. You keep the husk on, add a little water, and let the microwave do the heavy lifting. The result is corn that tastes almost as good as grilled corn, but with a fraction of the effort.
This guide will walk you through every step of the process. You will learn the right timing, the best techniques, and pro tips that take your microwave corn from good to great. Whether you are cooking for one or feeding a whole family, this method is a total game-changer for any kitchen.
Key Takeaways
- Quick and Easy: Cooking corn in husk in the microwave takes only 3 to 5 minutes per ear, making it the fastest cooking method available.
- Moisture Retention: The husk acts as a natural wrapper, trapping steam and keeping the corn juicy and tender inside.
- No Special Equipment Needed: You only need a microwave, a damp paper towel, and fresh or frozen corn.
- Versatile Cooking Method: This technique works for fresh corn, frozen corn, and even leftover corn on the cob.
- Nutrient Preservation: Microwave cooking helps retain more vitamins and nutrients compared to boiling.
- Perfect for Summer: It is the ideal way to prepare corn in husk cook microwave style during peak corn season.
- Easy Cleanup: No pots, no pans, no mess. Just remove the husk and enjoy.
📑 Table of Contents
- Why Cooking Corn in Husk in the Microwave Is a Game-Changer
- What You Need to Get Started
- Step-by-Step Guide to Cooking Corn in Husk in the Microwave
- Tips for Perfectly Cooked Corn Every Time
- How to Tell When Your Corn Is Done
- Creative Ways to Serve Microwave Corn in Husk
- Storing and Reheating Leftover Cooked Corn
- Frequently Asked Questions
- Conclusion
Why Cooking Corn in Husk in the Microwave Is a Game-Changer
You might be wondering why the husk matters so much. When you cook corn in husk, the outer leaves trap steam around the ear. This creates a natural steaming environment that cooks the corn evenly from all sides. The husk also prevents the kernels from drying out, which is a common problem when you boil or bake corn.
Here is why this method stands out from other cooking techniques:
- Speed: A single ear of corn cooks in about 3 to 5 minutes. An entire dozen takes less than 15 minutes.
- Flavor: The husk seals in the natural sugars and juices. You get a much sweeter result compared to boiling.
- Convenience: No need to preheat anything. No need to watch a pot on the stove. Just pop it in and wait.
- Health Benefits: Microwaving preserves more nutrients than boiling because the corn does not sit in water.
- Year-Round Cooking: You can enjoy this method whether you have fresh summer corn or frozen corn in the middle of winter.
The beauty of corn in husk cook microwave is how simple it is. There is almost no learning curve. If you can operate a microwave, you can cook perfect corn this way. It is one of those rare kitchen techniques that saves time, tastes amazing, and works every single time.
How the Husk Protects the Corn
The husk is more than just a wrapper. It is a natural cooking tool. When you wet the husk and place the corn in the microwave, the moisture inside the leaves turns into steam. This steam gently cooks the kernels from the outside in. Because the heat is distributed evenly, you avoid the common problem of some kernels being mushy while others are still crunchy.
The husk also acts as a barrier that prevents the corn from overheating. In a microwave, uneven heating is a real concern. But the husk absorbs some of that microwave energy and distributes it more gently. Think of it as a built-in cooking shield that protects the delicate kernels inside.
What You Need to Get Started
One of the best things about this method is how little you need. You probably already have everything in your kitchen right now. Here is a simple list of what you will need for corn in husk cook microwave success:
- Fresh or frozen corn on the cob: Look for ears with bright green, snug-fitting husks. The fresher the corn, the better the results.
- A damp paper towel or spray bottle: You need moisture to create steam inside the husk.
- A microwave-safe plate or dish: Any standard microwave-safe plate works perfectly.
- A sharp knife or corn holder: For serving and handling the hot corn.
- Butter, salt, and your favorite toppings: Because let us be honest, that is half the fun.
You do not need any special microwave corn cookers or gadgets. The husk itself does all the work. Save your money for good butter and toppings instead.
Choosing the Best Corn
The quality of your corn matters more than people realize. When shopping for fresh corn, look for ears with bright green husks that feel slightly damp. The silk at the top should be light brown and slightly sticky. Squeeze the ear gently through the husk. You should feel plump, firm kernels underneath.
If fresh corn is not available, frozen corn on the cob works wonderfully too. Just make sure it is not pre-cooked. You want raw frozen corn so the microwave can cook it properly. Frozen corn from the store often comes in convenient sizes that fit most microwaves perfectly.
| Corn Type | Best For | Cook Time |
|---|---|---|
| Fresh sweet corn | Peak summer flavor | 3-5 minutes per ear |
| Frozen corn on the cob | Year-round convenience | 4-6 minutes per ear |
| Pre-shucked corn | Quick weeknight meals | 3-4 minutes per ear |
| Organic corn | Best overall taste | 3-5 minutes per ear |
Step-by-Step Guide to Cooking Corn in Husk in the Microwave
Now for the part you have been waiting for. Here is the complete process for corn in husk cook microwave perfection. Follow these steps exactly, and you will get restaurant-quality corn at home.
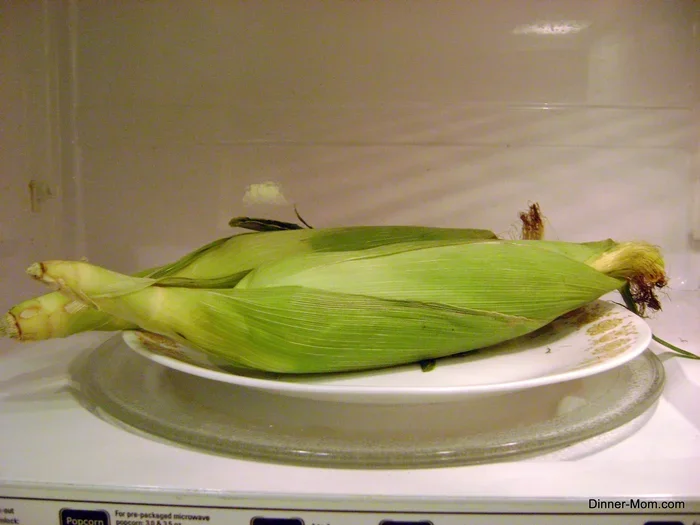
- Do not shuck the corn. Leave the husk on completely. This is the whole secret to the method.
- Remove the silk. Peel back the top of the husk just enough to pull out the silky threads. You do not need to remove the entire husk.
- Rinse the corn. Hold the ear under cool running water for a few seconds. This adds moisture that helps create steam.
- Soak the corn. Place the ear in a bowl of cold water for 5 minutes. This step is optional but it helps the husk hold more moisture for better steaming.
- Wrap in a damp paper towel. Take a damp paper towel and wrap it around the corn. This extra layer of moisture ensures even cooking.
- Place on a microwave-safe plate. Set the wrapped corn directly on the plate. Do not stack multiple ears on top of each other.
- Microwave on high. Cook one ear for 3 to 5 minutes. Two ears need 5 to 7 minutes. Three or more ears require 7 to 10 minutes.
- Let it rest. Remove the corn carefully. It will be hot. Let it sit for 2 minutes before unwrapping.
- Peel back the husk. Gently pull the husk away from the corn. It should slide off easily.
- Add your toppings. Spread butter, sprinkle salt, and enjoy immediately.
That is it. Ten simple steps and you have perfectly cooked corn in husk. The entire process from start to finish takes less than 15 minutes, and most of that time is just waiting.
Timing Chart for Perfect Corn
Getting the timing right is the most important part of corn in husk cook microwave. Too little time and the corn will be undercooked and crunchy. Too much time and the kernels will be mushy and lose their sweetness. Use this simple chart as your guide:
- One ear of corn: 3 to 4 minutes on high power
- Two ears of corn: 5 to 6 minutes on high power
- Three to four ears: 7 to 9 minutes on high power
- Frozen corn: Add 1 to 2 extra minutes to any of the above times
- Extra large ears: Add 30 seconds per ear beyond the standard times
These times are based on a standard 1000-watt microwave. If your microwave has a different wattage, you may need to adjust slightly. Start with less time and add more if needed. You can always cook the corn a little longer, but you cannot undo overcooked corn.
Tips for Perfectly Cooked Corn Every Time
Even though this method is simple, a few insider tips can take your results from good to absolutely perfect. Here are the tricks that experienced cooks use every time they prepare corn in husk cook microwave style:
Quick Tips for Better Results
- Leave the husk on until the very end. The husk does the heavy lifting during cooking. Only remove it right before serving.
- Use a damp, not soaking wet, paper towel. A dripping wet towel creates too much water, which can make the corn soggy.
- Rotate the corn halfway through. Microwaves have hot spots. Rotating ensures even cooking on all sides.
- Let the corn rest after cooking. The residual heat continues to cook the kernels gently. This resting period makes the corn more tender.
- Do not peel the husk completely before cooking. Leaving most of the husk in place during cooking traps more steam and flavor.
- Add a splash of milk to the water when soaking. This adds a subtle creaminess to the corn that is surprisingly delicious.
- Season inside the husk. Before cooking, place a pat of butter and a pinch of salt inside the husk. The steam carries the flavor directly into the kernels.
Common Mistakes to Avoid
Even simple methods have pitfalls. Here are the mistakes people make most often when cooking corn in the microwave:
- Cooking too many ears at once. Overcrowding the microwave leads to uneven cooking. Cook in batches if you need more than three or four ears.
- Forgetting to add moisture. Without enough water, the husk can scorch or the corn can dry out. Always rinse or soak the corn first.
- Using the wrong power setting. Always use high power (100%) for corn. Lower settings will cook the corn too slowly and make it tough.
- Not letting the corn rest. Cutting into the corn immediately after cooking releases steam and can burn your mouth. Give it a couple of minutes.
- Using old or dried-out corn. Fresh corn has more moisture and cooks much better. If your corn has been in the fridge for more than a week, it may not steam properly.
Expert Insights: Why This Method Beats Boiling
Professional chefs and food scientists agree that microwaving corn in the husk preserves more flavor than boiling. When you boil corn, the water-soluble sugars and nutrients leach out into the cooking water. You lose sweetness and nutrition down the drain. With the microwave method, everything stays locked inside the husk.
Corn in husk cook microwave also saves energy. A microwave uses significantly less electricity than heating a large pot of water. For a quick weeknight dinner or a snack, there is simply no better method. The husk does the work, the microwave does the heating, and you get to enjoy corn that tastes like it came straight from a summer barbecue.
How to Tell When Your Corn Is Done
Knowing when your corn is perfectly cooked is a skill that comes with practice. But there are clear signs that tell you the corn is ready. Here is how to check without cutting into the ear:
- The husk feels hot and steamy. When you pick up the wrapped corn, the husk should feel noticeably warm and release steam.
- The corn feels plump. Gently squeeze the husk. If the kernels feel firm but give slightly, they are done.
- The husk color changes slightly. Fresh green husks may darken a shade or two when the corn is fully cooked.
- A quick peek helps. Carefully pull back a small corner of the husk. The kernels should look plump and slightly bright.
If you are unsure, it is always better to add an extra 30 seconds than to undercook the corn. You can always put it back in the microwave. Undercooked corn is disappointing, but overcooked corn can still be saved with a little extra butter and salt.
Visual Cues of Perfectly Cooked Corn
When you peel back the husk, perfectly cooked corn should look bright and vibrant. The kernels should be plump, juicy, and slightly translucent. They should not be white or dull-looking, which indicates undercooking. And they should not be mushy or collapsed, which means overcooking.
The ideal corn in husk cook microwave result is kernels that are tender enough to bite through easily but still have a slight snap. This is the sweet spot where the natural sweetness really shines through. If you get this texture consistently, you have mastered the technique.
Creative Ways to Serve Microwave Corn in Husk
Once you master the basic method, you can get creative with flavors and serving styles. Corn in husk cook microwave is a blank canvas for all kinds of delicious combinations. Here are some ideas to try:
Classic Butter and Salt
Sometimes simple is best. Freshly cooked corn with a generous spread of butter and a sprinkle of sea salt is hard to beat. Use good-quality butter and flaky salt for the best results. This is the way corn was meant to be eaten.
Spicy Mexican Street Corn Style
After cooking, peel back the husk and brush the corn with a mix of mayonnaise, lime juice, chili powder, and cotija cheese. This gives you the famous elote flavor without the grill. It is bold, tangy, and incredibly addictive.
Herb Butter
Mix softened butter with chopped fresh herbs like parsley, cilantro, or thyme. Add a pinch of garlic powder and a squeeze of lemon juice. Spread this flavored butter on hot corn right out of the microwave. The herbs melt into the butter and soak into the warm kernels.
Sweet and Savory
For a unique twist, drizzle cooked corn with honey and sprinkle with smoked paprika and a pinch of cayenne pepper. The combination of sweet and smoky heat is surprisingly delicious and perfect for summer dinner parties.
Corn in Husk as a Serving Presentation
One of the most beautiful things about cooking corn in the husk is the presentation. You can serve the corn still in its husk for a rustic, eye-catching look. Guests peel back the husk themselves, which makes the meal feel interactive and fun. This presentation style works especially well for backyard gatherings and family dinners.
Another idea is to leave the husk partially pulled back and tie it with a piece of twine or a colorful ribbon. This creates a natural handle that makes the corn easy to hold while eating. It also looks beautiful on a dinner plate or a serving platter.
Storing and Reheating Leftover Cooked Corn
Got leftover corn? No problem. Cooked corn stores well and reheats beautifully in the microwave. Here is how to do it right:
- Refrigerate: Store cooked corn in an airtight container for up to 3 days. Keep the husk on or wrap the corn tightly in plastic wrap.
- Reheat in the husk: Place the corn back in the microwave for 1 to 2 minutes. The husk will steam the corn back to tender perfection.
- Reheat without the husk: Wrap the corn in a damp paper towel and microwave for 30 seconds to 1 minute.
- Freeze cooked corn: Remove the kernels from the cob and freeze them in a zip-lock bag. They will keep for up to 6 months.
Reheating corn in the husk is the best method because it maintains moisture and prevents the kernels from drying out. The husk acts as a natural reheating wrapper, just as it did during the original cooking process.
Frequently Asked Questions
Can I cook multiple ears of corn at the same time in the microwave?
Yes, you can cook multiple ears at once, but do not stack them. Place each ear on the microwave plate with space between them so the steam can circulate. For best results, cook no more than three or four ears at a time. Add about 2 to 3 extra minutes for each additional ear beyond the first.
Do I need to soak the corn before microwaving it?
Soaking is optional, but it helps. A 5-minute soak adds moisture to the husk, which creates more steam and results in juicier corn. If you are short on time, simply rinsing the corn under running water and wrapping it in a damp paper towel works just as well for corn in husk cook microwave recipes.
Can I cook corn in the husk if it is frozen?
Absolutely. Frozen corn on the cob works great with this method. Just add 1 to 2 extra minutes to the cooking time. Do not thaw the corn first, as the frozen moisture inside the husk helps create steam during cooking. This makes frozen corn a convenient option for corn in husk cook microwave any time of year.
Why is my corn chewy instead of tender after microwaving?
Chewy corn usually means it was overcooked. Microwave cooking times can vary based on the wattage of your microwave and the size of the corn ear. Start with the shorter end of the recommended time and add more if needed. Also, make sure you are using fresh corn, as older corn tends to become tougher after cooking.
Is it safe to eat the corn husk?
The husk is not meant to be eaten. It is a wrapper that helps cook the corn and should be removed before serving. However, the husk is completely non-toxic, so accidentally eating a small piece will not harm you. Just peel it back and discard it before enjoying your corn.
Can I add seasoning inside the husk before cooking?
Yes, this is a fantastic way to infuse flavor directly into the kernels. Before cooking, peel back the husk slightly, add a pat of butter, a sprinkle of salt, or your favorite seasonings, then fold the husk back over. The steam carries the flavors deep into the corn as it cooks. This technique works beautifully for garlic butter, herbs, or even a light coating of olive oil and parmesan cheese.
Conclusion
Corn in husk cook microwave is one of the simplest, fastest, and most delicious ways to prepare corn at home. It takes just minutes, requires almost no cleanup, and produces results that taste incredible. The husk does the work for you, trapping steam and locking in flavor so every kernel comes out perfectly tender and juicy.
Whether you are cooking fresh summer corn from the farmers market or reaching for frozen ears in the middle of winter, this method never disappoints. The step-by-step process is easy to follow, the timing chart takes the guesswork out of cooking, and the creative serving ideas make every meal feel special.
Now that you know how to cook corn in husk in the microwave like a pro, there is no reason not to try it tonight. Grab an ear of corn, follow the steps, and taste the difference for yourself. Once you experience how easy and delicious microwave corn can be, you will wonder why you ever bothered boiling it on the stove. Enjoy your corn, and happy cooking!